Red Velvet Waffle Cookies
Red Velvet Waffle Cookies: A Delicious Nostalgic Journey
There’s something about the aroma of baking that evokes cherished memories and warms the heart. For me, Red Velvet Waffle Cookies are more than just a delightful treat; they are a nostalgic nod to the cozy weekends spent in my grandmother’s kitchen. In her quaint home, the air was always filled with laughter and the sweet scent of baking. This recipe, inspired by those precious times, combines the classic allure of red velvet cake with the fun twist of waffle cookies. Whether you’re a seasoned baker or a kitchen novice, these cookies promise to be a showstopper, infusing joy into your culinary journey.
Why This Recipe Works
Classic Meets Contemporary
The blend of red velvet’s rich flavor with the unique texture of waffle cookies offers a delightful twist on traditional baking. The combination pays homage to the classic red velvet cake, renowned for its velvety texture and subtle cocoa flavor, while introducing the crispness of a waffle cookie. This fusion creates a sensory experience that is both familiar and refreshingly new.
Easy to Make
With simple steps and readily available ingredients, this recipe is perfect for all skill levels. Whether you’re a beginner eager to explore baking’s magic or a seasoned expert looking for a quick treat, these cookies fit the bill. The process does not require any specialized equipment beyond a waffle iron, making it accessible to most home kitchens.
Visually Stunning
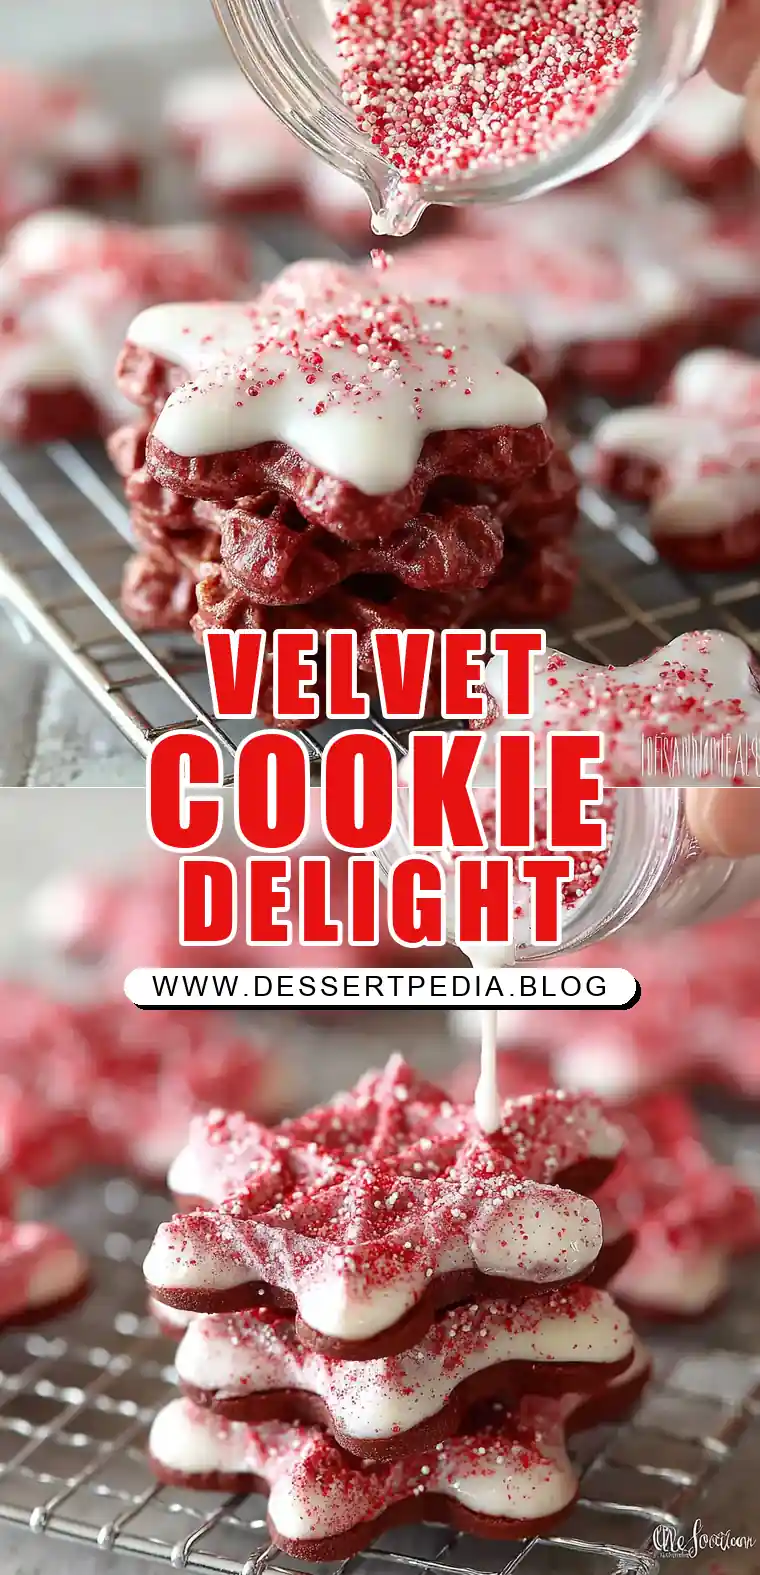
The vibrant red color and creamy glaze make these cookies visually appealing, perfect for any occasion. The bold red hue, reminiscent of festive celebrations, adds a pop of color to any dessert table, making these cookies an excellent choice for holidays, birthdays, or any gathering that calls for a touch of elegance.
Versatile Decoration
Customize with sprinkles and whipped cream to suit any festive mood or personal preference. The decoration possibilities are endless, allowing you to tailor the cookies to fit the theme of your event or the preferences of your guests. From colorful sprinkles to a dusting of powdered sugar, each addition can transform these cookies into a masterpiece.
Delightful Texture
The crispy exterior paired with a soft, tender interior is a textural delight. This contrast makes each bite an adventure, starting with a satisfying crunch that gives way to a melt-in-your-mouth center. This unique texture is achieved by the waffle iron’s ability to evenly cook the dough, creating a perfectly balanced cookie.
Ingredients
- 2 cups all-purpose flour: The base of our waffle cookies, providing structure and ensuring the cookies hold their shape.
- 1 tablespoon unsweetened cocoa powder: Adds a subtle chocolaty depth to the red velvet flavor, enhancing its complexity.
- 1 cup unsalted butter softened: Ensures a rich, buttery foundation, contributing to the tender crumb.
- 1 cup sugar: Sweetens and balances the cocoa powder, achieving the perfect sweet spot.
- 1/4 teaspoon salt: Enhances overall flavor by balancing sweetness and bringing out the cocoa’s richness.
- 3 eggs: Binds the ingredients and adds moisture, ensuring a soft, tender interior.
- 1 teaspoon vanilla extract: Infuses warmth and enhances sweetness, creating a comforting aroma and taste.
- 1 1/2 teaspoons red food coloring: Provides that iconic red velvet hue, making the cookies visually striking.
- Cooking spray: Prevents sticking in the waffle iron, ensuring each cookie is easily removed.
- Cream Cheese Glaze:
- 4 ounces cream cheese softened: The tangy base of the glaze, adding a creamy contrast.
- 1 cup powdered sugar: Sweetens and thickens the glaze, achieving the ideal texture.
- 1/2 cup milk: Adjusts glaze consistency, allowing for a smooth, even coating.
- Pinch salt: Balances the sweetness, enhancing the glaze’s flavor profile.
- Red and pink sprinkles optional: For decoration, adding a festive touch.
- Whipped cream for garnish optional: Adds a final touch of indulgence, making each cookie feel special.
Step-by-Step Instructions
- Prepare the Dry Ingredients: In a medium bowl, whisk together the flour and cocoa powder. This step ensures that the cocoa is evenly distributed, preventing any pockets of flavor.
- Cream the Butter and Sugar: In the bowl of a stand mixer, cream together the butter, sugar, and salt until smooth (about 4 or 5 minutes). This process incorporates air, contributing to the cookies’ fluffy texture.
- Combine Wet Ingredients: Turn the mixer to medium and add the eggs one at a time until incorporated. Then mix in the vanilla and red food coloring. This ensures a uniform color and texture.
- Incorporate Dry Ingredients: Set the mixer on low speed and slowly add the flour mixture. The batter will be sticky, which is ideal for the waffle iron.
- Cook the Cookies: Turn on your waffle iron, lightly spray with cooking spray, and set the temperature to medium-high (400 degrees F). Add about a tablespoon of dough to each section of the waffle iron. “Bake” for 2-4 minutes or until the cookies are golden brown. Let the cookies cool and crisp up on a wire rack.
- Make the Glaze: For the glaze, beat together the cream cheese and powdered sugar and salt until smooth. Slowly begin to incorporate the milk until you achieve the desired consistency. You may not need all of the milk.
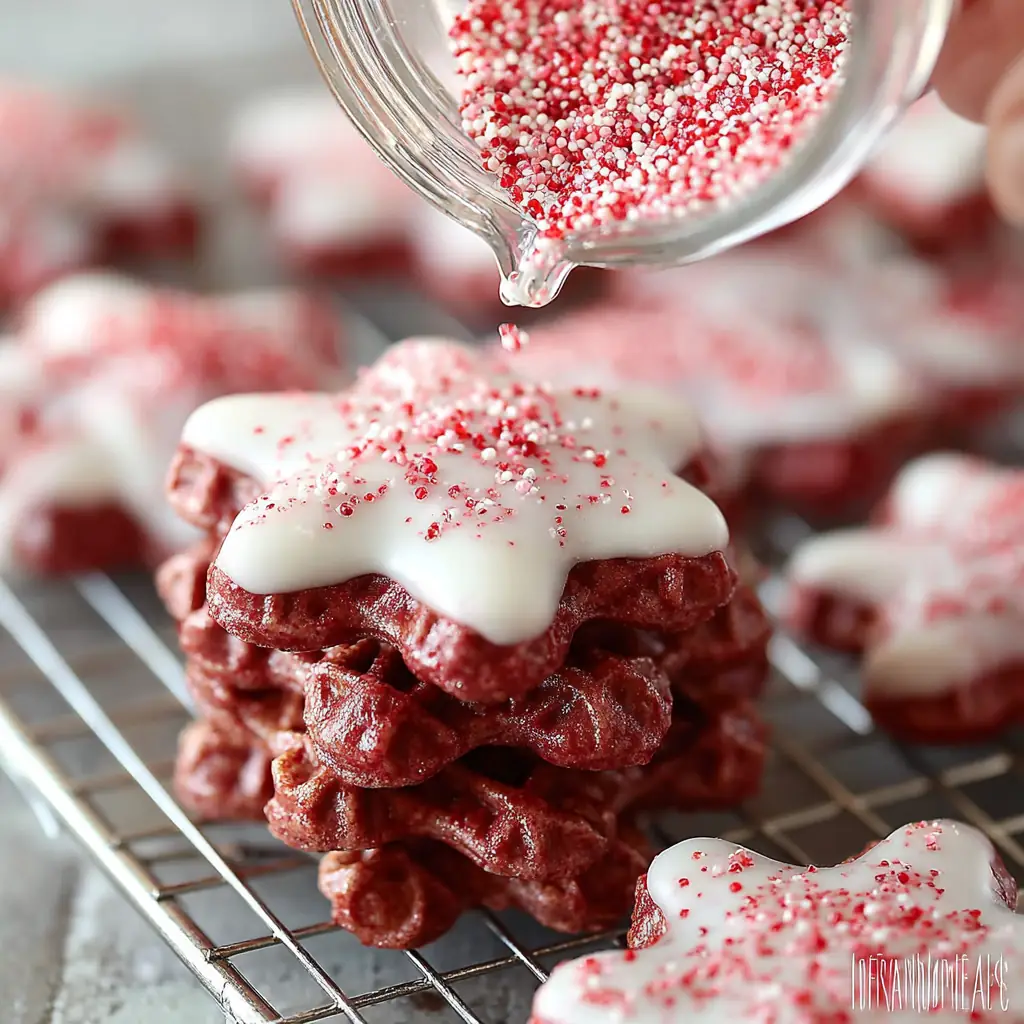
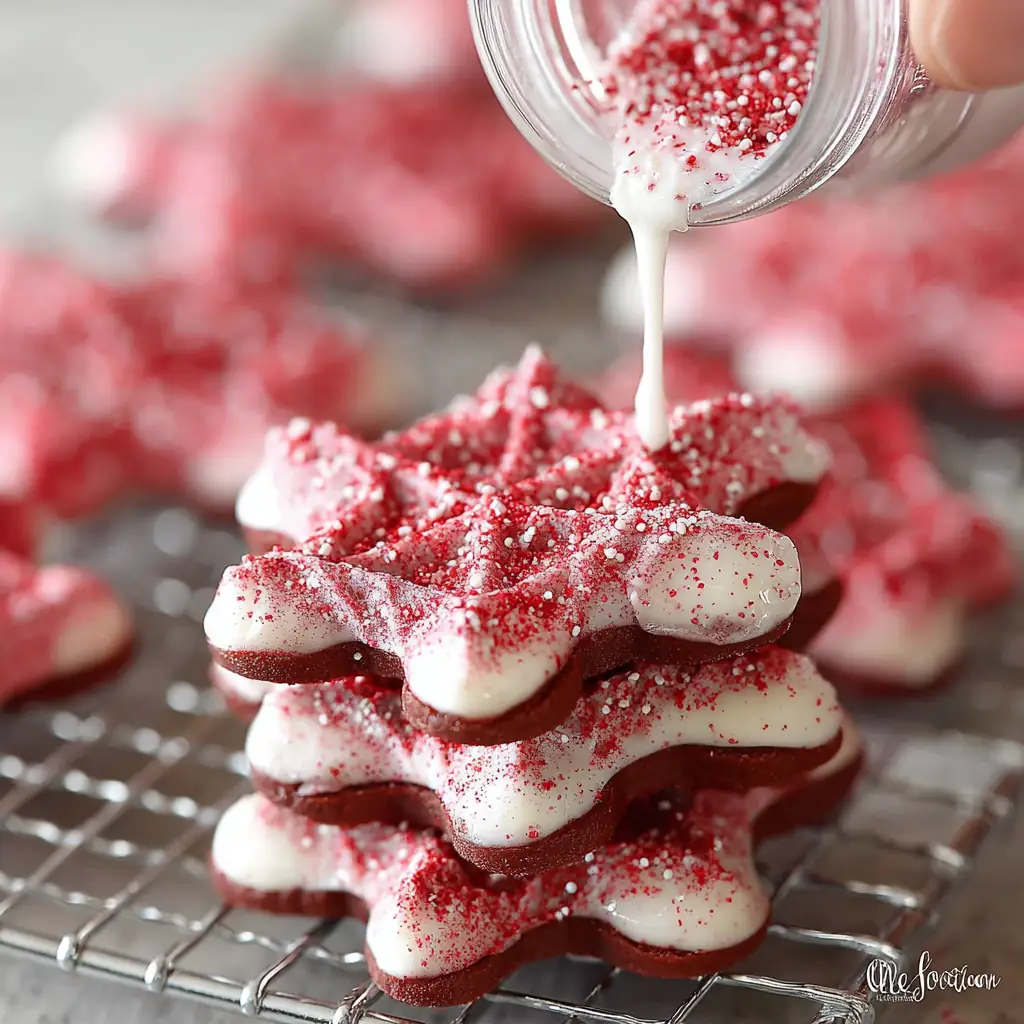
- Decorate the Cookies: Dip the tops of each cookie into the glaze and return them to the cooling rack. Decorate with sprinkles and serve with whipped cream.
Baking Time
- Prep Time: 15 minutes
- Cooking Time: 4 minutes per batch
- Total Time: 35-45 minutes
- Yield: 4-6 servings
Calorie Breakdown for a Typical Serving
| Calories | Carbohydrates | Protein | Fat | Sugar |
|---|---|---|---|---|
| 124kcal | 15g | 2g | 7g | 9g |
Patricia’s Tips for Success
- Ensure Butter is Softened: For a smooth batter, make sure your butter is fully softened. This will help it incorporate evenly with the sugar, creating a creamy foundation.
- Use Gel Food Coloring: For a more vibrant red color, consider using gel food coloring. It provides a more intense hue without altering the batter’s consistency.
- Don’t Overfill the Waffle Iron: To prevent overflow and ensure even cooking, add only a tablespoon of dough to each section.
- Cool Completely Before Glazing: Allow cookies to cool completely before glazing to ensure it sets properly and doesn’t run off.
- Adjust Milk Gradually: In the glaze, adjust the milk quantity gradually to reach the desired thickness.
Cooking Variations
- Dark Chocolate Powder: Substitute cocoa powder with dark chocolate powder for a richer taste, enhancing the depth of flavor.
- Mocha Twist: Add a hint of espresso powder to the batter for a mocha twist, adding complexity and depth.
- Crushed Nuts: Include crushed nuts in the batter for added texture and flavor, offering a delightful crunch.
Serving Suggestions
- Vanilla Ice Cream: Serve with a scoop of vanilla ice cream for a decadent dessert experience, balancing the cookies’ richness.
- Hot Beverage Pairing: Pair with a hot cup of coffee or tea for a cozy afternoon treat, enhancing the cookies’ comforting qualities.
- Homemade Gift: Wrap individually for a delightful homemade gift, perfect for sharing the joy of baking with loved ones.
Additional Thoughts
Creating these Red Velvet Waffle Cookies is more than just about satisfying a sweet tooth; it’s about creating moments that linger in memory. The process, from mixing the vibrant batter to decorating the final cookie, is both art and therapy. As each cookie emerges from the waffle iron, golden and crisp, they transform from mere ingredients into tokens of joy and love. In every bite, you taste not only the rich, velvety flavor but also the warmth of shared moments and the satisfaction of creating something beautiful from scratch. These cookies, though simple in their essence, carry the power to brighten a day, evoke a smile, and even start a conversation.
Join the Conversation
At Taste Buds Approved, we believe that food is a universal language. I invite you to share your own stories, variations, and experiences with our Red Velvet Waffle Cookies. How did they fare in your kitchen? Did they bring back memories or create new ones? Join the conversation in the comments below, and let’s exchange tips, thoughts, and perhaps even a few laughs. Your insights not only enrich our community but also inspire others to explore their culinary potential.
Conclusion
Red Velvet Waffle Cookies are a delightful fusion of tradition and innovation, offering the perfect balance of flavor, texture, and visual appeal. Whether you’re baking for a special occasion or simply to treat yourself, these cookies promise satisfaction and smiles. Dive into this recipe and discover the joy of baking, one delicious batch at a time.
Frequently Asked Questions
Q: Can I make these cookies without a waffle iron?
A: Yes, you can try baking them in the oven on a parchment-lined tray, though the texture may vary slightly.
Q: How do I store leftover cookies?
A: Store them in an airtight container at room temperature for up to three days to maintain freshness.
Q: Can I freeze the dough?
A: Yes, freeze the dough in portioned scoops. Thaw before using in the waffle iron for convenience and to maintain texture.
Q: Is there a substitute for cream cheese in the glaze?
A: You can use mascarpone as a substitute, though it will alter the flavor slightly, offering a more buttery taste.
Q: How can I make the cookies more festive?
A: Use themed sprinkles or add a few drops of peppermint extract for a holiday twist, enhancing their appeal.
Q: What if my glaze is too runny?
A: Gradually add more powdered sugar to thicken it to the desired consistency, ensuring a perfect coating.
Q: Can I use a different type of flour?
A: All-purpose flour works best, but you can experiment with cake flour for a softer texture, adjusting as needed.
Embark on this baking adventure and let Red Velvet Waffle Cookies bring warmth, joy, and delicious memories to your kitchen. Whether you’re reviving fond memories or creating new traditions, these cookies are sure to become a beloved favorite.

Red Velvet Waffle Cookies
Ingredients
Equipment
Method
- In a medium bowl, whisk together the flour and cocoa powder. Set aside.
- In the bowl of a stand mixer, cream together the butter, sugar, and salt until smooth (about 4 or 5 minutes). Mix to combine.
- Turn the mixer to medium and add the eggs one at a time until incorporated. Then mix in the vanilla and red food coloring. Finally, set the mixer on low speed and slowly add the flour. The batter will be sticky.
- Turn on your waffle iron, lightly spray with cooking spray, and set the temperature to medium-high (400 degrees F). Add about a tablespoon of dough to each section of the waffle iron. ‘Bake’ for 2-4 minutes or until the cookies are golden brown. Let the cookies cool and crisp up on a wire rack.
- For the glaze, beat together the cream cheese and powdered sugar and salt until smooth. Slowly begin to incorporate the milk until you achieve the desired consistency. You may not need all of the milk.
- Dip the tops of each cookie into the glaze and return them to the cooling rack. Decorate with sprinkles and serve with whipped cream.