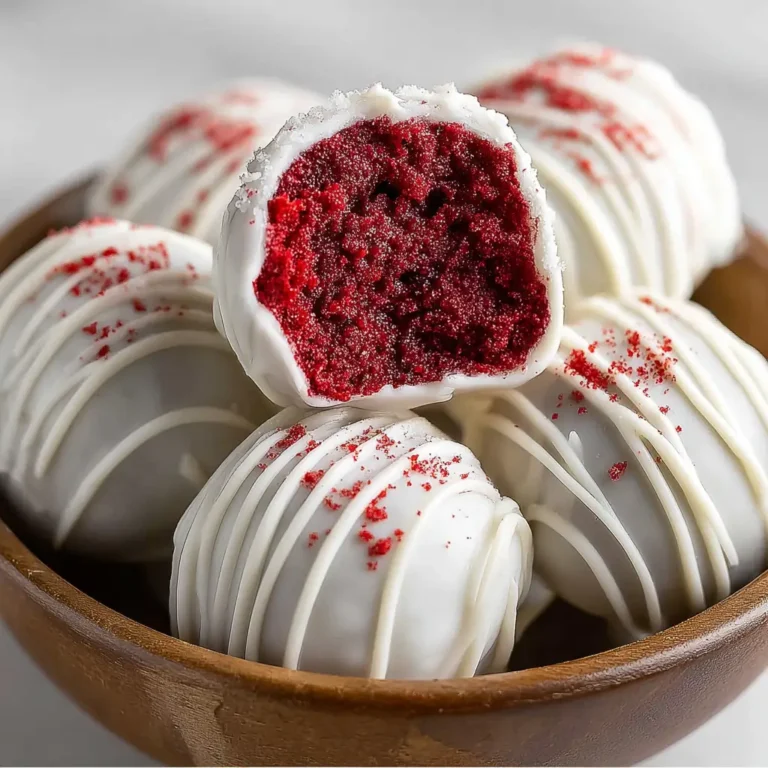
Red Velvet Truffles
Red Velvet Truffles: A Modern Twist on a Classic Delight
As the comforting aroma of red velvet filled the air, I was instantly transported back to my grandmother’s cozy kitchen, where the warmth of her baking always promised a sweet escape from the outside world. Her red velvet cake was legendary in our family, and it was from her that I learned the joy of sharing love through food. Inspired by those cherished memories, I created these Red Velvet Truffles, a delightful twist on her classic recipe. These truffles are not just a treat; they’re tiny bundles of joy that bring a smile with every bite. Easy to make and absolutely delicious, they’re perfect for any occasion, whether you’re hosting a party or indulging in a quiet moment of self-care.
Why This Recipe Works
Simplicity
With just a few ingredients, these Red Velvet Truffles are uncomplicated, making them perfect for both novice and experienced bakers. The streamlined process allows anyone to create a gourmet dessert without the stress of complex baking techniques.
Flavorful Delight
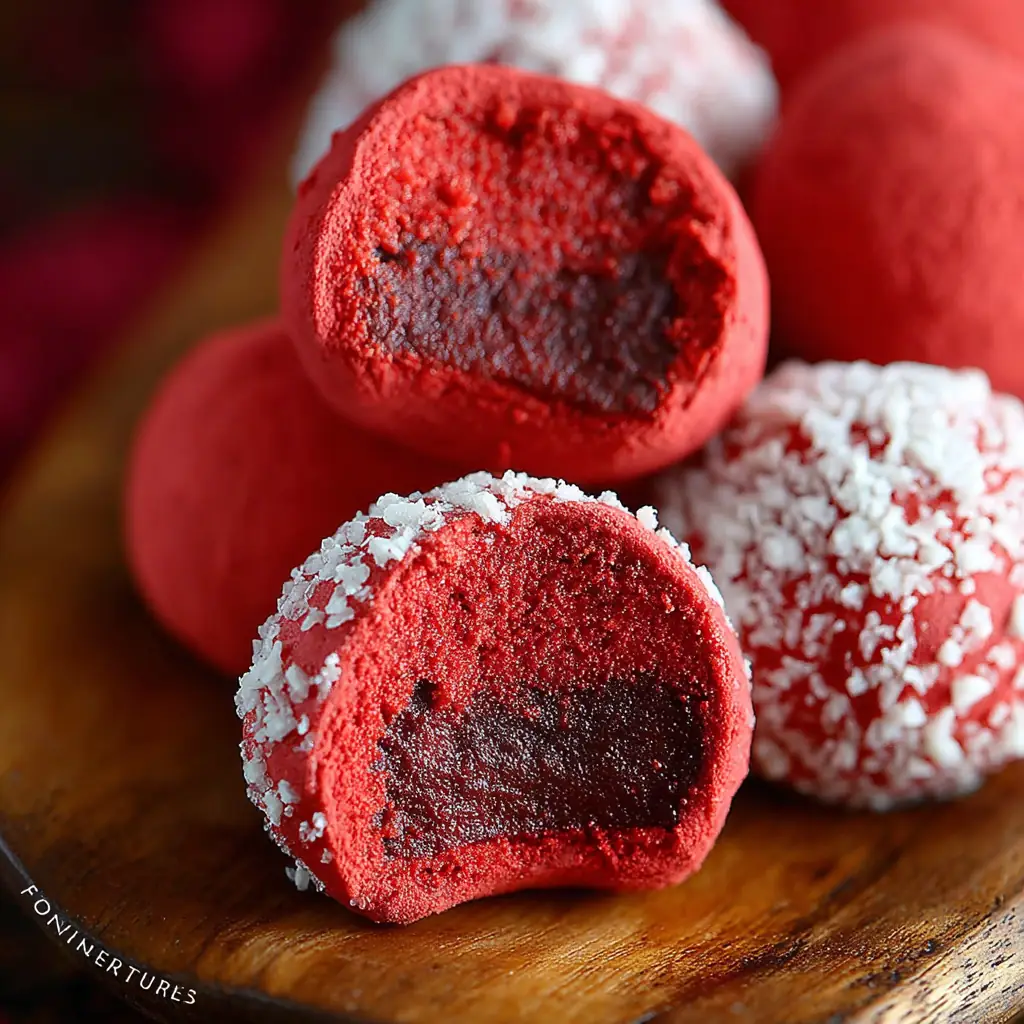
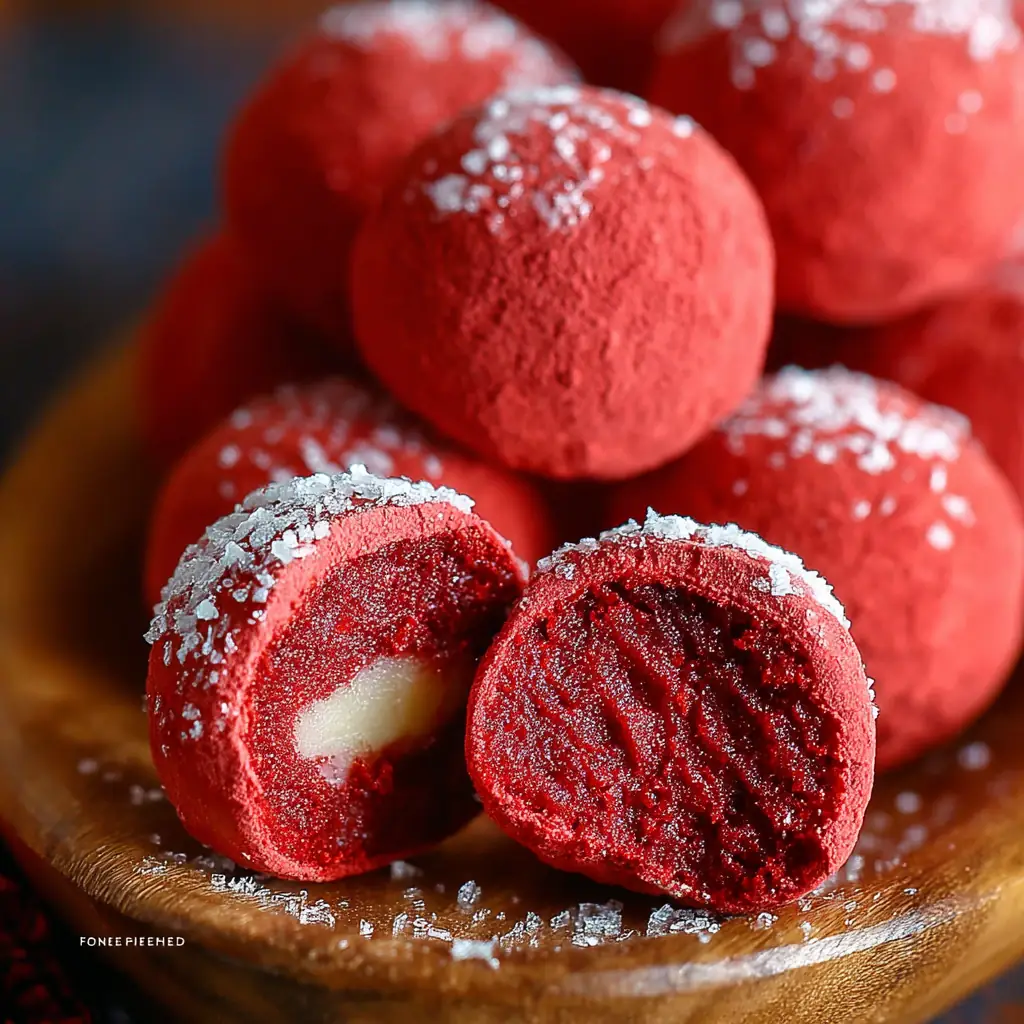
The combination of red velvet cake mix and cream cheese creates a rich, tangy-sweet flavor profile that’s irresistible. The subtle cocoa undertones of red velvet marry beautifully with the cream cheese’s tanginess, offering a taste that’s both familiar and exciting.
Versatile Coatings
Whether you roll them in sugar, nuts, or dip them in chocolate, the customization options are endless. This versatility means you can tailor the truffles to suit any event or personal preference, adding a personal touch to every batch.
Perfect Texture
The truffles are smooth and creamy, melting in your mouth and leaving a delightful aftertaste. The balance between the dense cake mix and the creamy cheese creates a truffle that’s both satisfying and light.
Make-Ahead Friendly
They store well in the refrigerator, making them an excellent choice for preparing in advance. Perfect for busy schedules, these truffles can be made ahead of time, allowing you to focus on other aspects of entertaining or simply enjoy them at your leisure.
Crowd-Pleaser
These truffles are as visually appealing as they are tasty, sure to impress guests at any gathering. Their vibrant color and polished finish make them a standout addition to any dessert table.
Ingredients
- 15.25 ounces red velvet cake mix: The star of the recipe, providing the classic red velvet flavor and color.
- 1 cup confectioner’s sugar: Adds sweetness and smoothness to the truffle mixture.
- 8 ounces cream cheese – full fat: Essential for creaminess and that tangy taste, full fat ensures the best texture.
- 3 tbsp heavy cream: Adjust the amount based on the consistency of your dough; it helps to bind the mixture together.
- Granulated sugar for rolling (optional): Adds a subtle crunch and sweetness if desired.
Step-by-Step Instructions
Prepare the Mixture: In the bowl of a stand mixer, combine the cake mix powder, confectioner’s sugar, and cream cheese. Mix on low until the ingredients start to pull together. If the mixture is dry, add the heavy cream 1 tbsp at a time until the mixture pulls together into a dough-like consistency.
Shape the Truffles: Scoop the mixture into tablespoon-sized portions and roll between your hands to smooth into rounds. This step is crucial for achieving the perfect mouthfeel and ensuring each truffle is consistent in size.
Coat the Truffles: Place them on a lined baking sheet or roll them in your choice of coating such as confectioner’s sugar or granulated sugar. For a more decadent option, dip them in melted chocolate.
Chill and Set: If coating in chocolate, chill them in the refrigerator or freezer before dipping to ensure they hold their shape. This step helps the coating adhere better and provides a satisfying snap when bitten into.
Prep Time: 15 minutes
Cooking Time: 0 minutes
Total Time: 15 minutes
Yield: 4-6 Servings
Nutritional Information
Calorie Breakdown for a Typical Serving
| Nutrient | Amount |
|---|---|
| Calories | 102kcal |
| Carbohydrates | 14g |
| Protein | 1g |
| Fat | 5g |
| Sugar | 9g |
Patricia’s Tips for Success
- Tip 1: Use full-fat cream cheese for the best texture and flavor. The richness of full-fat cream cheese enhances the truffles’ creamy consistency.
- Tip 2: If the dough seems too dry, add the heavy cream gradually until you achieve the desired consistency. This careful adjustment ensures the mixture binds well without becoming too loose.
- Tip 3: For a smoother finish, roll the truffles between slightly damp hands. This technique reduces sticking and helps achieve a polished look.
- Tip 4: Chilling the mixture before rolling can make the process easier and less sticky, especially in warmer climates.
- Tip 5: If you’re coating with chocolate, ensure the truffles are well chilled for a smooth, even coating. This prevents the chocolate from melting too quickly and ensures a neat finish.
- Tip 6: Experiment with different coatings such as crushed nuts or cocoa powder for variety. Each coating offers a new taste and texture experience.
- Tip 7: Store in an airtight container in the fridge to keep them fresh for up to 10 days, making them a convenient treat to have on hand.
Cooking Variations
- Variation 1: Add a teaspoon of vanilla extract to the mixture for an extra layer of flavor. Vanilla brings out the complexity of the red velvet, enhancing its depth.
- Variation 2: Incorporate crushed cookies or nuts into the dough for added texture. This adds a delightful crunch and can transform the truffle into a more substantial treat.
- Variation 3: Use white chocolate for coating to create a striking contrast with the red velvet. The sweetness of white chocolate pairs wonderfully with the tangy filling.
Serving Suggestions
- Suggestion 1: Serve on a decorative platter for a festive touch during holidays. The vibrant red color is perfect for Christmas, Valentine’s Day, or any celebratory occasion.
- Suggestion 2: Pair with a glass of chilled milk or a hot cup of coffee for a delightful snack. The combination enhances the flavors and provides a comforting experience.
- Suggestion 3: Wrap individually in decorative foil for a charming homemade gift. These truffles make thoughtful presents, conveying love and care through homemade goodness.
Additional Thoughts
Creating these Red Velvet Truffles is more than just making a sweet treat; it’s about crafting moments of joy and connection. Whether you’re following the traditional recipe or adding your own personal twist, these truffles are a reflection of creativity and love, much like the cherished memories of baking with my grandmother. They remind us of the simple pleasures in life and the happiness that comes from sharing our creations with others. So, gather your ingredients, invite a friend or loved one, and enjoy the process of creating something truly delightful.
Join the Conversation
I love hearing from you! Have you tried these Red Velvet Truffles or added your unique twist? Share your experiences and tips in the comments below or tag me on social media with your creations. Your stories and feedback are what make this community so special. Let’s continue to inspire each other with our culinary adventures.
Conclusion
These Red Velvet Truffles are a testament to how simple ingredients can transform into something extraordinary. Easy to make and even easier to enjoy, they’re the perfect indulgence for any occasion. Whether you’re a seasoned baker or trying something new, these truffles promise a delightful experience with every bite. Happy baking!
Frequently Asked Questions
Q: Can I use a different flavor of cake mix?
A: Absolutely! Feel free to experiment with other cake mix flavors for a unique twist. Chocolate, lemon, or even spice cake mixes can create exciting new variations.
Q: How long do these truffles last?
A: They can be stored in the refrigerator for up to 10 days, making them perfect for enjoying throughout the week or saving for special occasions.
Q: Can I freeze the truffles?
A: Yes, you can freeze them for up to 3 months. Just thaw in the refrigerator before serving to maintain their delicious texture.
Q: What if my dough is too sticky?
A: Chill the dough for a short period to make it easier to handle. This will make shaping the truffles more manageable and less messy.
Q: Can I make these truffles vegan?
A: You can try using vegan cream cheese and plant-based cream substitutes, but the texture may vary. It’s a great way to cater to dietary preferences while still enjoying a delicious treat.
Q: How do I prevent the truffles from falling apart when coating in chocolate?
A: Ensure they are well chilled before dipping to maintain their shape. A solid chill helps the truffles hold together during the coating process.
Q: Is there a substitute for heavy cream?
A: You can use milk or a dairy-free alternative, but the texture might be slightly different. Experiment to find the blend that works best for your dietary needs and taste preferences.
Red Velvet Truffles
Ingredients
Equipment
Method
- In the bowl of a stand mixer, combine the cake mix powder, confectioner’s sugar, and cream cheese.
- Mix on low until the ingredients start to pull together. If the mixture is dry, add the heavy cream 1 tbsp at a time until the mixture pulls together into a dough-like consistency.
- Scoop the mixture into tablespoon-sized portions and roll between your hands to smooth into rounds.
- You can either place them on a lined baking sheet or roll them in confectioner’s sugar, granulated sugar, chopped nuts, or any other additional coating you like.
- If you decide to coat them in chocolate, be sure to chill them in the refrigerator or freezer before dipping so that they hold their shape.
- Store these in the refrigerator for up to 10 days.