Oreo Mousse Cake
A Family Tradition Reimagined: The Oreo Mousse Cake
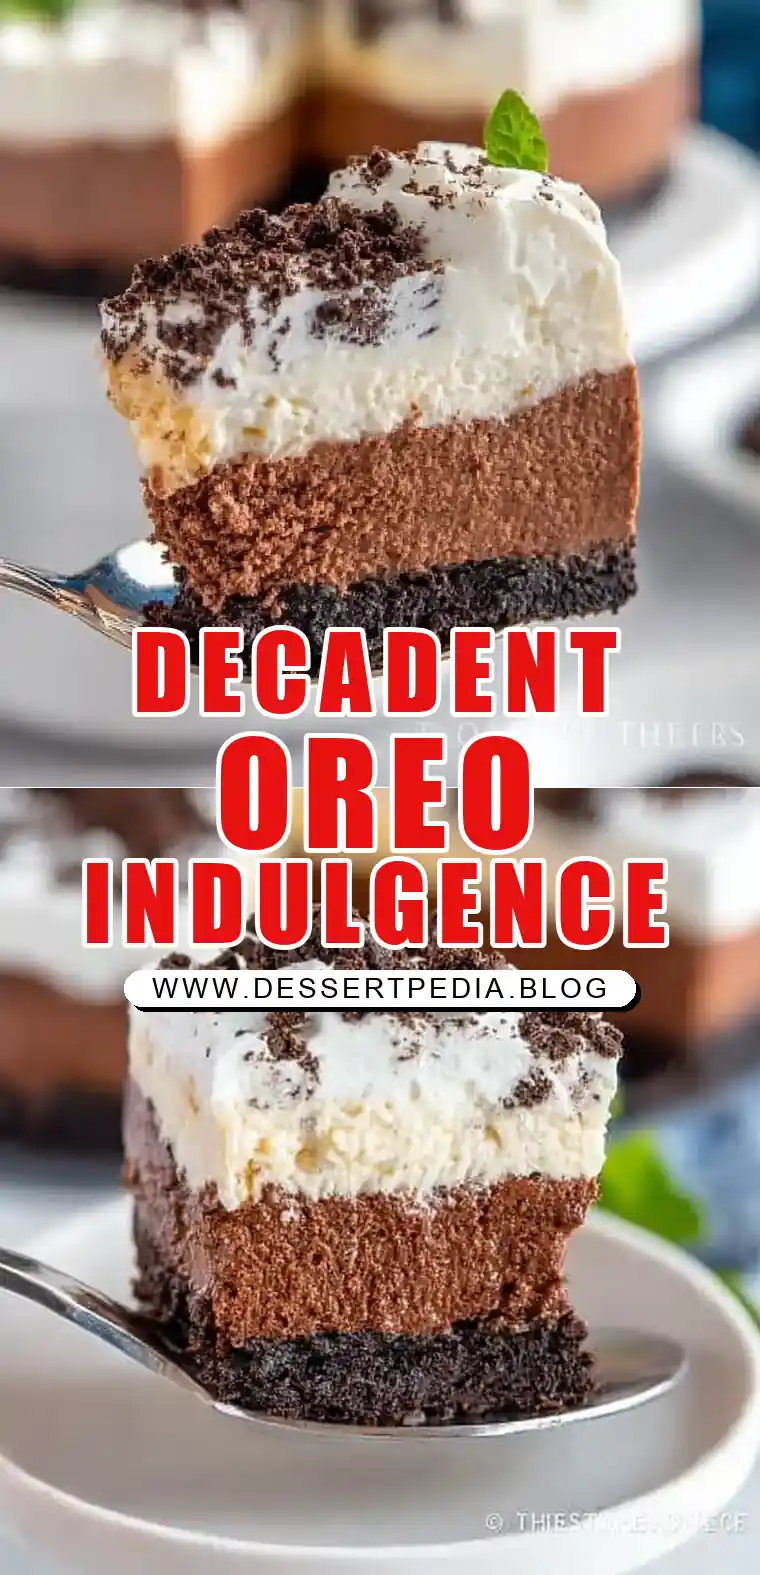
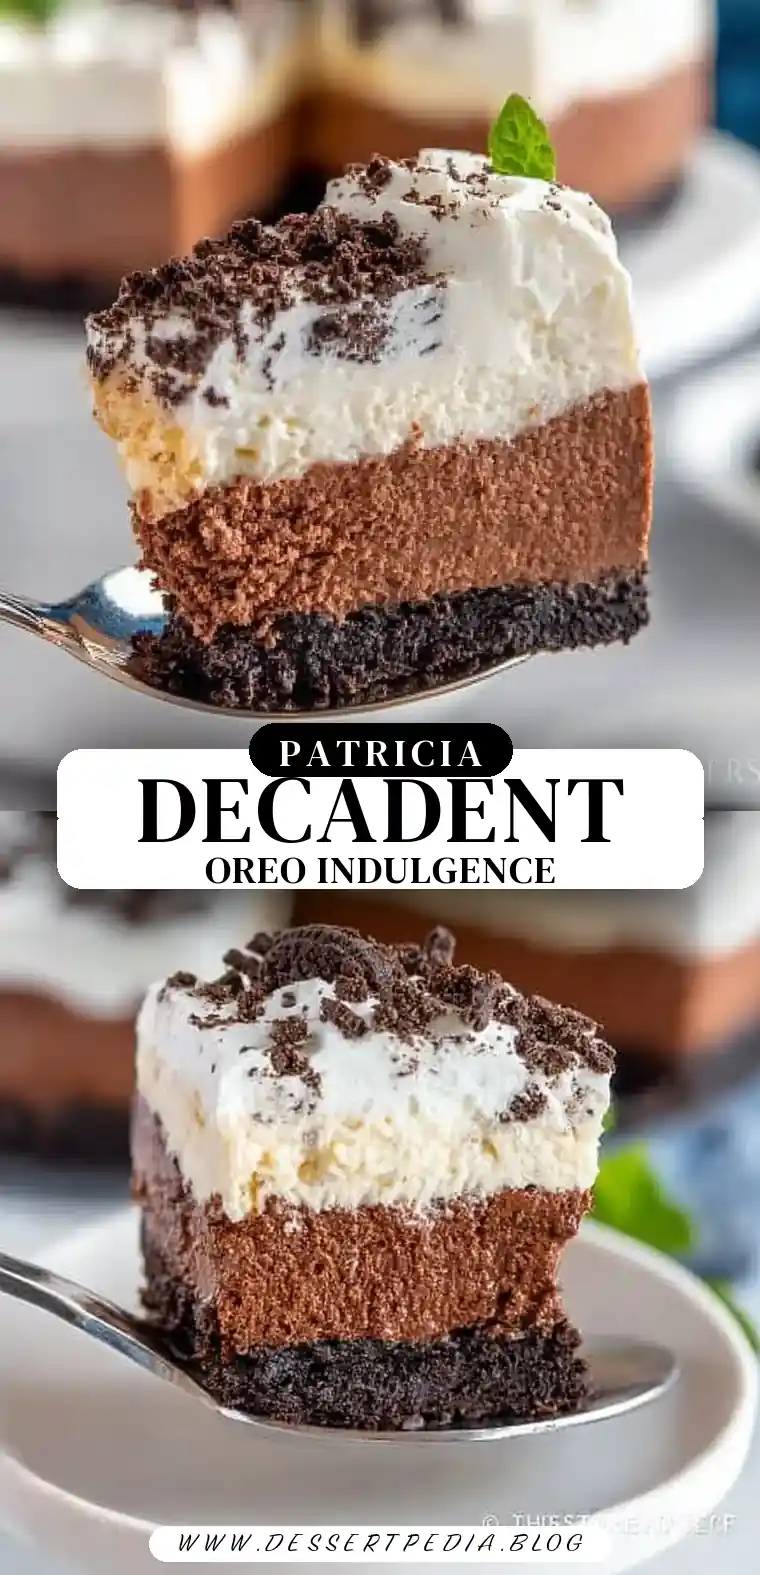
The first time I tasted something as delightful as an Oreo Mousse Cake was in my grandmother’s cozy kitchen. Her cooking always had a way of bringing the family together, transforming even the simplest of ingredients into something extraordinary. That memory is what inspired this recipe—a rich, indulgent dessert that combines the childhood joy of Oreos with the sophistication of a mousse cake. It’s perfect for a weekend family gathering or a simple treat to indulge in after dinner. From the crunch of the Oreo crust to the creamy layers of chocolate and whipped cream, this cake is a symphony of textures and flavors that will have everyone asking for seconds.
The Story Behind the Recipe
In many families, recipes are passed down through generations, often carrying sentimental value and cherished memories. The Oreo Mousse Cake is a modern twist on a classic dessert that bridges the gap between nostalgia and contemporary flavors. The inspiration stems from my grandmother’s ability to create warmth and joy with her culinary creations, making each meal a celebration. This recipe encapsulates that spirit, aiming to bring people together over a shared love for delicious food.
Why This Recipe Works
Versatile Delight
The Oreo Mousse Cake is adaptable for various occasions, from casual get-togethers to elegant dinner parties. Its universal appeal lies in its simplicity and the comforting familiarity of Oreos, which are beloved by both children and adults alike. Whether served at a birthday party or a sophisticated soirée, this cake is sure to be a hit.
No-Bake Simplicity
One of the standout features of this recipe is its no-bake nature. This makes it incredibly convenient and perfect for hot summer days when the last thing you want is to turn on the oven. The ease of preparation allows even novice bakers to create a dessert that looks and tastes like it took hours to make.
Rich Flavor Profile
The combination of semi-sweet chocolate and Oreos creates a perfect balance of sweetness and depth. The semi-sweet chocolate adds a layer of complexity to the mousse, while the Oreos bring a familiar, comforting taste. Together, they create a harmonious blend that satisfies even the most discerning sweet tooth.
Easy Ingredients
With just six core ingredients, this recipe is straightforward and budget-friendly. Most of the ingredients are pantry staples or readily available at any grocery store, making it an accessible option for those looking to whip up a quick yet impressive dessert.
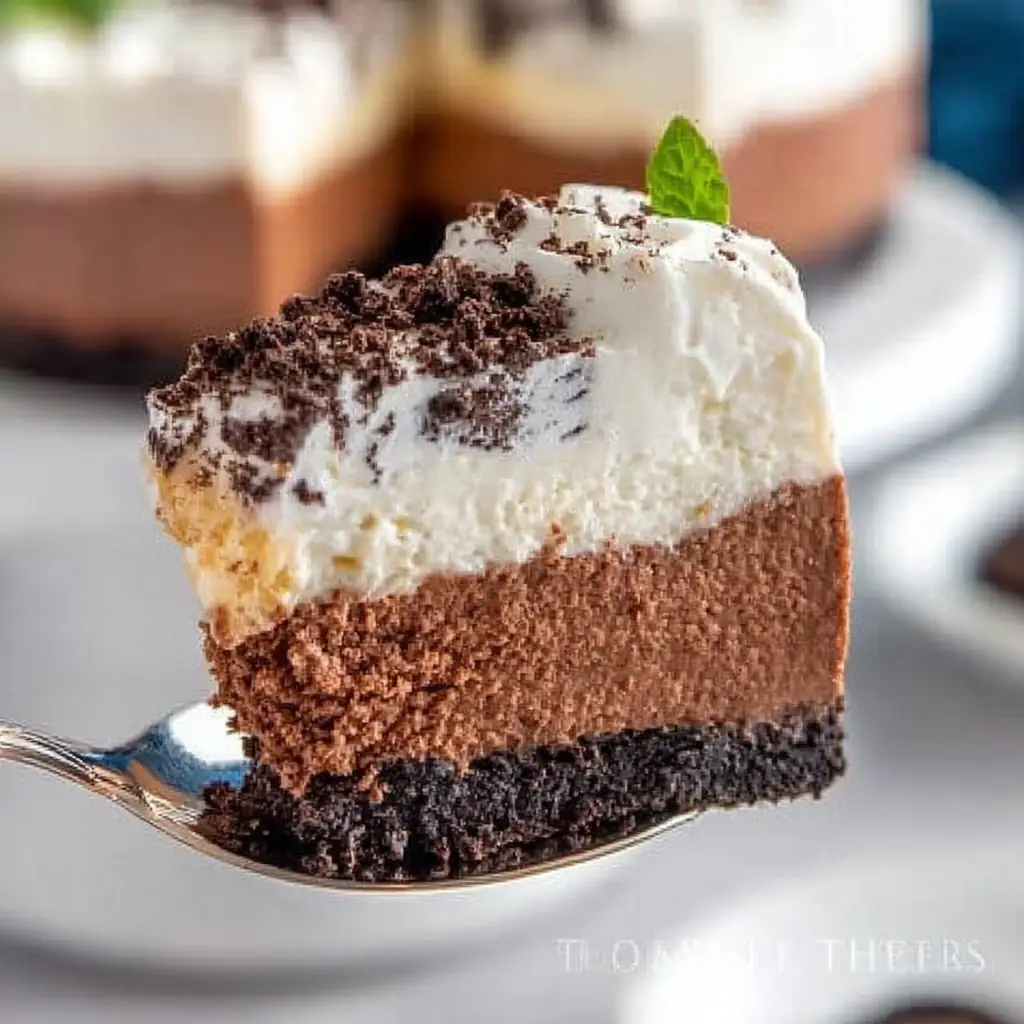
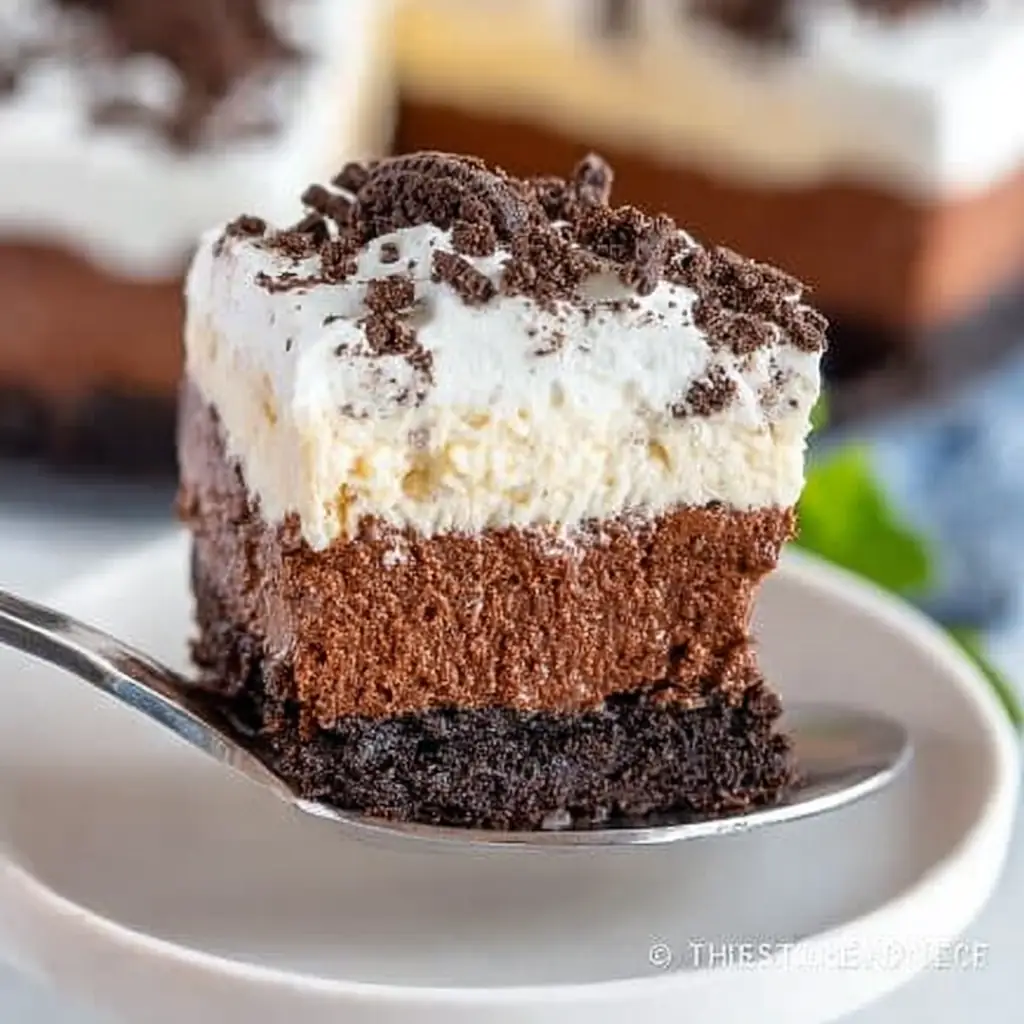
Impressive Presentation
The layered look and Oreo topping make this cake visually stunning and appealing to guests. The contrast between the dark Oreo crust, the rich chocolate layer, and the light whipped cream creates a striking appearance that is sure to garner compliments.
Ingredients
- 14.3 oz Oreo Cookies, crushed: Provides the base and decorative topping; use a food processor for fine crumbs.
- ⅓ cup unsalted butter, melted: Helps bind the cookie crust together.
- 8 oz semi-sweet chocolate chips, melted: Forms the rich chocolate mousse layer.
- 3 cups heavy whipping cream: Creates the light, fluffy mousse texture.
- ½ cup confectioner’s sugar: Sweetens the whipped cream without overpowering it.
- Additional crushed Oreos: For a decorative finish.
Step-by-Step Instructions
- Prepare the Crust: Combine the crushed Oreos and melted butter in a mixing bowl. Mix them together until the crumbs are moist.
- Form the Base: Press the mixture into the bottom of a lined 9-inch springform pan. Chill in the freezer until ready to fill.
- Melt the Chocolate: Melt the chocolate chips in a medium microwave-safe bowl in 30-second increments (stirring in between each round) until melted and stir until smooth. Set aside to cool slightly.
- Whip the Cream: Whip the heavy cream and confectioner’s sugar in the bowl of a stand mixer with the whisk attachment on medium speed until stiff peaks form (this works best if the bowl is chilled prior to whipping).
- Create the Mousse Layer: Gently fold half of the whipped cream into the slightly cooled melted chocolate until combined.
- Assemble the Cake: Transfer the chocolate mixture into the spring form pan with the Oreo crust. Spread evenly to the edges.
- Add the Top Layer: Spread the remaining whipped cream evenly over the chocolate layer.
- Decorate: Sprinkle with additional crushed Oreo pieces.
- Chill: Cover loosely and refrigerate for approximately 4 hours or until set.
Prep Time: 20 minutes
Cooking Time: 0 minutes
Total Time: 4 hours 20 minutes
Yield: 8 Servings
Table: Calorie Breakdown for a Typical Serving
| Nutrient | Amount |
|---|---|
| Calories | 514kcal |
| Carbohydrates | 41g |
| Protein | 5g |
| Fat | 38g |
| Sugar | 27g |
Patricia’s Tips for Success
Chill Your Tools
Tip 1: Chill your mixing bowl and whisk attachment before whipping cream for best results. This small step can make a significant difference in achieving the perfect whipped cream consistency.
Mind the Chocolate Temperature
Tip 2: Ensure the melted chocolate is not too hot when folding in the whipped cream to prevent deflation. This ensures the mousse retains its light, airy texture.
Adjust Sweetness
Tip 3: If you prefer a less sweet cake, reduce the confectioner’s sugar slightly. This adjustment allows you to tailor the dessert to your personal taste preferences.
Slice with Precision
Tip 4: Use a sharp knife to slice the cake for clean layers. Running the knife under hot water before slicing can also help achieve neat, even cuts.
Texture Variation
Tip 5: For added texture, reserve some larger Oreo chunks for the top layer. This adds an extra element of crunch and visual interest to the finished cake.
Cooking Variations
Dark Chocolate Depth
Variation 1: Substitute dark chocolate chips for a more intense cocoa flavor. This option is perfect for those who enjoy a richer, more robust chocolate experience.
Fruity Addition
Variation 2: Add a layer of fresh raspberries between the chocolate and cream layers for a fruity twist. The tartness of the raspberries complements the sweetness of the chocolate and cream beautifully.
Minty Freshness
Variation 3: Use mint-flavored Oreos for a refreshing twist. This variation adds a cool, minty flavor that pairs wonderfully with the chocolate and cream.
Serving Suggestions
Classic Accompaniments
Suggestion 1: Serve with a dollop of whipped cream and a sprig of mint for added freshness. This simple garnish elevates the presentation and adds a touch of elegance.
Beverage Pairings
Suggestion 2: Pair with a hot cup of coffee or a glass of cold milk. The coffee enhances the chocolate flavors, while the milk provides a creamy contrast.
Decadent Drizzle
Suggestion 3: Add a drizzle of caramel or chocolate sauce for extra decadence. This finishing touch adds richness and a touch of indulgence to each slice.
Additional Thoughts
This Oreo Mousse Cake is not just a dessert; it’s an experience that brings joy and nostalgia to the table. The simplicity of the recipe makes it accessible to everyone, from novice bakers to seasoned chefs. Its no-bake nature makes it a go-to for warm days when you want a delicious treat without heating up the kitchen. The contrast of textures—the crunchy base, the silky chocolate mousse, and the light whipped cream—creates a harmonious bite that is utterly satisfying. By experimenting with different variations, you can easily adapt this recipe to suit any palate or occasion.
Join the Conversation
I would love to hear how your Oreo Mousse Cake turns out! Did you try any of the variations, or perhaps you came up with your own twist? Share your experiences and photos in the comments below or tag me on social media @TasteBudsApproved. Seeing your creations always inspires me and brings our cooking community closer together.
Conclusion
The Oreo Mousse Cake is a celebration of flavors and textures, embodying the spirit of accessible and enjoyable home cooking. Whether you’re making it for a family gathering or a special celebration, this cake is sure to impress with its rich, creamy layers and delightful Oreo crunch. It’s a testament to the power of simple ingredients to create something truly special, echoing the warmth and love of a family kitchen.
Frequently Asked Questions
Q: Can I use a different type of cookie for the crust?
A: Yes, graham crackers or digestive biscuits can be used as alternatives. They will provide a different but equally delicious flavor profile.
Q: How long can I store the Oreo Mousse Cake?
A: It should be consumed within two days and kept refrigerated. This ensures it maintains its freshness and optimal texture.
Q: What if I don’t have a stand mixer?
A: A hand mixer will work just as well for whipping the cream. Just be sure to beat the cream to stiff peaks for the best consistency.
Q: Can I make this cake ahead of time?
A: Absolutely, it’s best when made a day in advance to allow the flavors to meld. This also makes it a convenient option for entertaining.
Q: Is there a substitute for heavy cream?
A: You can use whipped topping, but the texture and flavor may differ slightly. Heavy cream is recommended for the best results.
Q: Can I freeze this cake?
A: Freezing is not recommended as it may alter the texture of the mousse. The cake is best enjoyed fresh from the refrigerator.
Q: What if I have leftover cake?
A: Store it in an airtight container in the refrigerator to maintain freshness. It makes for a delightful treat the next day!
In conclusion, the Oreo Mousse Cake is more than a dessert; it’s a delightful journey of flavors and memories that invites everyone to take a bite and savor the moment. Whether you’re reminiscing about family gatherings or looking to create new traditions, this cake is sure to find a special place in your heart and on your table.
Oreo Mousse Cake
Ingredients
Equipment
Method
- Combine the crushed Oreos and melted butter in a mixing bowl. Mix them together until the crumbs are moist.
- Press the mixture into the bottom of a lined 9-inch springform pan. Chill in the freezer until ready to fill.
- Melt the chocolate chips in a medium microwave-safe bowl in 30-second increments (stirring in between each round) until melted and stir until smooth. Set aside to cool slightly.
- Whip the heavy cream and confectioner’s sugar in the bowl of a stand mixer with the whisk attachment on medium speed until stiff peaks. (this works best if the bowl is chilled prior to whipping)
- Gently fold half of the whipped cream into the slightly cooled melted chocolate until combined.
- Transfer the chocolate mixture into the spring form pan with the Oreo crust. Spread evenly to the edges.
- Spread the remaining whipped cream evenly over the chocolate layer.
- Sprinkle with additional crushed Oreo pieces.
- Cover loosely and refrigerate for approximately 4 hours or until set.