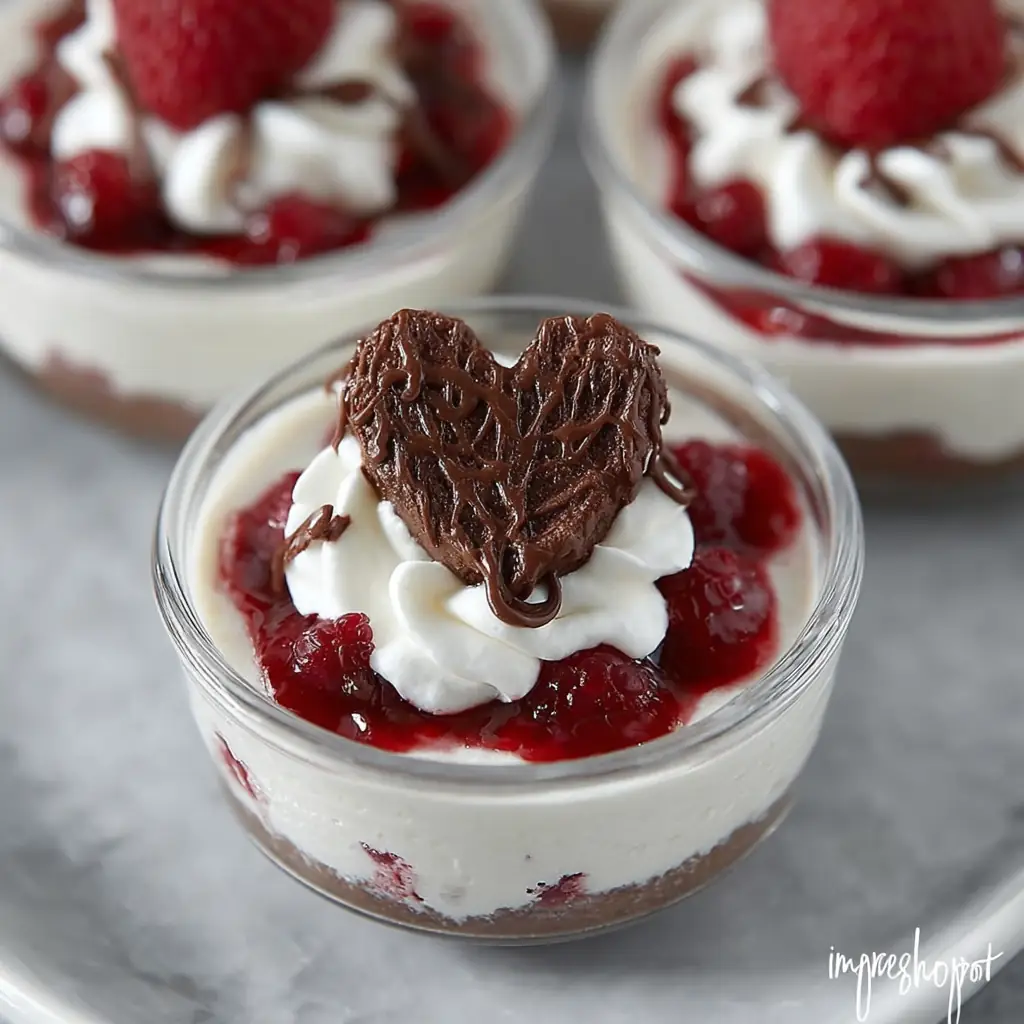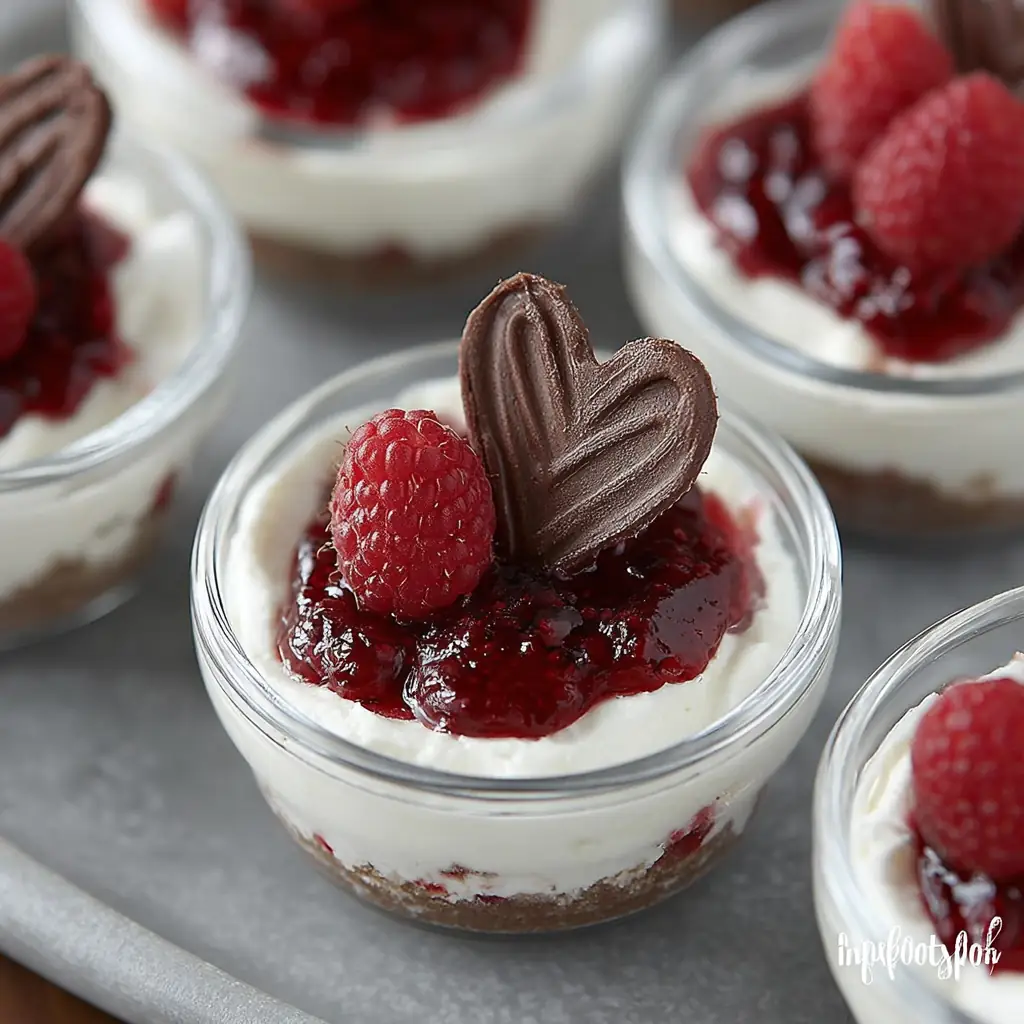
No-Bake Chocolate Raspberry Cheesecakes
A Delectable Journey: Crafting No-Bake Chocolate Raspberry Cheesecakes
Imagine stepping into a cozy kitchen filled with the irresistible aromas of sweet chocolate and tart raspberries. A modest collection of simple ingredients sits on the counter, ready to be transformed into a delightful dessert. This scene is inspired by cherished weekends spent in my grandmother’s kitchen, where her love for baking was infectious and her no-bake creations a pure joy. This “No-Bake Chocolate Raspberry Cheesecakes” recipe is an ode to those comforting days, offering a simplified yet indulgent way to enjoy cheesecake without the need for an oven. Perfect for both novice cooks and seasoned chefs, this dessert combines the rich flavors of chocolate and raspberries in a creamy, satisfying treat.
Why This Recipe Works:
The allure of this recipe lies in its simplicity and elegance, allowing you to create a sumptuous dessert with minimal fuss. Here’s why it stands out:
- Simplicity: With no baking required, this recipe is perfect for all skill levels. Whether you’re a beginner or a seasoned baker, the straightforward process ensures success.
- Flavor Fusion: The combination of chocolate and raspberry is both classic and irresistible. The rich, creamy cheesecake pairs beautifully with the tartness of raspberries, creating a harmonious flavor profile.
- Time-Efficient: Quick preparation means you spend less time in the kitchen and more time enjoying your creation. This makes it ideal for busy schedules or last-minute dessert needs.
- Versatile Presentation: Ideal for individual servings, making them perfect for gatherings. The mini cheesecakes can be dressed up for a formal occasion or enjoyed casually at home.
- Make-Ahead Friendly: Can be prepared in advance, giving you the flexibility to plan ahead for celebrations or casual get-togethers.
Ingredients Breakdown:
To achieve the perfect no-bake cheesecake, each ingredient plays a crucial role:
- Chocolate Graham Cracker Crumbs: Provides a rich, chocolatey base that complements the creamy filling.
- Sugar: Sweetens both the crust and the cheesecake filling, balancing the tartness of raspberries.
- Unsalted Butter: Helps bind the crust and adds richness to the overall flavor.
- Cream Cheese: The star ingredient, offering a creamy texture that forms the base of the cheesecake.
- Whole Milk: Adds a slight creaminess and helps combine ingredients for a smooth filling.
- Vanilla Extract: Enhances the overall flavor profile, adding warmth and depth.
- Salt: Balances the sweetness and enhances the flavors.
- Heavy Whipping Cream: Ensures a light, airy texture, making the cheesecake fluffy and indulgent.
- Raspberry Jam: Adds a fruity, tangy twist that pairs perfectly with the chocolate base.
- Fresh Raspberries, Whipping Cream, Heart Chocolates: Optional garnishes for presentation, adding a touch of elegance.
Step-by-Step Instructions:
Creating these delightful cheesecakes is a straightforward process. Follow these steps for perfect results:
Prepare the Crust: In a medium bowl, mix the graham cracker crumbs with sugar and melted butter. Divide into six small dishes and press into an even layer. Chill in the refrigerator to set.
Make the Cheesecake Filling: In a stand mixer, beat the cream cheese until smooth. Add sugar, milk, vanilla, and salt, then beat until smooth and creamy. Set aside.
Whip the Cream: In a clean mixer bowl, beat the heavy cream, starting on low speed and gradually increasing to high until stiff peaks form. This step is crucial for achieving the light, airy texture of the cheesecake.
Combine the Mixtures: Fold one-third of the whipped cream into the cream cheese mixture to lighten it. Add the remaining whipped cream and fold gently until fully combined, ensuring the mixture remains airy.
Assemble the Cheesecakes: Divide the cream cheese mixture over the prepared crusts, smoothing the tops for an even finish.
Add Raspberry Swirls: Heat the raspberry jam with a little water in the microwave until liquid. Cool slightly, then drizzle over the cheesecakes, creating swirls with a toothpick for a beautiful marbled effect.
Chill: Refrigerate for at least 1 hour or up to 1 day. Cover with plastic wrap if refrigerating longer than 1 hour to prevent the cheesecake from drying out.
Prep Time: 20 minutes
Cooking Time: N/A
Total Time: 80 minutes (including refrigeration)
Yield: 6 servings
Nutritional Insights:
Here’s a look at the calorie breakdown for a typical serving, ensuring you’re informed about your indulgence:
| Calories | Carbohydrates | Protein | Fat | Sugar |
|---|---|---|---|---|
| 657 kcal | 54 g | 7 g | 47 g | 44 g |
Patricia’s Tips for Success:
To ensure your no-bake cheesecakes are a triumph, consider these expert tips:
- Fine Crumb Base: For the crust, use a food processor to achieve the finest graham cracker crumbs. This will help create a compact, even base.
- Softened Cream Cheese: Ensure the cream cheese is fully softened to avoid lumps in the cheesecake. This will ensure a smooth, creamy texture.
- Perfect Peaks: Beat the whipping cream to stiff peaks for the best texture. It’s the key to a light, airy cheesecake.
- Gentle Folding: Use a gentle folding motion to maintain airiness in the cheesecake mixture. Over-mixing can deflate the whipped cream, leading to a denser texture.
- Artful Swirls: Swirling the jam adds visual appeal; don’t rush this step. Take your time to create beautiful patterns.
- Chill Time: Chill thoroughly for best results, ensuring the cheesecakes set properly. Patience is key to achieving the perfect texture.
- Flavor Experiments: Feel free to experiment with different jams for varied flavors. Strawberry or blackberry can provide delightful variations.
Cooking Variations:
To keep things exciting, here are some variations you can try:
- Substitute Jams: Replace raspberry jam with strawberry or blackberry for a different twist, each bringing its unique flavor profile.
- Extra Chocolatey: Add a tablespoon of cocoa powder to the cheesecake mixture for extra chocolate flavor, intensifying the chocolate experience.
- Crust Alternatives: Use different types of cookies for the crust, like Oreos or digestive biscuits, for a unique base flavor.
Serving Suggestions:
Enhance the dessert experience with these serving ideas:
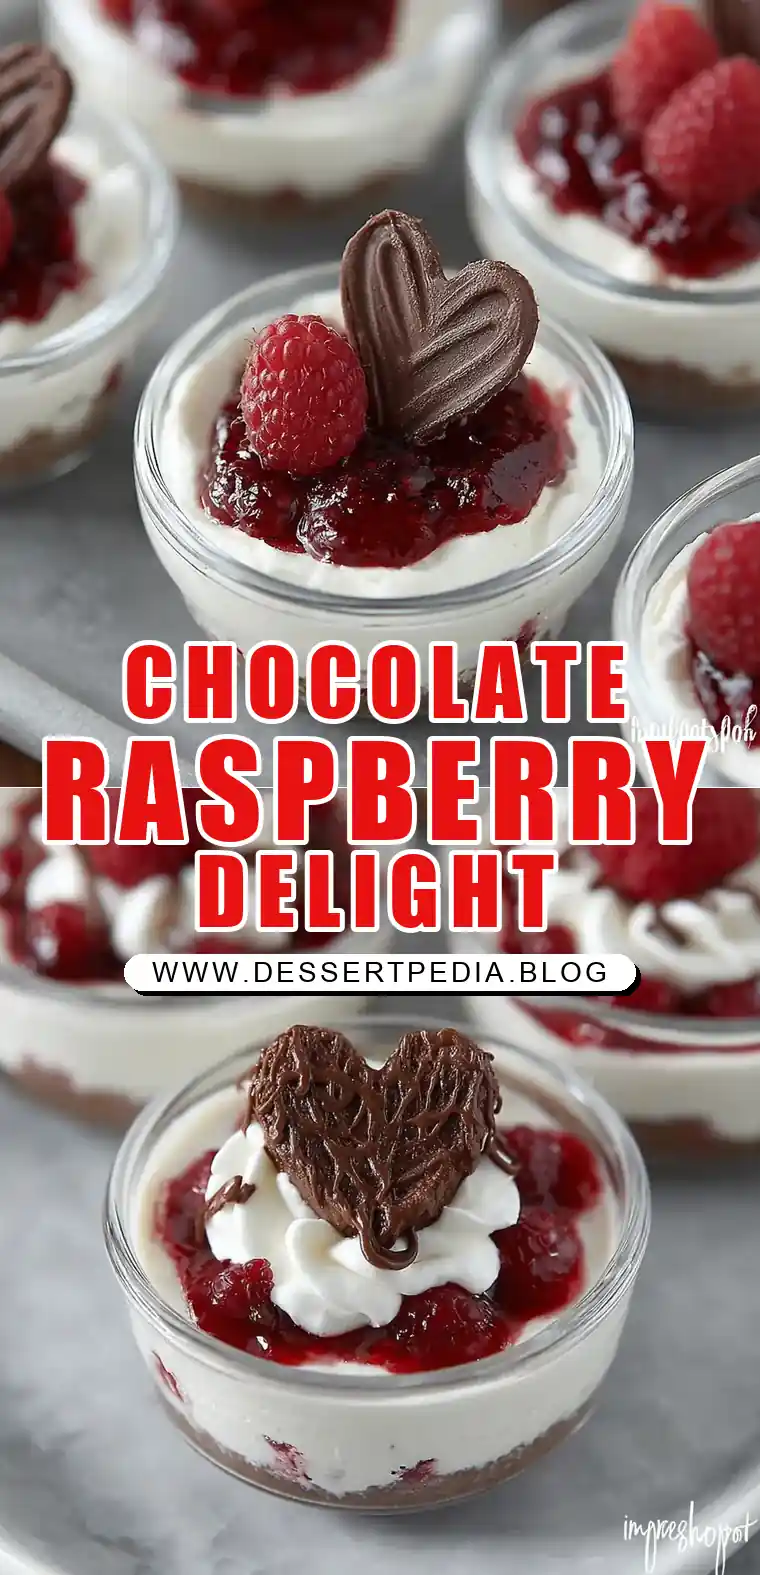
- Elegant Presentation: Serve with a dollop of whipped cream and a fresh raspberry on top for a touch of elegance.
- Coffee Pairing: Pair with a hot cup of coffee for a delightful dessert experience, as the rich flavors complement each other beautifully.
- Decorative Display: Present on a decorative dessert plate to elevate the visual appeal, making it suitable for special occasions.
Additional Thoughts:
These no-bake chocolate raspberry cheesecakes are not just a treat for the taste buds but also a celebration of simplicity and elegance in dessert making. They reflect the essence of my grandmother’s teachings that memorable dishes don’t need to be complex; they just need to be made with love and shared with joy. The balance of creamy cheesecake, rich chocolate, and tart raspberry creates a harmonious dance of flavors that will leave you and your guests craving more. Whether it’s a casual family night or a special celebration, these cheesecakes are sure to impress.
Join the Conversation:
I’d love to hear how your no-bake adventures turn out. Did you add your own twist? Or perhaps you have a cherished baking memory that this recipe brings to mind? Share your stories, tips, or questions in the comments below. Let’s keep the love for easy, delicious desserts going strong!
Conclusion:
Creating these No-Bake Chocolate Raspberry Cheesecakes is a delightful journey of flavor and texture, perfect for any occasion. Their simplicity, combined with a decadent taste, makes them a winning choice for dessert lovers everywhere. Whether you’re a seasoned baker or a kitchen novice, this recipe promises delicious results with minimal effort.
Frequently Asked Questions:
To help you navigate any uncertainties, here are answers to some common questions:
Q: Can I use low-fat cream cheese?
A: Yes, but it may alter the texture slightly, making it less creamy. Full-fat cream cheese is recommended for the best results.
Q: How long can I store these cheesecakes?
A: They can be stored in the refrigerator for up to three days, keeping them fresh and delicious.
Q: Can I freeze these cheesecakes?
A: Yes, you can freeze them without garnishes, wrapped well, for up to a month. Thaw them in the refrigerator before serving for the best texture.
Q: What can I use instead of chocolate graham crackers?
A: Regular graham crackers with a tablespoon of cocoa powder can be a substitute, providing a similar chocolate flavor.
Q: Is it necessary to use a stand mixer?
A: While a stand mixer is convenient, a hand mixer will also work. Just ensure your cream cheese and whipped cream are well-mixed.
Q: Can I make a larger batch?
A: Absolutely! Simply scale up the ingredients proportionally to suit your needs.
Q: How can I ensure the whipped cream doesn’t deflate?
A: Fold gently and avoid over-mixing to maintain its texture. Keeping the cream cold before whipping can also help achieve stiff peaks.
By following this comprehensive guide, you can master the art of no-bake cheesecakes and delight in the joy of creating a dessert that’s as beautiful as it is delicious.

No-Bake Chocolate Raspberry Cheesecakes
Ingredients
Equipment
Method
- In a medium bowl, stir together the graham cracker crumbs with the sugar and melted butter until combined. Divide the mixture into six small dishes (about 4 inches in diameter and 2 inches deep). Press into an even layer with your fingers or a spatula. Place in the refrigerator while preparing the cheesecake.
- In a stand mixer fitted with the paddle attachment, beat the cream cheese on high until smooth and creamy. Add the sugar, milk, vanilla, and salt. Beat again until smooth and combined. Transfer the cream cheese mixture into a large bowl and set aside.
- In a stand mixer fitted with the whisk (in a new or cleaned bowl) beat the heavy whipping cream on low for about 45 seconds. Increase the speed to medium and continue beating for another 45 seconds. Increase the speed to high and beat until stiff peaks form.
- With a spatula, stir about one-third of the whipped cream into the cream cheese mixture and fold it in until completely combined. Add the remaining whipped cream and fold until fully combined.
- Using a spatula or piping bag, divide the cream cheese mixture evenly over the six prepared crusts. Smooth the top with a spatula.
- In a microwave safe bowl, add the jam and 1 tablespoon of water. Heat for about 30 seconds to make the jam liquid. (Heat for an additional 15 seconds, if needed). Stir to combine. Allow the jam to cool slightly, then drop small amounts of jam on top of each cheesecake. Use a skewer or toothpick to drag the jam through the top of the cheesecake to make swirls.
- Refrigerate the cheesecake about 1 hour until firm or up to 1 day. (Cover with plastic wrap if refrigerating for longer than 1 hour.)