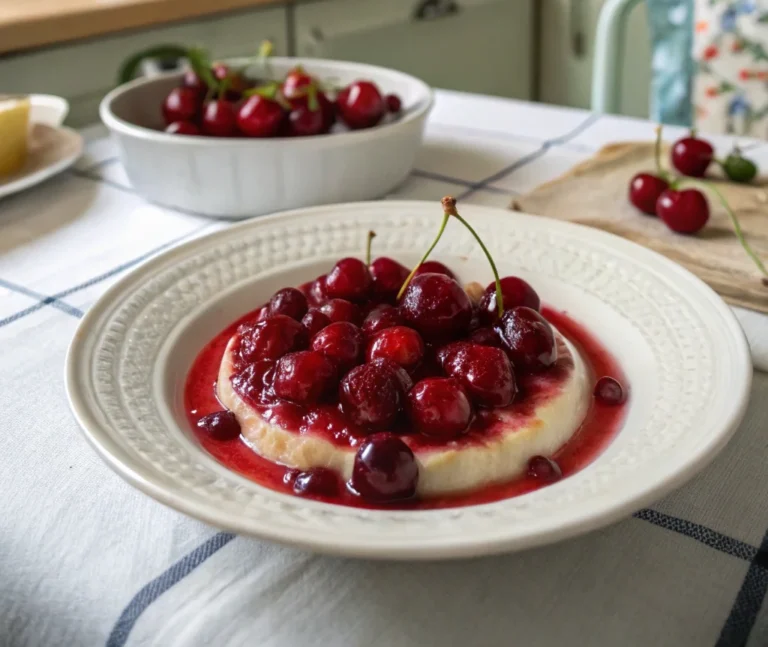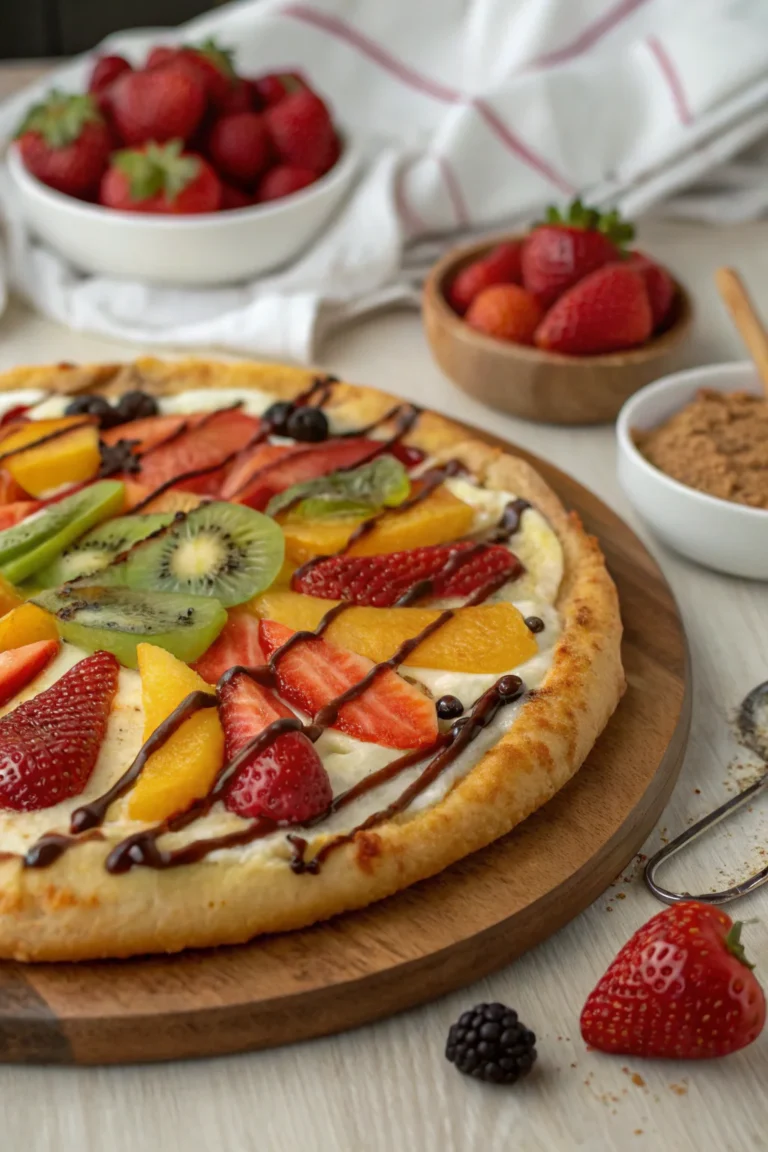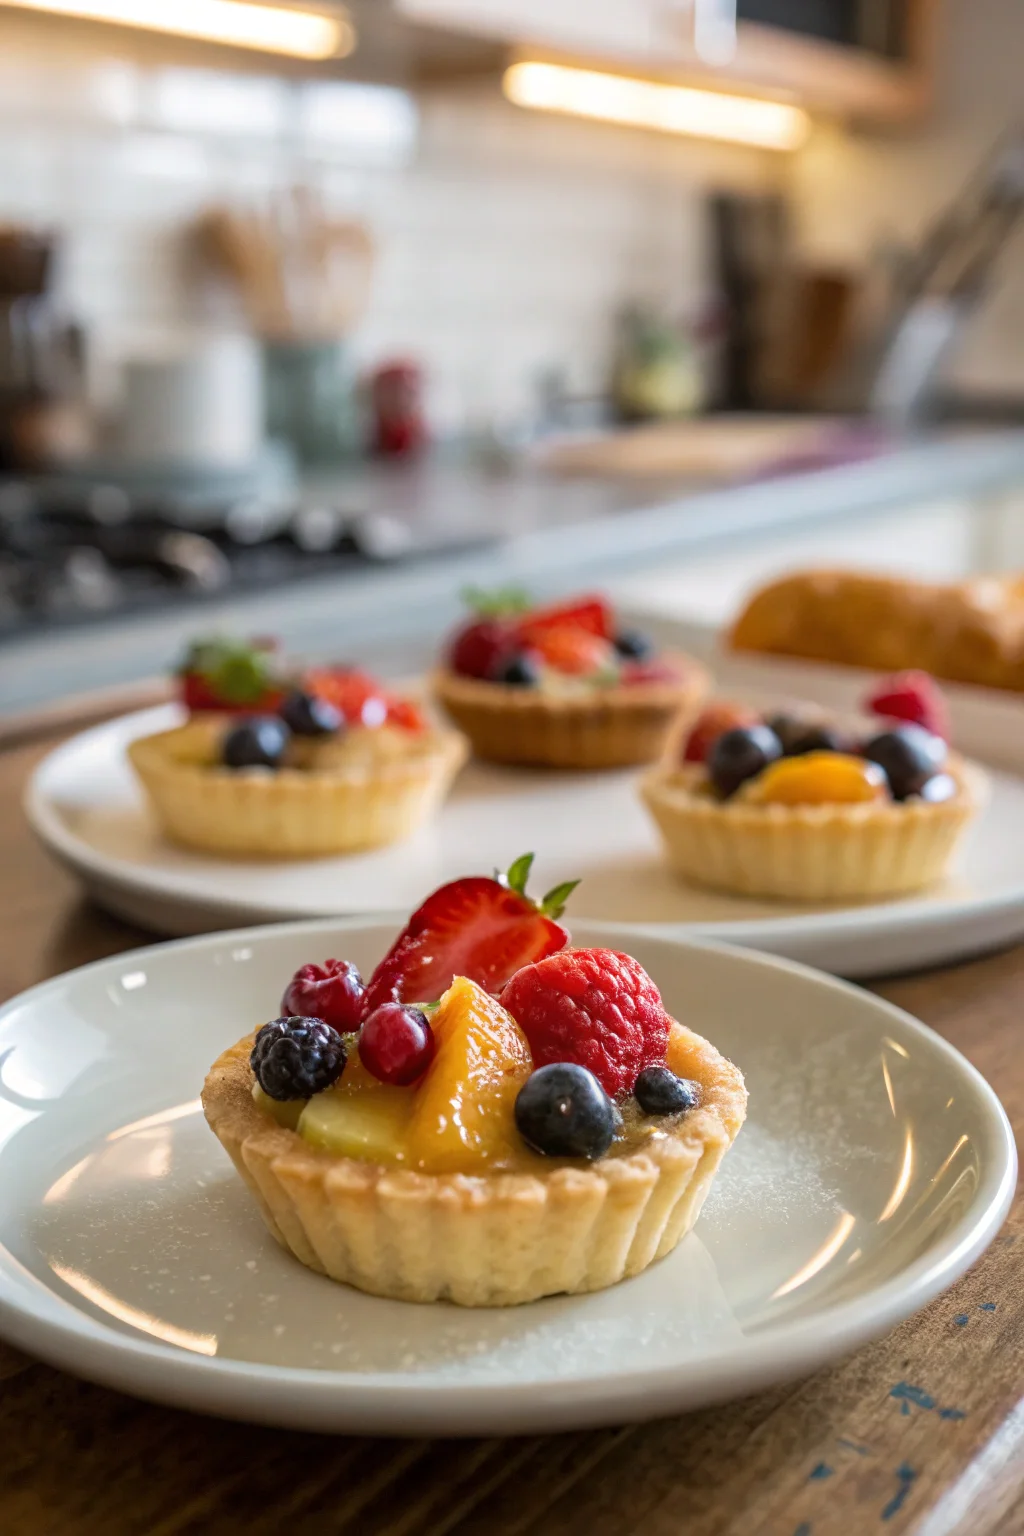
Mini Fruit Tarts
There’s something undeniably enchanting about the world of miniature desserts, especially when it comes to these delightful Mini Fruit Tarts. Imagine a cozy weekend spent in the kitchen, inspired by the warm memories of my grandmother’s kitchen, where the air was always filled with the tantalizing aroma of freshly baked goods. These Mini Fruit Tarts are more than just a dessert; they’re an invitation to share stories, laughter, and sweet moments with loved ones. With their buttery cookie shells, creamy filling, and vibrant fruit toppings, they promise a symphony of flavors in every bite. Whether you’re a seasoned baker or a novice, this recipe is designed to offer both ease and enjoyment in the kitchen. Let’s dive into the delightful world of Mini Fruit Tarts, where every step brings us closer to a masterpiece that’s as pleasing to the eyes as it is to the palate.
Table of Contents
Why This Recipe Works
- Perfect Balance of Flavors: The combination of a buttery crust, creamy filling, and fresh fruit offers a harmonious blend of sweet and tangy.
- Texture Contrast: The crisp cookie shell contrasts beautifully with the smooth cream cheese filling and juicy fruit topping.
- Versatility: You can customize the fruit toppings based on what’s in season or your personal preference.
- Ease of Preparation: With simple steps and common ingredients, these tarts are accessible to bakers of all skill levels.
- Visual Appeal: Their colorful and elegant presentation makes them a stunning addition to any dessert table.
- Portion Control: Being bite-sized, they offer a guilt-free indulgence and are perfect for entertaining.

Ingredients
- 1 1/3 cup plus 1 tablespoon all-purpose flour: Provides structure for the tart shells.
- 1/2 teaspoon baking soda: Helps the dough rise slightly, giving a light texture.
- 1/4 teaspoon baking powder: Works with baking soda for the perfect rise.
- 1/2 cup butter, softened: Adds richness and flavor to the dough.
- 3/4 cup white sugar: Sweetens the dough and helps with browning.
- 1 egg yolk: Adds richness and helps bind the dough.
- 1/2 teaspoon vanilla extract: Enhances the flavor of the dough.
- 1- 8oz block of cream cheese, softened: Serves as the creamy base for the filling.
- 2 cups powdered sugar: Sweetens the cream cheese filling.
- 1/2 teaspoon vanilla extract: Adds depth to the filling.
- 1 teaspoon lemon juice and zest: Provides a refreshing tang to balance the sweetness.
- Fresh fruit for topping: Adds color, flavor, and a juicy freshness to the tarts.
Step-by-Step Instructions
- Preheat and Prepare: Grease a mini-muffin tin to ensure easy removal of the tarts and preheat your oven to 350°F (175°C). This is a crucial first step to ensure your tarts bake evenly.
- Cream Butter and Sugar: In a large bowl, cream together the softened butter and white sugar until light and fluffy. This process incorporates air, leading to a tender crust.
- Incorporate Egg and Vanilla: Add the egg yolk and vanilla extract to the butter mixture. Mix until the texture is smooth and fluffy, ensuring the ingredients are well integrated.
- Mix Dry Ingredients: In a separate bowl, combine the all-purpose flour, baking soda, and baking powder. This ensures the leavening agents are evenly distributed in the dough.
- Combine Mixtures: Gradually add the dry ingredients to the butter mixture, stirring until well combined. The dough may appear crumbly, but this is normal.
- Shape the Dough: Use a small cookie scoop to portion 1 1/2 inch balls of dough. Roll them into smooth balls with your hands to create uniform tart shells.
- Form the Tart Shells: Place a ball of dough into each well of the mini-muffin tin, pressing down slightly to form a crust shape. This step helps the dough hold its shape during baking.
- Bake the Tarts: Bake for 8-10 minutes or until the edges are golden brown. Keep an eye on them to avoid over-baking.
- Cool the Tarts: Allow the tarts to cool in the tin before carefully removing them. This prevents the delicate shells from breaking.
- Prepare the Filling: In another bowl, cream together the softened cream cheese and powdered sugar until thick and smooth. This forms the base of the luscious filling.
- Flavor the Filling: Add vanilla extract, lemon juice, and zest to the cream cheese mixture, mixing until fully combined. This adds a refreshing zing to the creamy filling.
- Assemble the Tarts: Once the tart shells are completely cooled, pipe or spread the cream cheese filling into each shell. This is where you can get creative with your presentation.
- Add the Fruit Toppings: Top each tart with your choice of fresh fruit. Choose vibrant and contrasting colors for a visually appealing finish.
Prep Time: 20 minutes
Cooking Time: 10 minutes
Total Time: 30 minutes
Yield: 24 Servings
Calorie Breakdown for a Typical Serving
| Nutrient | Amount |
|---|---|
| Calories | 120 |
| Carbs | 15g |
| Protein | 2g |
| Fat | 6g |
| Sugar | 11g |
Patricia’s Tips for Success
Tip 1: Ensure your butter and cream cheese are fully softened to avoid lumpy mixtures and ensure even blending.
Tip 2: Don’t skip the cooling phase for the tarts; this helps them firm up and makes removal easier.
Tip 3: For a professional finish, use a piping bag to fill the tart shells with the cream cheese mixture.
Tip 4: To prevent the fruit from sliding off, gently press them into the filling.
Tip 5: Experiment with different fruit combinations for seasonal variations.
Tip 6: If you’re short on time, prepare the tart shells a day in advance and fill them before serving.
Tip 7: Keep the tarts chilled until serving to maintain the freshness of the fruit topping.
Cooking Variations
Variation 1: For a tropical twist, top the tarts with mango and pineapple.
Variation 2: Add a chocolate drizzle over the fruit topping for a decadent touch.
Variation 3: Swap the lemon juice and zest for orange for a different citrus flavor.
Variation 4: Use a mix of berries, like strawberries, blueberries, and raspberries, for a patriotic theme.
Variation 5: Incorporate a layer of fruit jam beneath the cream cheese filling for added flavor.
Serving Suggestions
Suggestion 1: Serve these Mini Fruit Tarts as a light dessert at a summer picnic or barbecue.
Suggestion 2: Pair them with a cup of tea or coffee for a delightful afternoon treat.
Suggestion 3: Include them as part of a dessert buffet for a baby shower or bridal event.
Suggestion 4: Offer them at brunch alongside a selection of other miniature pastries.
Suggestion 5: Present them as a sweet surprise for a loved one’s birthday celebration.
Additional Thoughts
Creating these Mini Fruit Tarts is not just about following a recipe, but about embracing the joy of baking and sharing that joy with others. I remember the first time I made these tarts; it was a sunny Saturday, and I was looking to recreate a childhood favorite my grandmother used to make. Her kitchen was always a place of warmth, filled with the laughter of family and the aroma of delicious treats. As I mixed the dough and prepared the filling, I was transported back to those cherished moments. The simple act of baking these tarts connected me to my roots and allowed me to share a piece of that history with my family.
The beauty of cooking lies in its ability to bring people together. Whether you’re baking these tarts for a special occasion or just because, they’re sure to become a favorite in your household. The process is straightforward, yet the result is nothing short of extraordinary. Each tart is a little work of art, a testament to the love and care you put into creating something special. As you top each tart with fresh fruit, you’re not just adding flavor, but injecting a splash of color and vibrancy that makes the dessert come alive.
There’s a certain magic that happens when you see the smiles of those enjoying your creations. It’s a reminder of why we cook: to nourish, to connect, and to create lasting memories. So, as you embark on this baking adventure, remember that it’s not just about the end result, but the journey and the joy you bring to those around you. These Mini Fruit Tarts are more than just a recipe; they’re a celebration of flavor, creativity, and the shared experience of enjoying good food with good company.
Join the Conversation
I’d love to hear about your experiences with this Mini Fruit Tarts recipe! Did you try any variations, or perhaps discovered a new favorite fruit topping? Join our community of food enthusiasts by leaving a comment below. Your feedback and stories not only inspire me but also help others who are exploring the delightful world of baking. Sharing your insights and experiences creates a tapestry of culinary inspiration that we can all learn from. So, don’t hesitate to share your thoughts and join the conversation!
Conclusion
In conclusion, these Mini Fruit Tarts are a delightful addition to any dessert repertoire. They offer a perfect balance of flavors, textures, and aesthetics, making them an ideal choice for both casual gatherings and special occasions. With their simple preparation and endless customization options, you can easily adapt them to suit any season or event. As you enjoy these tarts, may they bring you as much joy in sharing as they did in creating. Remember, the best recipes are those that tell a story, and with each tart, you’re creating a delicious chapter in your culinary journey.
Frequently Asked Questions
Q: Can I make the tart shells in advance?
A: Yes, you can prepare the tart shells a day ahead and store them in an airtight container.
Q: What fruits work best for topping the tarts?
A: Berries, kiwi, mango, and grapes are great choices for topping these tarts.
Q: How long can I store the tarts in the fridge?
A: They can be stored in the fridge for up to three days.
Q: Can I use low-fat cream cheese for the filling?
A: Yes, low-fat cream cheese can be used, but the filling may be slightly less creamy.
Q: Is it possible to freeze the tarts?
A: The tart shells can be frozen, but it’s best to add the filling and fruit topping fresh.
Q: What’s the best way to transport these tarts?
A: Use a sturdy container and ensure they’re chilled to keep the filling firm during transport.
Q: Can I add spices to the dough for extra flavor?
A: A pinch of cinnamon or nutmeg can add a delightful twist to the tart shells.
Mini Fruit Tarts
Course: DessertCuisine: AmericanDifficulty: EasyThese delightful Mini Fruit Tarts are the perfect bite-sized treat for any occasion. A buttery crust filled with a creamy, tangy filling and topped with fresh fruit – they are as delicious as they are adorable!
Ingredients
1 1/3 cup plus 1 tablespoon all-purpose flour
1/2 teaspoon baking soda
1/4 teaspoon baking powder
1/2 cup butter, softened (4 oz or 1 stick)
3/4 cups white sugar
1 egg yolk
1/2 teaspoon vanilla extract
1- 8oz block of cream cheese, softened
2 cups powdered sugar
1/2 teaspoon vanilla extract
1 teaspoon lemon juice and zest
Fresh fruit for topping
Directions
- Preheat the oven to 350°F (175°C) and grease a mini-muffin tin.
- In a large bowl, cream together the butter and sugar until smooth and fluffy.
- Add the egg yolk and vanilla extract to the butter mixture and mix well.
- In a separate bowl, combine the flour, baking soda, and baking powder.
- Add the dry ingredients to the wet mixture; mix until well combined (dough may seem crumbly).
- Use a small cookie scoop to portion 1 1/2 inch balls of dough, roll them into smooth balls by hand, and place into each well of the mini-muffin tin, pressing down slightly.
- Bake for 8-10 minutes or until the edges are golden. Allow to cool before removing from the pan.
- For the filling, cream together the cream cheese and powdered sugar until thick and smooth.
- Add the vanilla extract, lemon juice, and zest to the filling mixture and mix well.
- Pipe or spread the filling into the cooled cookie shells.
- Top each tart with fresh fruit.
- Store the Mini Fruit Tarts in the fridge until ready to serve. Enjoy!