Hot Chocolate Bombs
The Art of Crafting Hot Chocolate Bombs: A Cozy Winter Delight
As the first chill of winter sweeps through the air and the days grow shorter, my thoughts drift back to the cozy afternoons spent in my grandmother’s kitchen. Her love was poured into every cup of hot chocolate she made, transforming simple ingredients into a comforting embrace that warmed the soul. It’s this nostalgia that inspired my journey into creating Hot Chocolate Bombs—tiny, exquisite spheres that encapsulate the joy of those cherished moments. These delightful treats offer more than just a visual spectacle; they present an experience, each one bursting open to reveal hidden treasures of marshmallows and rich cocoa when doused in hot milk. Join me as we explore how to bring this magic into your home, ensuring that every sip is a nostalgic journey back to warmth and love.
Why This Recipe Works:
Joyful Surprise
Each hot chocolate bomb is a delightful surprise, revealing a hidden world of marshmallows and cocoa when melted. The anticipation as the chocolate shell dissolves into a swirl of creamy delight is a joyful experience that rekindles the simple pleasures of childhood.
Versatile Flavors
From classic chocolate to festive peppermint, there’s a flavor for every palate and occasion. Whether you’re a traditionalist who loves the classic cocoa taste or an adventurer eager to try bold new concoctions, hot chocolate bombs can be tailored to your preferences.
Aesthetic Appeal
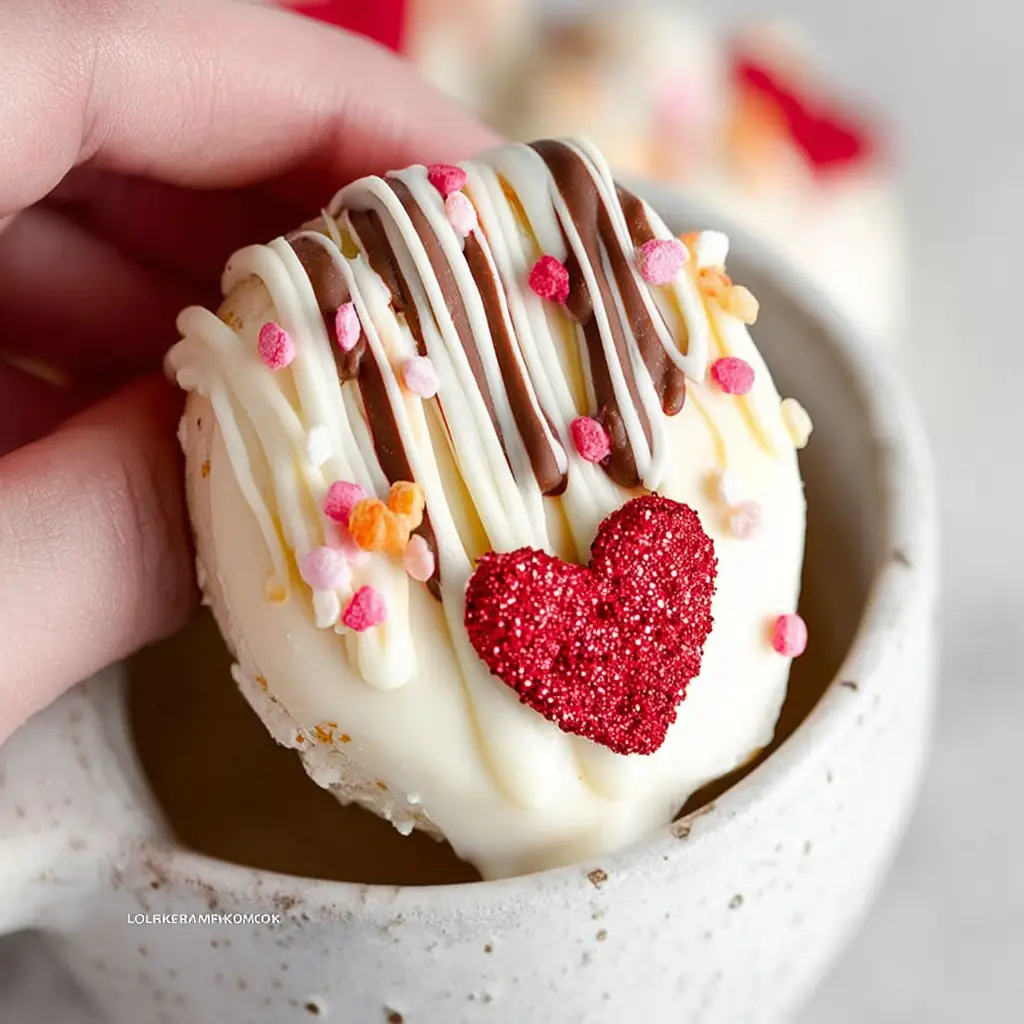
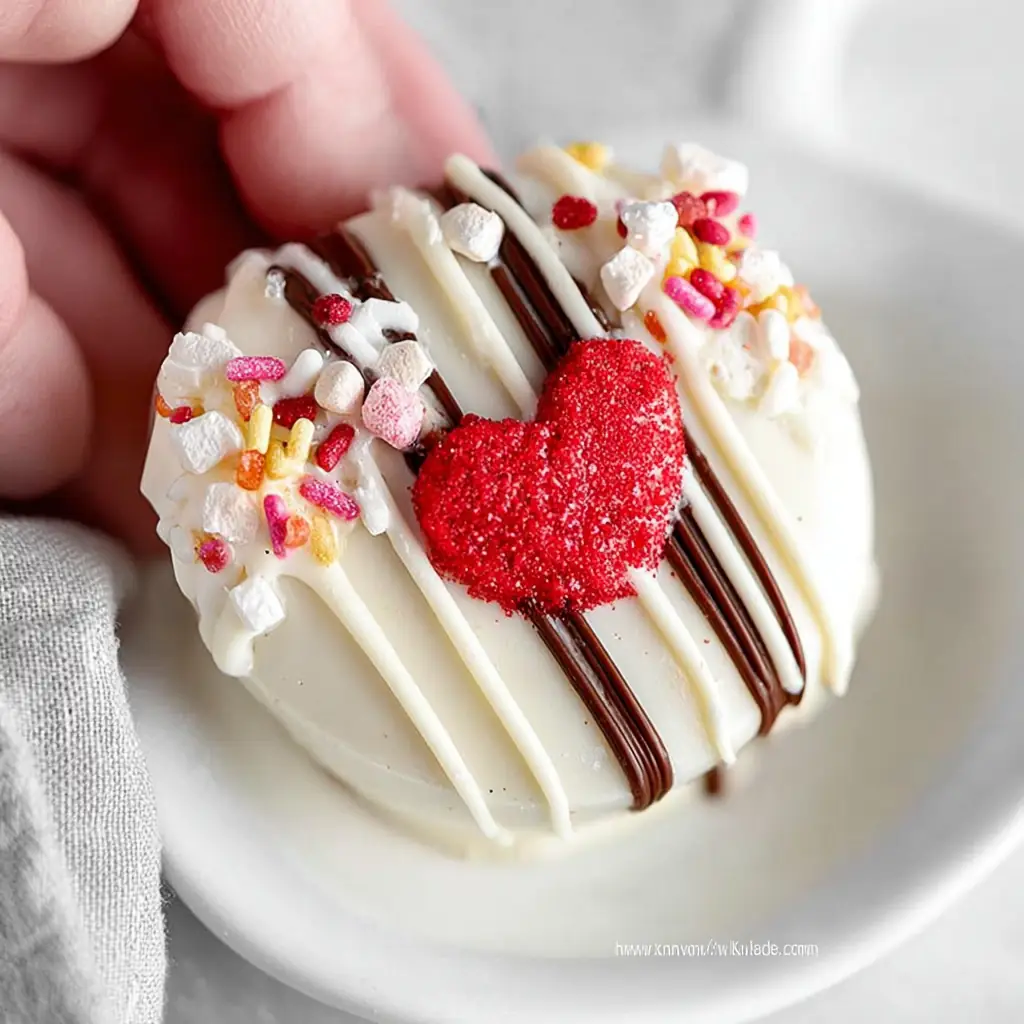
These bombs are a visual treat, perfect for gifting and impressing guests with minimal effort. Their glossy shells and decorative touches make them an attractive centerpiece for holiday gatherings or a thoughtful, homemade gift.
Ease of Preparation
Despite their elaborate appearance, hot chocolate bombs are simple to make with step-by-step guidance. This accessibility allows anyone, regardless of baking experience, to create a culinary masterpiece that delights taste buds and eyes alike.
Customizable
Personalize each bomb with your favorite flavors, colors, and decorations for a unique touch. Whether adding a dash of cinnamon, a sprinkle of sea salt, or a hint of chili powder, your creativity can shine through in each delicious bomb.
Long Shelf Life
Make them in advance and store them, ready to delight whenever the craving strikes. These bombs maintain their flavor and integrity for weeks, allowing you to enjoy them at your leisure or keep them on hand for unexpected guests.
Ingredients:
- Milk or Semi-Sweet Chocolate Chips/Chocolate Candy Melts: Provides the creamy shell and rich chocolate flavor.
- Hot Cocoa Powder Mix: Infuses the bomb with a rich cocoa essence.
- Mini Dehydrated Marshmallows: Adds texture and sweetness.
- White Chocolate Candy Melts: Used for decoration, creating a beautiful contrast.
- Shaved Chocolate: A simple yet elegant touch to garnish.
- Crushed Peppermint Candies: For that signature holiday flavor in peppermint bombs.
- White Chocolate Chips/White Chocolate Candy Melts: Perfect for sugar cookie bombs, offering a sweet, creamy profile.
- Rainbow Sprinkles and Extracts: Adds a festive touch and depth of flavor to sugar cookie bombs.
- Eggnog Powder Mix and Nutmeg: Brings a seasonal twist to eggnog bombs.
Step-by-Step Instructions:
Prepare Your Workspace: Place the silicone mold on a flat, moveable surface like a tray or cutting board. This setup ensures easy transport to the freezer later on.
Melt the Chocolate: Place the chocolate in a microwave-safe container, such as a glass measuring cup, and microwave at 50% power in 30-second intervals, stirring in between. This gentle method prevents scorching and ensures a smooth melt. Mine took about 2 full minutes total.
Coat the Molds: Add a heaping tablespoon of melted chocolate to each well of the silicone mold. Using a small rubber spatula, offset spatula, or back of a spoon, spread the chocolate up the sides of the mold until completely coated.
Build the Shells: Wait about 5 minutes for the chocolate to cool slightly, then divide the remaining chocolate between all of the wells and spread it around to give each of them a thicker coat. You want the chocolate to be thick, especially around the top edges, to ensure structural integrity.
Set the Molds: Place the mold, while on the tray, in the freezer for the chocolate to set for at least 30 minutes. This step solidifies the shells, making them easier to handle.
Release the Chocolate Cups: Once the chocolate has set, remove the mold from the freezer. Give a little tug around the silicone mold to help release the chocolate. Then carefully use your fingers to push the chocolate cup out of the mold, taking care not to crack the delicate shells. Place the chocolate cups on a plate.
Fill the Bombs: Place the drink mix, marshmallows, and any other add-ins you are including in three of the chocolate cups. This combination of flavors and textures creates the bomb’s delightful inner surprise.
Seal the Bombs: Working quickly to avoid melting the chocolate with your fingers, place one of the empty cups open-side down on a hot plate to melt the edges slightly. Then, place it on the filled half of the sphere and press lightly, sealing the edges together.
Decorate the Bombs: Melt the decorating chocolate the same way you melted the chocolate for the spheres, then transfer it to a piping bag or decorating squeeze bottle. Pipe a thin ribbon of chocolate around the seam of the spheres and smooth it out with your finger. Drizzle the melted chocolate over the tops of the bombs and sprinkle with decorations of your choice.
Final Touches: Allow the chocolate to set before moving the bombs. Keep them refrigerated or frozen until ready to use, ensuring they maintain their shape and flavor.
Prep Time: 30 minutes
Cooking Time: 10 minutes
Total Time: 40 minutes
Yield: 4-6 Servings
Table: Calorie Breakdown for a Typical Serving
| Nutrient | Amount |
|---|---|
| Calories | 150 |
| Carbohydrates | 20g |
| Protein | 2g |
| Fat | 7g |
| Sugar | 15g |
Patricia’s Tips for Success:
Tip 1: Use gloves to avoid fingerprints on the chocolate.
Fingerprints can mar the glossy finish of the chocolate, so gloves are a simple way to ensure your bombs look professional.
Tip 2: If chocolate isn’t melting well, add about 1 tsp of coconut oil.
Coconut oil can help smooth out chocolate that refuses to melt evenly, offering a silky texture without altering the flavor significantly.
Tip 3: Ensure the chocolate is thick around the edges to prevent breakage.
Thick edges lend stability to the delicate chocolate spheres, making them easier to handle and less prone to cracking.
Tip 4: Use tempered chocolate for a smooth finish if chocolate bark is unavailable.
Tempered chocolate provides a shiny, professional-looking finish and a satisfying snap when broken.
Tip 5: Freeze the chocolate molds on a tray for easy handling.
A tray provides a stable base, making it easier to move the molds to and from the freezer without disturbing the chocolate.
Tip 6: Heat the plate by running it under hot water to melt the edges evenly.
A gently heated plate melts the chocolate edges evenly, creating a seamless seal when joining the halves.
Cooking Variations:
Standard Hot Chocolate Bomb:
Classic cocoa powder and marshmallows for a timeless treat that never fails to warm the heart.
Peppermint Hot Chocolate Bomb:
Add crushed peppermint candies for a festive twist, reminiscent of candy canes and holiday cheer.
Sugar Cookie Hot Chocolate Bomb:
Infuse with vanilla and almond extracts for a sweet surprise, capturing the essence of freshly baked cookies.
Sea Salt Caramel Bomb:
Incorporate a pinch of sea salt and caramel bits for a sophisticated, sweet-and-salty experience that tantalizes the taste buds.
Spiced Chai Bomb:
Mix in chai spices such as cinnamon, cardamom, and ginger for an exotic, warming blend that transports you to distant lands.
Serving Suggestions:
Suggestion 1: Top with whipped cream and a sprinkle of cinnamon for added warmth.
A dollop of whipped cream and a dusting of cinnamon enhance the flavors and add a touch of indulgence.
Suggestion 2: Serve alongside a plate of freshly baked cookies for a cozy afternoon treat.
Pairing these bombs with cookies creates a delightful, comforting experience perfect for sharing with loved ones.
Suggestion 3: Pair with a shot of espresso for a delightful mocha experience.
For coffee lovers, adding espresso creates a rich, mocha-like drink that combines the best of both worlds.
Suggestion 4: Create a Hot Chocolate Bomb Bar at your next gathering.
Let guests customize their bombs with various toppings and flavorings for a fun, interactive experience that sparks creativity.
Additional Thoughts:
Hot Chocolate Bombs are more than a drink; they’re a celebration of flavors and memories. Whether you’re crafting them for a holiday gathering or a simple cozy night in, they bring a touch of magic to every occasion. The versatility of these bombs allows you to customize each one to suit your tastes and preferences, making them a beloved treat for all ages. Embrace the creativity and joy that comes with each step, and don’t be afraid to experiment with new flavors and combinations. The process of creating and enjoying these bombs is as rewarding as the taste itself, fostering a sense of accomplishment and delight.
Join the Conversation:
I’d love to hear how your Hot Chocolate Bombs turned out! Did you try a new flavor or come up with a unique decoration idea? Share your stories, photos, and tips in the comments below. Let’s create a community of hot chocolate enthusiasts who inspire and learn from each other. Whether you’re a seasoned chocolatier or a beginner venturing into the world of sweet confections, your experiences and insights can enrich our shared love for this delightful treat.
Conclusion:
Transform your winter evenings with the delightful indulgence of Hot Chocolate Bombs, where each sip is a warm hug in a mug. With their stunning appearance and customizable flavors, these bombs are sure to become a cherished part of your seasonal traditions. Invite warmth and joy into your kitchen by crafting these unique treats, and delight in the smiles they bring to those around you. As you savor each sip, let the rich flavors and soothing warmth transport you back to those cozy afternoons of yesteryear, enveloped in the love and comfort of family traditions.
Frequently Asked Questions:
Q: Can I use any type of milk for melting the bombs?
A: Yes, you can use any milk or milk alternative of your choice, such as almond milk, oat milk, or coconut milk, to suit dietary preferences and enhance the flavor.
Q: How should I store the hot chocolate bombs?
A: Keep them refrigerated or frozen until you’re ready to use them. This prolongs their shelf life and maintains the quality of the chocolate.
Q: Can I make these without a silicone mold?
A: Silicone molds are recommended for ease of use, but you can try using a cupcake tin lined with paper cups. The flexibility of silicone makes it easier to release the chocolate without breakage.
Q: What’s the best way to melt chocolate for the bombs?
A: Use a microwave-safe container and melt at 50% power, stirring every 30 seconds. This method prevents overheating and ensures a smooth, even melt.
Q: Can I add alcohol to the bombs?
A: For an adult version, a splash of your favorite liqueur, such as Baileys or Kahlúa, can be added to the hot milk before pouring it over the bomb. This adds a luxurious twist to your drink.
Q: How long do these bombs last?
A: They can last up to a month if stored properly in the fridge or freezer, allowing you to enjoy them at your convenience or have them ready for spontaneous gatherings.
Q: Can I gift these hot chocolate bombs?
A: Absolutely! They’re perfect for gifting, especially when wrapped in cellophane with a festive ribbon. Their beautiful appearance and delicious surprise make them an ideal handmade gift that conveys warmth and thoughtfulness.


Hot Chocolate Bombs
Ingredients
Equipment
Method
- Place the silicone mold on a flat, moveable surface like a tray or cutting board.
- Place the chocolate in a microwave-safe container like a glass measuring cup and microwave at 50% power in 30-second intervals, stirring in between each time. Mine took about 2 full minutes total.
- Add a heaping tablespoon of melted chocolate to each well of the silicone mold.
- Using a small rubber spatula, offset spatula, or back of a spoon, spread the chocolate up the sides of the mold until completely coated.
- Wait about 5 minutes for the chocolate to cool a bit and then divide the remaining chocolate between all of the wells and spread it around to give each of them a thicker coat. You want the chocolate to be thick, especially around the top edges.
- Place the mold, while on the tray in the freezer for the chocolate to set for at least 30 minutes.
- Once the chocolate has set, remove from the freezer. Give a little tug around the silicone mold to help release the chocolate. Then carefully use your fingers to push the chocolate cup out of the mold. Place the chocolate cups on a plate.
- Place the drink mix, marshmallows, and any other add-ins you are including in 3 of the chocolate cups.
- Working quickly (so your fingers don’t melt the chocolate), place one of the empty cups open-side down on a hot plate to melt the edges a bit. Then place it on the filled half of the sphere and press lightly.
- Melt the decorating chocolate the same way you melted the chocolate for the spheres and then transfer it to a piping bag or decorating squeeze bottle.
- Pipe a thin ribbon of chocolate around the seam of the spheres and then smooth it out with your finger.
- Then drizzle the melted chocolate over the tops of the bombs and sprinkle with decorations.
- Allow the chocolate to set before moving.
- Keep refrigerated or frozen until ready to use.
- To make the hot chocolate: Place the bomb in an empty mug and top with 8 ounces of hot milk. Stir well before enjoying it.
- To make homemade hot chocolate powder: Combine all of the ingredients (sugar, cocoa powder, white chocolate, and powdered milk) in a small bowl. Stir to combine. Set aside until ready to use.