Air Fryer Taro Root
If you’ve never tried taro root before, you’re in for a delightful treat. This humble tuber, often overshadowed by its more popular cousins like sweet potatoes and yams, has a unique flavor and creamy texture that’s simply irresistible. Today, I’m thrilled to share my Air Fryer Taro Root recipe, inspired by the cozy weekends I spent in my grandmother’s kitchen. She had a knack for turning simple ingredients into extraordinary dishes, and taro was one of her favorites. This recipe is not only a nod to her culinary magic but also a testament to how modern kitchen gadgets like the air fryer can transform traditional ingredients into something fresh and exciting. Whether you’re a seasoned cook or just starting out, this recipe is accessible, flavorful, and a fantastic way to explore new ingredients.
Why This Recipe Works:
• Quick and Easy: The air fryer significantly cuts down the cooking time, making it a perfect choice for busy weeknights. Unlike traditional methods that may require boiling or baking for extended periods, the air fryer delivers a crispy exterior and tender interior in just a fraction of the time. This is especially beneficial for those who want to try new recipes without committing to lengthy preparations.
• Healthy Alternative: Using an air fryer reduces the need for excessive oil, offering a healthier option without compromising on taste. Traditional deep-frying methods can add unnecessary calories and fats, but the air fryer uses hot air circulation to achieve similar results with minimal oil. This makes it a great alternative for health-conscious individuals or those looking to cut down on their oil consumption.
• Flavorful: The combination of garlic powder and black pepper enhances the natural sweetness of taro, making every bite burst with flavor. These spices are simple yet effective, adding a depth that complements the nutty taste of taro. You can also experiment with your favorite spices to create a unique blend that suits your palate.
• Versatile: This dish can complement a variety of meals, from Asian-inspired dishes to classic American fare. Its neutral flavor profile allows it to pair well with diverse cuisines, making it a flexible addition to any meal plan. Whether you’re serving it alongside a savory stir-fry or as a side to a hearty steak, taro can hold its own.
• Kid-Friendly: The crispy exterior and creamy interior make it a hit even with picky eaters. Kids love the texture contrast of crispy on the outside and soft on the inside, making it an excellent option for introducing them to new vegetables. You might find that it’s not just the kids but the whole family reaching for seconds.
• Minimal Cleanup: With just one bowl and the air fryer basket, cleanup is a breeze. Unlike traditional frying that can leave your kitchen greasy, the air fryer contains the mess, making post-cooking cleanup quick and easy. If you line your air fryer basket with parchment paper, cleanup is even more efficient.
Ingredients:
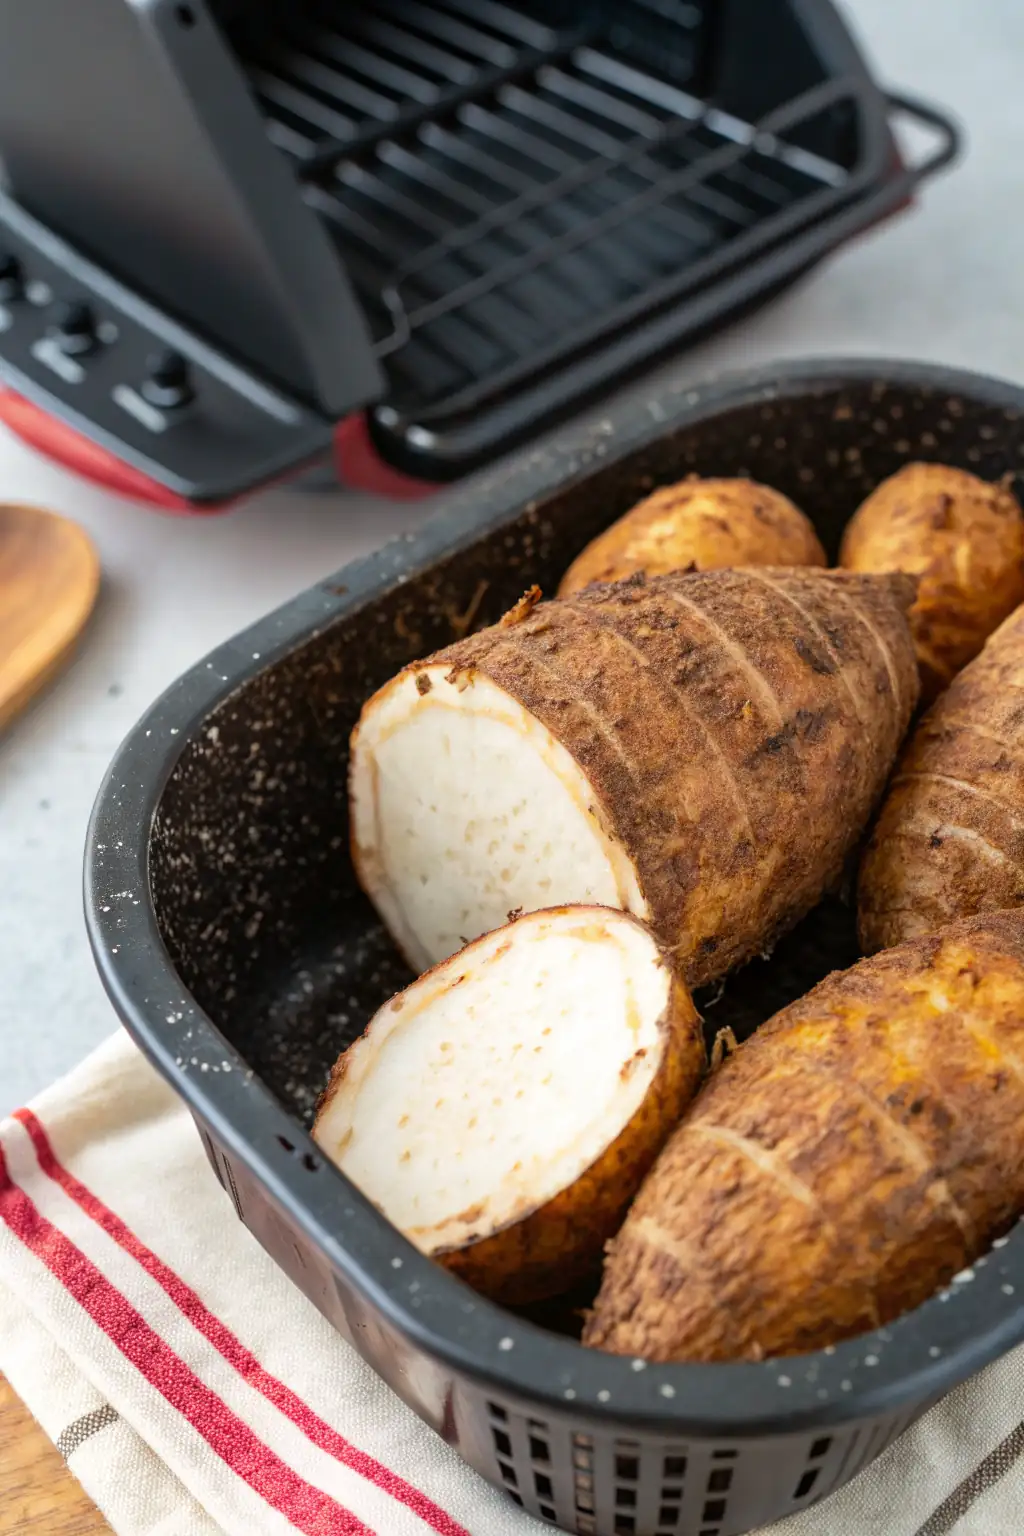
• Taro Root (1 lb): A starchy root vegetable with a nutty flavor, perfect for air frying. When selecting taro, look for firm, unwaxed roots that feel heavy for their size. The skin should be free of mold and blemishes to ensure the best quality.
• Olive Oil (1 tablespoon): Adds a touch of richness and helps the taro crisp up beautifully. Olive oil is preferred for its heart-healthy benefits and its ability to withstand high cooking temperatures, which helps achieve that perfect golden brown crust.
• Salt (1 teaspoon): Enhances the natural flavors of the taro. While a teaspoon is a good starting point, feel free to adjust the salt according to your taste or dietary needs.
• Garlic Powder (1 teaspoon, optional): Adds a savory depth; omit if you prefer a milder flavor. If you’re a garlic lover, consider using freshly minced garlic for a more intense flavor, but be aware that it may burn in the air fryer if not monitored closely.
• Black Pepper (1/2 teaspoon, optional): Offers a subtle kick; adjust to your taste preference. Freshly ground black pepper can provide a more pungent flavor than pre-ground, so adjust accordingly.
Step-by-Step Instructions:
-
Prepare the Taro: Peel the taro root using a vegetable peeler and cut it into 1-inch cubes. Be cautious, as taro can be slippery. To make handling easier, you can use a damp cloth to hold the taro while peeling.
-
Season the Taro: In a mixing bowl, combine taro cubes with olive oil, salt, garlic powder, and black pepper. Toss until evenly coated. This ensures that each piece of taro gets a uniform layer of seasoning, which is crucial for even cooking and flavor distribution.
-
Preheat the Air Fryer: Preheat the air fryer to 375°F for 5 minutes to ensure even cooking. Preheating is important as it allows the taro to start cooking immediately upon entering the basket, resulting in a better texture.
-
Arrange Taro in the Basket: Arrange the taro cubes in a single layer in the air fryer basket. Avoid overcrowding for best results, working in batches if necessary. Overcrowding can lead to uneven cooking and prevent the taro from getting crispy.
-
Cook the Taro: Cook the taro for 15 minutes, shaking the basket halfway through to ensure even cooking. Shaking the basket helps redistribute the taro, allowing each piece to crisp up evenly on all sides.
-
Check Doneness: Check the doneness by piercing with a fork. The taro should be tender and lightly golden. If needed, continue cooking for an additional 5-10 minutes. Be careful to not overcook, as taro can quickly go from perfectly done to overly dry.
-
Serve and Enjoy: Carefully remove the taro from the air fryer and let it cool for a few minutes before serving, as they retain heat well. This resting period allows the exterior to firm up slightly, enhancing the crispy texture.
Prep Time: 15 minutes
Cook Time: 25 minutes
Total Time: 40 minutes
Yield: 2 Servings
Table: Calorie Breakdown for a Typical Serving
| Component | Amount |
|---|---|
| Calories | 150 |
| Carbs | 36g |
| Protein | 1g |
| Fat | 3g |
| Sugar | 0g |
Patricia’s Tips for Success:
Tip 1: Choose firm taro with no soft spots or blemishes for the best texture. Fresh taro should be firm and free from any signs of sprouting or wrinkling, which can indicate age.
Tip 2: Toss the taro cubes well to ensure each piece is evenly coated with seasoning. This will help the taro cook evenly and absorb the flavors of the spices and oil.
Tip 3: Do not skip preheating the air fryer; it ensures the taro cooks evenly from the start. This step is crucial for achieving a uniform texture and preventing the taro from sticking to the basket.
Tip 4: Use a high-quality olive oil for a richer flavor profile. Extra virgin olive oil provides a robust flavor that complements the nuttiness of taro.
Tip 5: If you’re sensitive to heat, reduce or omit the black pepper. Adjusting the amount of pepper allows you to customize the heat level to your liking.
Tip 6: Keep an eye on the taro towards the end of cooking to prevent over-browning. The natural sugars in taro can caramelize quickly, so watch closely to avoid burning.
Tip 7: Experiment with additional seasonings like paprika or cumin for a flavor twist. These spices can add a smoky or earthy note that pairs well with taro’s natural sweetness.
Cooking Variations:
Variation 1: Swap olive oil with coconut oil for a tropical twist. Coconut oil adds a subtle sweetness and a hint of coconut flavor that pairs beautifully with taro.
Variation 2: Add a sprinkle of Parmesan cheese in the last few minutes of cooking for a cheesy finish. The cheese will melt and form a crispy crust, adding a savory touch to each bite.
Variation 3: Toss the cooked taro with fresh herbs like parsley or cilantro before serving for added freshness. Herbs can brighten the dish and add a pop of color and flavor.
Variation 4: Experiment with spices like curry powder for an exotic flavor profile. Curry powder can bring warmth and complexity to the dish, making it a great choice for adventurous eaters.
Variation 5: Serve with a dipping sauce such as aioli or sriracha for extra flavor. Dipping sauces can add moisture and a burst of flavor, elevating the dish to new heights.
Serving Suggestions:
Suggestion 1: Serve as a side dish with grilled chicken or fish for a balanced meal. The crispy taro is a great accompaniment to protein-rich dishes, providing a satisfying contrast in texture.
Suggestion 2: Pair with a fresh salad for a light and satisfying lunch. The taro adds a hearty element to a salad, making it more filling and nutritious.
Suggestion 3: Enjoy as a snack with a sprinkle of sea salt and a squeeze of lime. The acidity from the lime enhances the taro’s flavor and adds a refreshing kick.
Suggestion 4: Use as a base for a vegetarian bowl with sautéed greens and tofu. This creates a nutritious and balanced meal that is both satisfying and delicious.
Suggestion 5: Include in a brunch spread alongside eggs and toast for a hearty start to your day. The taro adds an unexpected twist to traditional brunch fare, impressing your guests with its unique flavor and texture.
Additional Thoughts:
The Air Fryer Taro Root recipe is a wonderful introduction to this versatile ingredient. Taro has been a staple in many Asian and Pacific Island cultures, celebrated for its unique texture and flavor. By embracing this ingredient, you’re not only expanding your culinary repertoire but also paying homage to a rich cultural heritage. Whether you’re serving it as a snack, side, or part of a larger meal, this recipe is sure to impress and delight everyone at the table.
Taro is valued not only for its taste but also for its nutritional benefits. It’s a good source of dietary fiber, which aids in digestion and helps maintain a healthy gut. Additionally, taro contains vitamins and minerals such as vitamin E, vitamin C, and potassium, contributing to overall well-being.
The air fryer method respects the traditional preparation of taro while introducing a modern twist that simplifies the cooking process. This approach makes it easy to enjoy the benefits of taro without the time-consuming steps often associated with its preparation.
Join the Conversation:
I’d love to hear how your Air Fryer Taro Root turned out! Did you try any variations, or have you discovered a new favorite way to serve it? Share your experiences and photos in the comments below. The kitchen is a place for exploration and sharing, and I can’t wait to see how you make this recipe your own.
Your feedback helps create a community of food enthusiasts who are eager to learn and share their culinary journeys. Whether you’re a beginner or an experienced cook, your insights can inspire others to try new ingredients and techniques.
Conclusion:
Air Fryer Taro Root is a simple yet flavorful dish that brings a taste of tradition and a hint of innovation to your table. With minimal prep and cooking time, it’s a recipe that fits seamlessly into any meal plan, offering a healthy, delicious option that even the pickiest eaters will enjoy. Try it today and experience the joy of cooking with taro in a modern way.
This recipe is not just about the end product, but also about the process of discovering new flavors and techniques. The air fryer allows you to experiment with traditional ingredients in a contemporary setting, making it easier than ever to enjoy a variety of foods in a healthier manner.
Frequently Asked Questions:
Q: Can I use frozen taro root for this recipe?
A: Yes, just thaw and pat dry before seasoning. Ensure that the taro is completely thawed to allow for even cooking.
Q: How do I store leftovers?
A: Store in an airtight container in the fridge for up to 3 days. Reheat in the air fryer for a few minutes to regain the crispy texture.
Q: Can I double the recipe?
A: Absolutely, but cook in batches to avoid overcrowding the air fryer. Overcrowding can lead to uneven cooking and less crispy results.
Q: What if my taro is still hard after cooking?
A: Cook for an additional 5 minutes, checking frequently. The cooking time can vary depending on the size of the taro pieces and the efficiency of your air fryer.
Q: Is taro root safe to eat raw?
A: No, taro must be cooked to remove natural toxins. Raw taro contains calcium oxalate, which can cause irritation and should be avoided.
Q: Can I omit the olive oil?
A: You can, but the texture may be less crispy. The oil helps the taro to brown and develop a crispy exterior.
Q: What’s the best way to peel taro?
A: Use a vegetable peeler and be cautious of the slippery surface. Cutting the taro into manageable pieces before peeling can make the process easier.

Air Fryer Taro Root
Ingredients
Equipment
Method
- Peel the taro root and cut it into 1-inch cubes.
- In a mixing bowl, toss the taro cubes with olive oil, salt, garlic powder, and black pepper until evenly coated.
- Preheat the air fryer to 375°F for 5 minutes.
- Place the seasoned taro cubes in the air fryer basket in a single layer (work in batches if necessary).
- Cook for 15 minutes, shaking the basket halfway through for even cooking.
- Check for doneness; the taro should be tender and lightly golden. If needed, cook for an additional 5-10 minutes.
- Remove from the air fryer and serve hot.