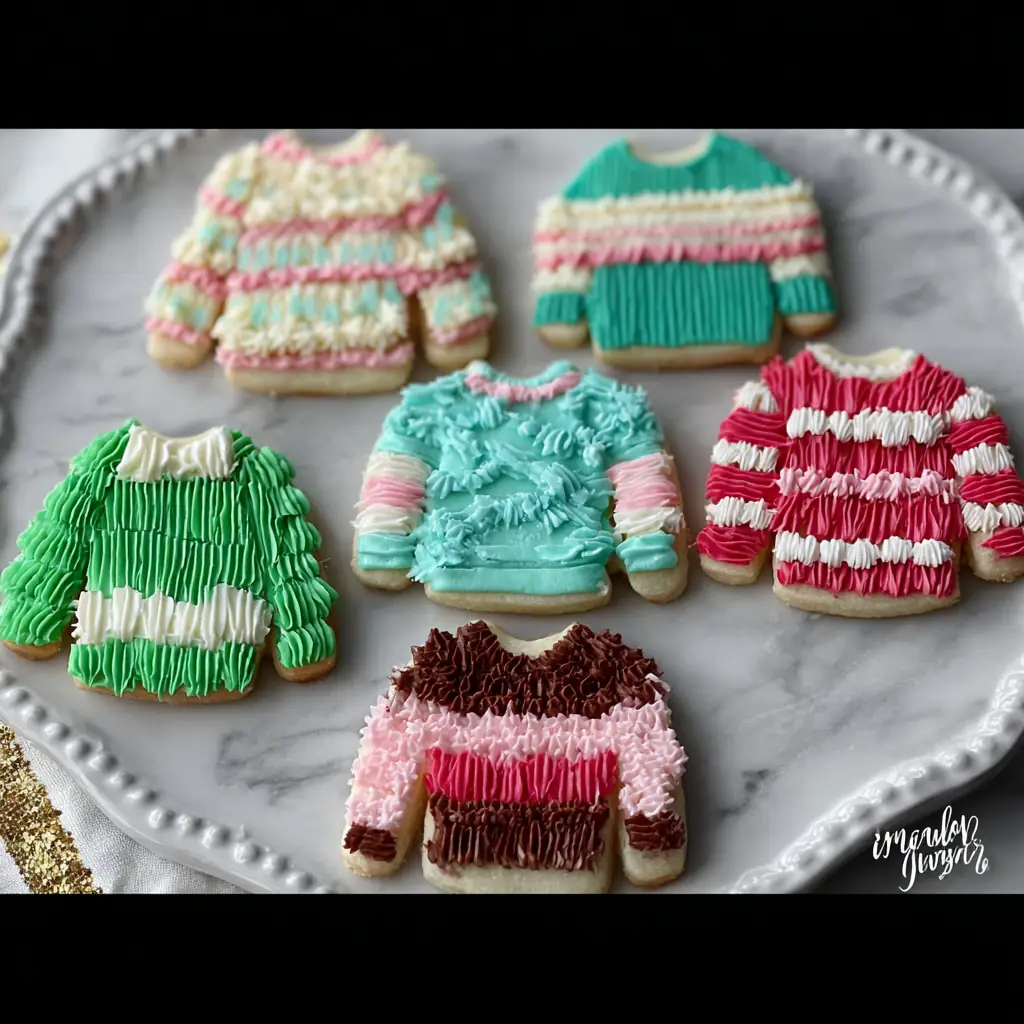
Ugly Christmas Sweater Cookies
Ugly Christmas Sweater Cookies: A Festive Tradition Reimagined
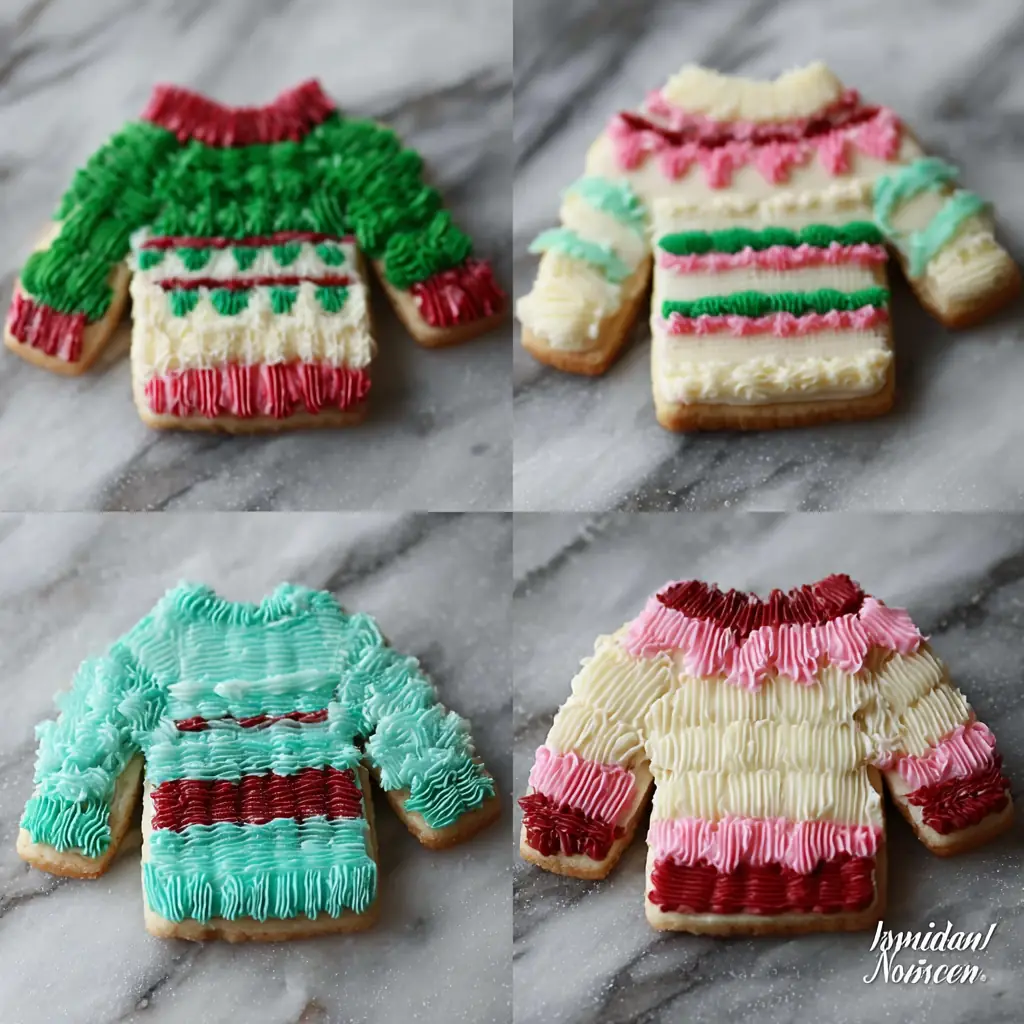
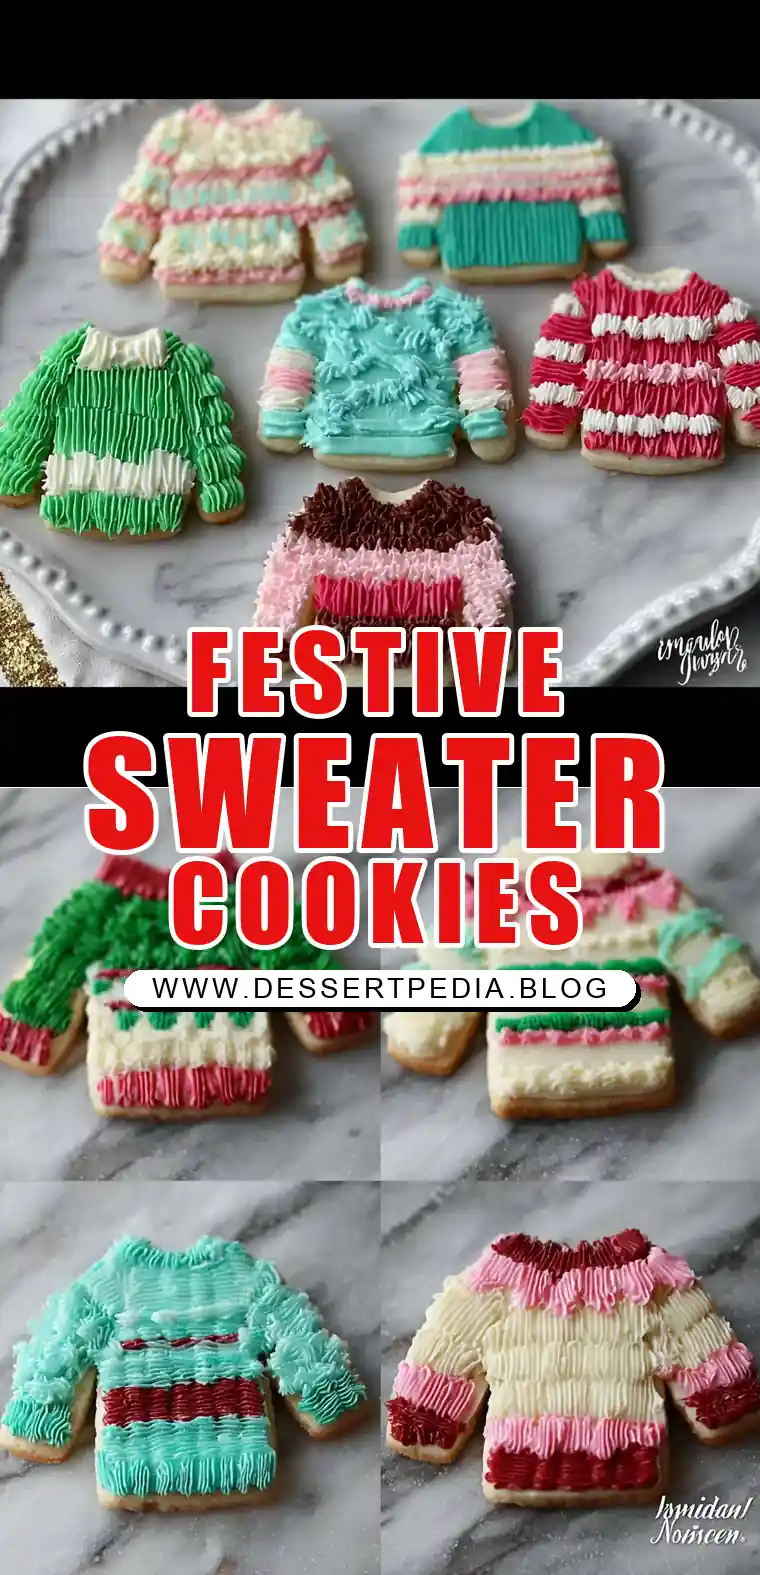
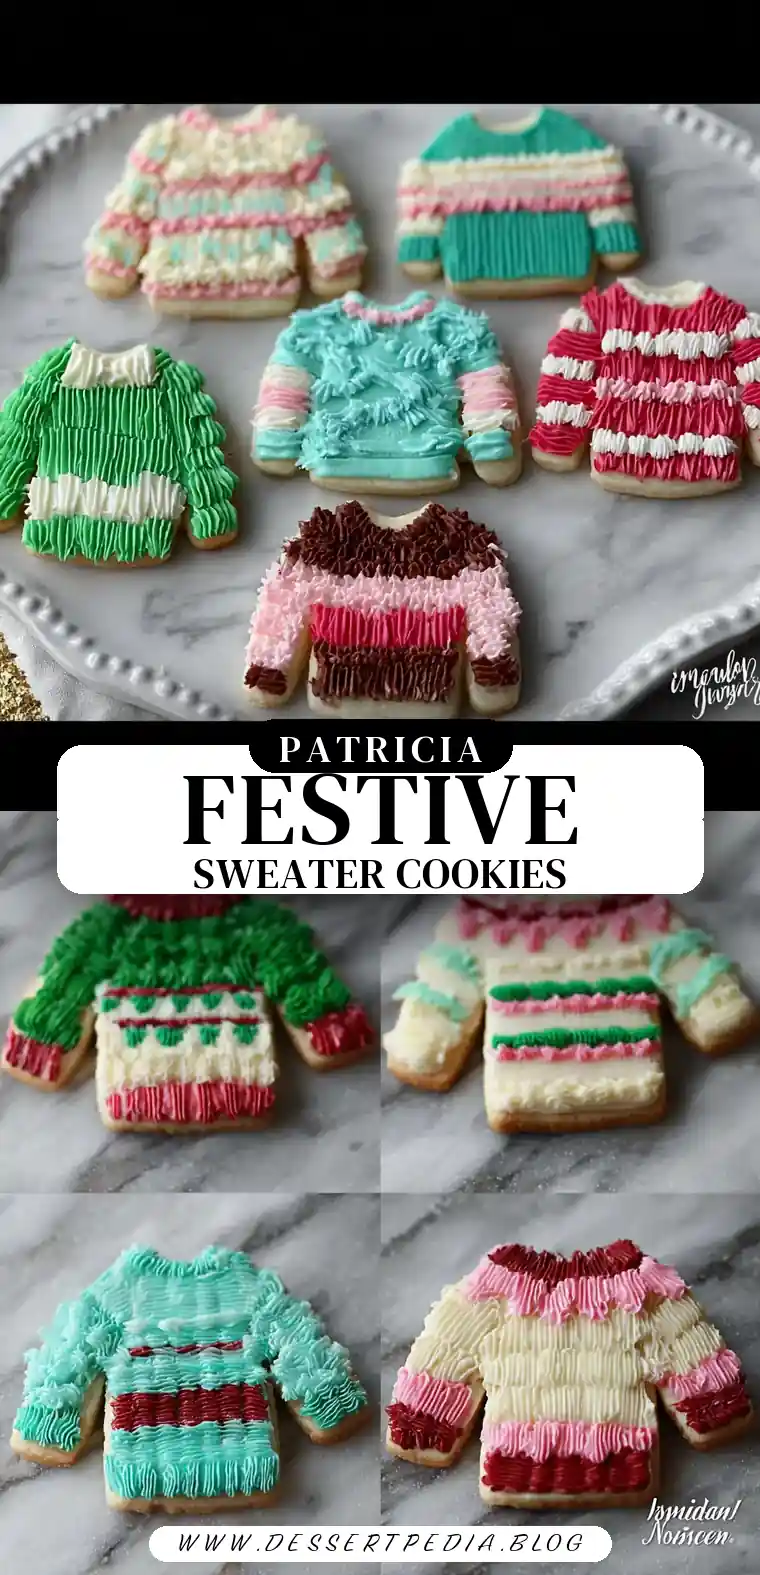
There’s something undeniably charming about the quirky tradition of Ugly Christmas Sweaters. I fondly remember the times spent digging through my grandmother’s attic, unearthing a treasure trove of vividly patterned sweaters, each more elaborate than the last. It wasn’t just the warmth they provided against the winter chill; it was the stories they carried, knitted into every stitch. This nostalgic tradition inspired the Ugly Christmas Sweater Cookies – a delightful treat that captures the whimsy of those cherished family gatherings. Baking these cookies is like wrapping yourself in a cozy, edible version of those sweaters, bringing joy and laughter to the kitchen.
Why This Recipe Works
- Nostalgic Appeal: These cookies bring the fun of Ugly Christmas Sweaters to your dessert table, sparking joy and laughter.
- Perfect Texture: The balance of crisp edges and soft centers makes these cookies irresistible.
- Creative Freedom: With colorful frosting, these cookies are a canvas for your imagination.
- Make-Ahead Friendly: The dough can be prepared in advance, allowing for flexible baking schedules.
- Family-Friendly: This recipe is a joyful activity for all ages, making it perfect for family bonding.
- Versatile Design: Customize each cookie to reflect personal style or holiday themes.
Ingredients
- 5 cups all-purpose flour: Provides structure for the cookies.
- 1 teaspoon baking soda: Ensures the cookies rise properly.
- 1 teaspoon salt: Enhances flavor.
- 1 cup vegetable shortening (Crisco): Adds tenderness and moisture.
- 2 cups sugar: Sweetens and helps with browning.
- 2 eggs: Binds the ingredients together.
- 1 teaspoon vanilla: Adds aromatic flavor.
- 1 cup buttermilk: Contributes to a soft texture.
- Frosting:
- 3/4 cup vegetable shortening: Offers stability to the frosting.
- 1/4 cup unsalted butter, softened: Adds richness.
- 7 cups (2 pounds) confectioner’s sugar: Sweetens and thickens the frosting.
- 1 teaspoon vanilla: Enhances the frosting’s flavor.
- 2-3 tablespoons milk: Adjusts frosting consistency.
- Gel food coloring: Colors the frosting for decorating.
- Piping bags and tips: Essential for intricate designs.
Step-by-Step Instructions
Prepare the Cookie Dough:
Begin by preparing the cookie dough. In a large bowl, sift together the flour, baking soda, and salt. This ensures even distribution of the leavening agent and salt throughout the dough, which is critical for uniform texture and flavor.Cream the Ingredients:
In a stand mixer with the paddle attachment, cream together the vegetable shortening, sugar, eggs, and vanilla. The creaming process is crucial as it incorporates air into the mixture, contributing to the cookie’s texture.Combine Dry and Wet Ingredients:
Once combined, add half of the dry ingredients. Begin to mix and pour in the buttermilk. This gradual incorporation helps prevent lumps and ensures a smooth dough. Add the remaining dry ingredients and mix until just combined.Chill the Dough:
Refrigerate the dough for at least four hours or overnight. Chilling the dough is essential as it allows the flour to fully hydrate and the flavors to meld, resulting in a more flavorful cookie that doesn’t spread as much during baking.Preheat and Roll Out:
After your dough has chilled, preheat your oven to 375 degrees F. On a well-floured surface, roll out about a quarter of the dough to a 1/8 – 1/4-inch thickness, depending on your preference. The thickness will affect the cookie’s texture, with thinner cookies being crisper and thicker ones being softer.Cut and Bake:
Cut out the dough using a sweater-shaped cookie cutter. Transfer each cut out to an ungreased cookie sheet. This step is where your creativity can shine—consider using various shapes or creating your own designs. Bake 8-10 minutes or until the first sign of browning appears on the surface of the cookies. This browning indicates that the sugars are caramelizing, adding flavor.Cool and Prepare Frosting:
Remove from the oven and transfer the cookies to a cutting board or your counter top to cool completely. While the cookies cool, prepare your frosting. With a mixer, cream together the vegetable shortening and butter. Slowly add the confectioner’s sugar, one cup at a time. Mix in the vanilla extract.Adjust Frosting Consistency and Color:
Add milk as needed for a smoother consistency. Divide the frosting into smaller bowls and add gel food coloring to achieve the desired colors. Using gel food coloring is recommended as it provides vibrant colors without altering the frosting’s texture.Decorate:
Place the frosting in a piping bag with the desired tip. Once your cookies have cooled, use the prepared piping bags to create designs on your sweater cookies. Allow the frosting to set before packing and storing the cookies in an airtight container.
Prep Time: 20 minutes
Cooking Time: 10 minutes
Total Time: 4 hours 30 minutes
Yield: 4-6 servings
Table: Calorie Breakdown for a Typical Serving
| Component | Calories | Carbs (g) | Protein (g) | Fat (g) | Sugar (g) |
|---|---|---|---|---|---|
| Cookie | 250 | 35 | 3 | 10 | 20 |
| Frosting | 150 | 25 | 0 | 7 | 22 |
| Total | 400 | 60 | 3 | 17 | 42 |
Patricia’s Tips for Success
- Tip 1: Ensure your dough is well-chilled to prevent spreading during baking. Chilled dough helps maintain the cookie shape during baking.
- Tip 2: Use gel food coloring for vibrant frosting colors without altering the consistency. This ensures your designs are bright and appealing.
- Tip 3: Practice piping on parchment paper before decorating the cookies. This helps build confidence and refine your decorating skills.
- Tip 4: Rotate your baking sheets halfway through for even browning. This ensures that cookies bake evenly, especially if your oven has hot spots.
- Tip 5: Store cookies in layers separated by parchment paper to maintain design integrity. This prevents the designs from smudging or sticking together.
Cooking Variations
- Variation 1: Add cocoa powder to the dough for chocolate-flavored cookies. This provides a rich, chocolaty base that pairs well with sweet frosting.
- Variation 2: Incorporate spices like cinnamon or nutmeg for a festive twist. These spices add warmth and depth, perfect for the holiday season.
- Variation 3: Use almond extract in place of vanilla for a different flavor profile. Almond extract gives a nutty, aromatic flavor that complements the sweetness of the cookies.
Serving Suggestions
- Suggestion 1: Pair these cookies with hot cocoa for a comforting winter treat. The rich cocoa complements the sweetness of the cookies perfectly.
- Suggestion 2: Serve as part of a holiday dessert buffet for visual impact. The array of colorful cookies will be a show-stopping centerpiece.
- Suggestion 3: Gift them in decorative tins for a homemade holiday present. Personalized cookies make thoughtful and delicious gifts.
Additional Thoughts
The Ugly Christmas Sweater Cookies are more than just a holiday treat; they’re a canvas for creativity and a source of joy. Whether you’re a seasoned baker or a newbie, the simple steps and forgiving dough make them accessible to all. My grandmother always believed that food is love made visible, and these cookies embody that sentiment perfectly. The process of decorating each cookie with care and imagination is both therapeutic and satisfying, offering a delightful escape from the holiday hustle.
As you work on these cookies, remember that it’s not just about the end result, but also the journey. The laughter shared and the creative energy spent are what make these cookies special. And don’t worry about achieving perfection; the quirks and imperfections are what make each cookie unique and charming, just like the sweaters that inspired them.
Join the Conversation
I invite you to share your Ugly Christmas Sweater Cookie creations with me! Whether you’re a novice baker finding your way or a seasoned pro adding a new twist, I’d love to see how you bring these cookies to life. Share your photos, tips, and even your funny decorating mishaps in the comments below. Let’s make this holiday season a colorful, cookie-filled celebration!
Conclusion
Creating Ugly Christmas Sweater Cookies is a festive, fun-filled experience that brings warmth and creativity into your kitchen. These whimsical treats are perfect for sharing with friends and family, adding a playful touch to your holiday celebrations. So, gather your loved ones, embrace the joy of baking, and let your imagination run wild with these delightful cookies.
Frequently Asked Questions
Q: Can I use butter instead of vegetable shortening?
A: Yes, you can substitute butter, but the texture might be slightly different. Butter will make the cookies richer and may alter the texture slightly, making them a bit crisper.
Q: How long can I store these cookies?
A: These cookies can be stored in an airtight container for up to a week. For longer storage, consider freezing them.
Q: Can I freeze the frosting?
A: Yes, you can freeze the frosting for up to three months. Thaw it in the fridge before use, and give it a good stir to restore its consistency.
Q: What can I use if I don’t have buttermilk?
A: You can make a substitute by mixing 1 cup of milk with 1 tablespoon of lemon juice or vinegar. Let it sit for a few minutes until it curdles slightly.
Q: How do I prevent the cookies from spreading too much?
A: Ensure your dough is well-chilled and avoid over-rolling the dough. A thicker dough will hold its shape better during baking.
Q: Can I use natural food coloring?
A: Yes, natural food coloring can be used, but the colors may be less vibrant. Consider using concentrated natural colorings for more intense colors.
Q: What other shapes can I make besides sweater cookies?
A: Feel free to use any holiday-themed cookie cutter you have on hand! Stars, trees, and snowflakes are great alternatives and add variety to your cookie platter.
Ugly Christmas Sweater Cookies
Ingredients
Equipment
Method
- Begin by preparing the cookie dough. In a large bowl, sift together the flour, baking soda, and salt. Set aside.
- In a stand mixer with the paddle attachment, cream together the vegetable shortening, sugar, eggs, and vanilla. Once combined, add half of the dry ingredients. Begin to mix and pour in the buttermilk. Then add the remaining dry ingredients and mix until just combined. Refrigerate the dough for at least four hours or overnight.
- After your dough has chilled, preheat your oven to 375 degrees F.
- On a well-floured surface, roll out about a quarter of the dough to a 1/8 – 1/4-inch thickness, depending on your preference. Cut out the dough using a sweater-shaped cookie cutter. Transfer each cut out to an ungreased cookie sheet. Bake 8-10 minutes or until the first sign of browning appears on the surface of the cookies. Remove from the oven and transfer the cookies to a cutting board or your counter top to cool completely.
- While the cookies cool, prepare your frosting. With a mixer, cream together the vegetable shortening and butter. Slowly add the confectioner’s sugar, one cup at a time. Mix in the vanilla extract. Add milk as needed for a smoother consistency. Divide the frosting into smaller bowls and add gel food coloring to achieve the desired colors.
- Place the frosting in a piping bag with the desired tip. A small star tip is great for the sweater texture, and a round tip is recommended for details and dots.
- Once your cookies have cooled, use the prepared piping bags to create designs on your sweater cookies. Allow the frosting to set before packing and storing the cookies in an airtight container.