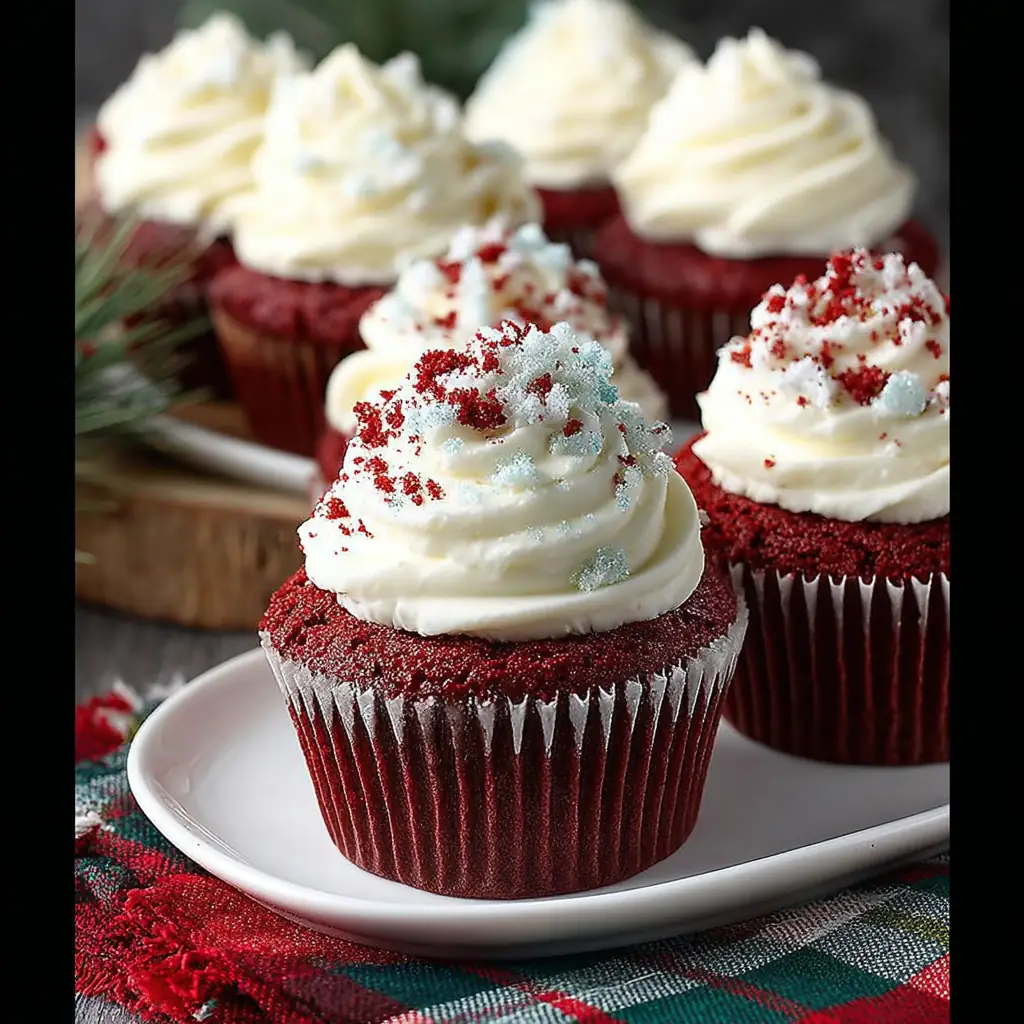
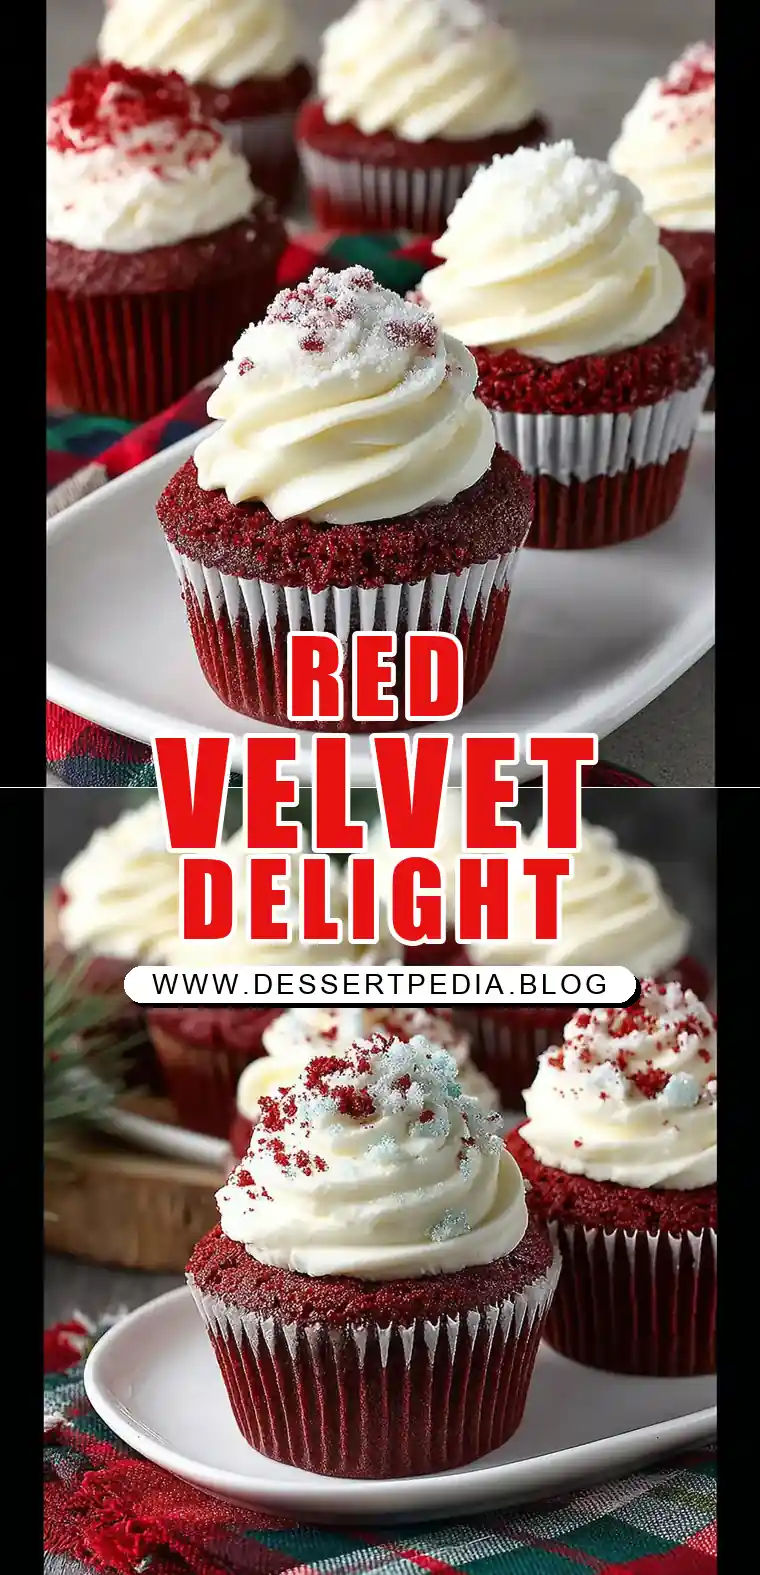
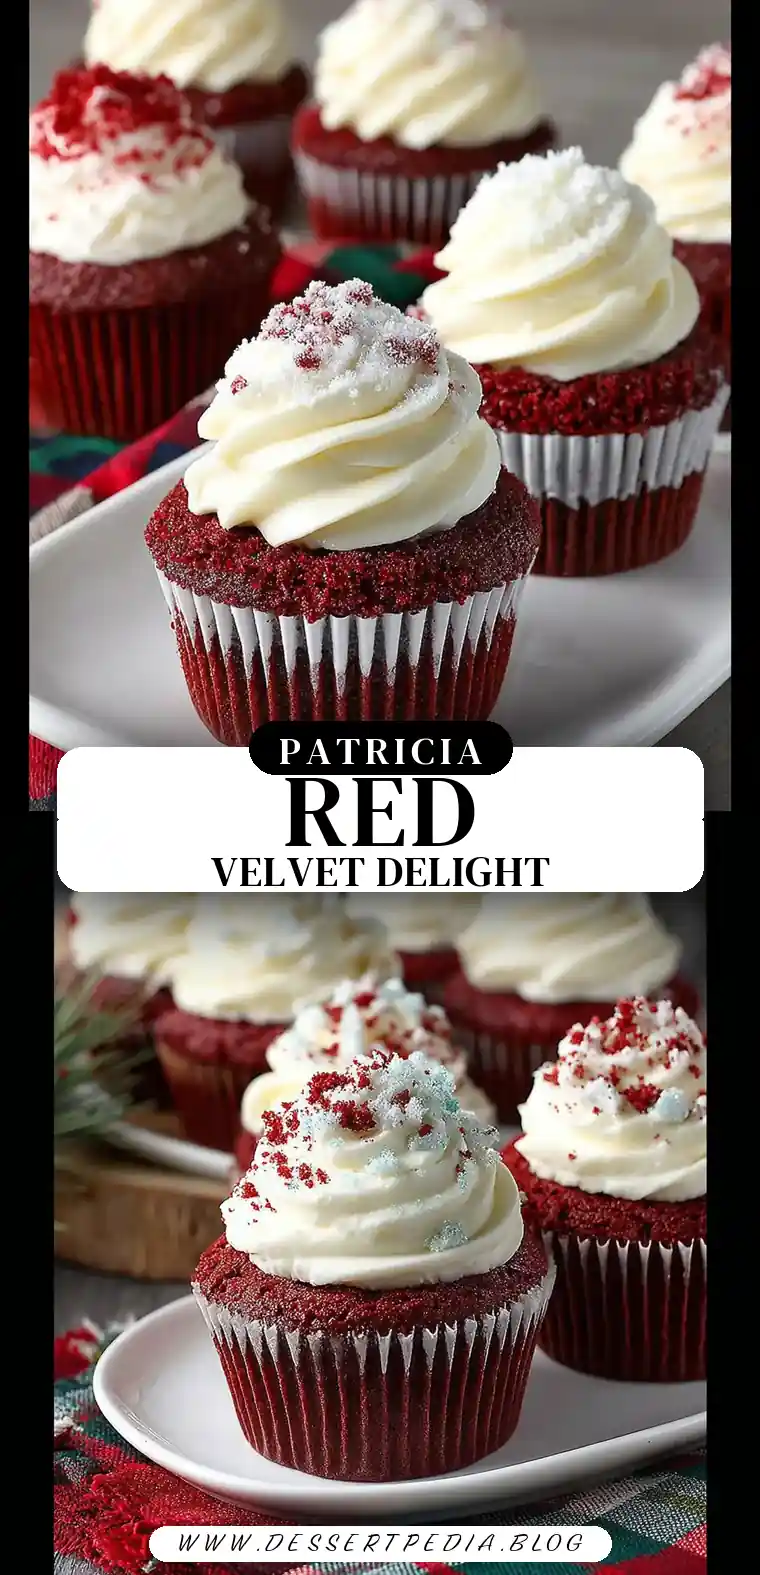
Red Velvet Cupcakes
A Culinary Journey: Red Velvet Cupcakes and Family Traditions
Growing up, weekends at my grandmother’s house were a blend of comforting aromas and the warmth of family gatherings. One of my fondest memories was the anticipation of her Red Velvet Cupcakes, which she would prepare with the kind of love only a grandmother can offer. As she sifted flour and measured cocoa, she would recount stories of her own childhood, instilling in me a deep appreciation for the tradition behind every baked good. This recipe for Red Velvet Cupcakes is a tribute to those cozy weekends, a delicious nod to family heritage with a modern twist for today’s home cook.
The Heart of Homemade Delights: The Story Behind Red Velvet
Red Velvet Cake has long been a staple in Southern kitchens, its origins steeped in mystery and debate. Some say the cake dates back to the early 1900s, while others trace its popularity to the 1940s and 1950s. Regardless of its historical beginnings, Red Velvet has cemented itself in American culture as a beloved treat, often gracing tables during holidays, birthdays, and various celebrations.
Perhaps its allure lies in its vibrant red hue, which captivates the eyes before indulging the taste buds. Traditionally, the red color was a result of the reaction between cocoa powder and acidic ingredients like buttermilk and vinegar. Today, we achieve that eye-catching color with food coloring, allowing for a consistent and vivid presentation.
But Red Velvet is more than just its color. It is an experience that combines the rich, subtle taste of cocoa with the tanginess of cream cheese frosting, all culminating in a moist, tender crumb. This perfect balance of flavors and textures is what makes Red Velvet Cupcakes universally adored.
Why This Recipe Works:
Perfect Texture
The combination of buttermilk and vinegar creates a tender, moist crumb. The acidity in the buttermilk breaks down gluten in the flour, resulting in a softer texture, while the vinegar reacts with the baking soda, providing the essential rise and fluffiness expected in a well-made cupcake.
Vibrant Color
Using no-taste red food coloring ensures a rich hue without bitterness. This modern adaptation allows bakers to achieve a consistent and appealing color, ensuring that the aesthetics of the cupcakes match their delicious taste.
Balanced Flavor
Cocoa adds depth, while cream cheese frosting provides tangy sweetness. This pairing is essential, as the slight bitterness of cocoa is offset by the sweet and creamy frosting, creating a harmonious balance that pleases the palate.
Ease of Preparation
Simple steps make this a perfect project for bakers of all levels. With clear instructions and accessible ingredients, even novice bakers can achieve professional-looking results, making it an ideal recipe for a weekend baking project.
Crowd-Pleaser
These cupcakes are a hit at any gathering, enchanting guests with their classic appeal. Whether for a casual brunch or a formal dinner party, Red Velvet Cupcakes add a touch of elegance and nostalgia, making them a versatile choice for any occasion.
Ingredients:
The ingredients list for Red Velvet Cupcakes reflects a combination of traditional elements and modern conveniences, ensuring both authenticity and ease of use.
- 2 ½ cups all-purpose flour: Provides the structure necessary for a perfect crumb.
- 2 tbsp cocoa powder (not Dutch processed): Adds a subtle chocolate flavor without overpowering the cake.
- 1 tsp salt: Enhances the overall flavor profile by balancing sweetness.
- 1 ½ tsp baking powder: Acts as a leavening agent, ensuring the cupcakes rise properly.
- ½ cup unsalted butter (softened): Adds richness and a tender texture.
- 1 ½ cups granulated sugar: Not only sweetens but also helps with the texture, contributing to the moist crumb.
- 2 large eggs (room temperature): Binds ingredients together, providing structure and stability.
- 1-2 tsp red food coloring: Adjust for preferred intensity, ensuring the iconic red hue.
- 1 tsp vanilla extract: Adds flavor depth, complementing the cocoa and enhancing the overall taste.
- 1 cup buttermilk: Moistens and tenderizes the cupcakes, contributing to their signature texture.
- 2 tbsp water: Helps achieve the right batter consistency, ensuring even baking.
- 1 ½ tsp white vinegar: Activates baking soda, essential for the cake’s rise and texture.
- 1 tsp baking soda: Provides lift, working in tandem with the vinegar for a light and airy crumb.
- 16 ounces cream cheese (softened): Forms the base for the luscious frosting.
- ½ cup unsalted butter (softened): Adds creaminess, enhancing the texture of the frosting.
- 6-8 cups confectioner’s sugar (sifted): Sweetens and thickens the frosting, allowing for a smooth, spreadable consistency.
- 1-2 tsp clear vanilla extract: Keeps the frosting white, ensuring a classic appearance.
- 1-2 tbsp sprinkles (optional): For decoration, adding a festive touch.
Step-by-Step Instructions:
Mastering the art of Red Velvet Cupcakes requires attention to detail at every step. Follow these detailed instructions to achieve bakery-quality results at home.
Preheat Your Oven: Set the temperature to 350°F and line a cupcake pan with paper liners. This ensures even baking and easy removal of the cupcakes.
Prepare the Dry Ingredients: In a medium bowl, whisk together flour, cocoa powder, salt, and baking powder. This step is crucial for even distribution of ingredients, preventing lumps and ensuring a smooth batter.
Cream Butter and Sugar: In a large bowl, cream together the softened butter and granulated sugar until light and fluffy. This process incorporates air, which is essential for the cupcakes’ rise and texture.
Incorporate Eggs and Vanilla: Add the eggs one at a time, mixing well after each addition. Stir in the vanilla extract, ensuring a homogenous mixture.
Add Food Coloring: Mix in the desired amount of red food coloring until evenly distributed. This step is key for achieving the vibrant red color that defines Red Velvet.
Combine Wet and Dry Ingredients: Gradually add the dry ingredients to the wet mixture, alternating with buttermilk. This technique prevents overmixing, which can lead to dense cupcakes.
Adjust Consistency with Water: Mix in 2 tablespoons of water until the batter is smooth, ensuring the right consistency for even baking.
Activate Leavening Agents: In a small bowl, combine vinegar and baking soda. Once it fizzes, quickly fold it into the batter. This reaction is crucial for the cupcakes’ light and airy texture.
Fill the Liners: Divide the batter evenly into the prepared cupcake liners, filling each about two-thirds full to allow room for rising.
Bake: Place in the preheated oven and bake for 15-18 minutes, or until a toothpick inserted in the center comes out clean. This ensures the cupcakes are fully cooked without being dry.
Cool Completely: Allow the cupcakes to cool in the pan for a few minutes before transferring to a wire rack. Cooling completely is essential before frosting to prevent the frosting from melting.
Prepare the Frosting: In a large bowl, beat the softened cream cheese until smooth. Add the softened butter and mix until well combined.
Add Confectioner’s Sugar: Gradually incorporate the sifted confectioner’s sugar, mixing well between each addition to achieve a smooth consistency.
Flavor with Vanilla: Beat in the clear vanilla extract until the frosting is creamy and spreadable.
Frost the Cupcakes: Once the cupcakes are completely cool, spread or pipe the frosting on top. Add sprinkles if desired for a decorative touch.
Patricia’s Tips for Success:
As with any recipe, a few expert tips can elevate your baking from good to great. Here are some tried-and-true tips to ensure your Red Velvet Cupcakes are a success every time.
Tip 1: Use room temperature ingredients to ensure a smooth batter. Cold ingredients can result in a lumpy batter and uneven baking.
Tip 2: Don’t overmix the batter—this can make cupcakes dense. Mix until just combined for the best texture.
Tip 3: For the best color, use gel food coloring. It provides a more vibrant hue without altering the batter’s consistency.
Tip 4: Sift confectioner’s sugar to avoid lumpy frosting. This step ensures a smooth and professional-looking finish.
Tip 5: Cool cupcakes completely before frosting to prevent melting. Patience is key to achieving a picture-perfect presentation.
Tip 6: Use an offset spatula for a smooth frosting finish. It allows for precise application and a polished look.
Tip 7: Store cupcakes in an airtight container to maintain freshness. Proper storage keeps them moist and delicious for days.
Cooking Variations:
While traditional Red Velvet Cupcakes are a classic, there are endless possibilities for customization. Here are some variations to try:
Variation 1: Add chocolate chips to the batter for extra richness. This adds texture and a burst of chocolate flavor in every bite.
Variation 2: Substitute almond extract for a nutty flavor twist. A small change that can create a whole new taste experience.
Variation 3: Incorporate a teaspoon of instant coffee for a mocha touch. This enhances the cocoa flavor and adds a sophisticated depth.
Serving Suggestions:
Presentation is just as important as taste when it comes to serving Red Velvet Cupcakes. Consider these suggestions to make your cupcakes the star of any event:
Suggestion 1: Pair with a glass of cold milk for a classic treat. The milk complements the sweetness and provides a refreshing contrast.
Suggestion 2: Serve with fresh berries for a refreshing contrast. The tartness of the berries balances the rich cupcake flavors.
Suggestion 3: Accompany with a scoop of vanilla ice cream for dessert. The combination of warm cupcakes and cold ice cream is irresistible.
Additional Thoughts:
These Red Velvet Cupcakes are more than just a dessert; they are a piece of family tradition, a nod to simpler times when the kitchen was the heart of the home. Baking them is a delightful journey back to those cherished weekends in my grandmother’s kitchen, where love was the secret ingredient. Whether you are baking these for a special occasion or simply to indulge in a bit of nostalgia, they promise to bring a smile to your face and warmth to your heart.
Each time I bake these cupcakes, I am reminded of the power of food to connect us to our past, to our family, and to each other. The kitchen is a place where memories are created, where stories are shared, and where love is baked into every bite.
Join the Conversation:
I would love to hear your memories associated with Red Velvet Cupcakes or any special baking traditions you cherish. Share your thoughts, tips, or questions in the comments below, and let’s celebrate the joy of baking together. Each story adds another layer to our shared love of food and family.
Conclusion:
Red Velvet Cupcakes are a timeless classic that combines flavor, elegance, and a touch of nostalgia. Whether you’re a seasoned baker or a kitchen novice, this recipe is designed to be both accessible and rewarding, bringing the joy of baking into your home.
Baking is not just about the end product; it’s about the process, the creativity, and the joy it brings. It’s about taking a moment to slow down and create something beautiful and delicious. So, gather your ingredients, preheat your oven, and experience the magic of Red Velvet Cupcakes for yourself.
Frequently Asked Questions:
Q: Can I use regular vanilla extract in the frosting?
A: Yes, but clear vanilla extract keeps the frosting bright white.
Q: What’s the best way to store these cupcakes?
A: Store them in an airtight container in the refrigerator for up to three days.
Q: Can I make the batter in advance?
A: It’s best to bake the batter immediately for optimal rise and texture.
Q: How can I make these cupcakes gluten-free?
A: Substitute all-purpose flour with a gluten-free baking mix.
Q: Is there an alternative to buttermilk?
A: You can use a mixture of milk and lemon juice or vinegar as a substitute.
Q: Can I freeze these cupcakes?
A: Yes, freeze unfrosted cupcakes for up to three months. Thaw before frosting.
Q: What if I don’t have a piping bag?
A: Use a zip-top bag with a corner snipped off as a makeshift piping bag.
By delving into the history, perfecting the technique, and sharing in the communal spirit of baking, we can keep the tradition of Red Velvet Cupcakes alive for future generations to enjoy.
Red Velvet Cupcakes
Ingredients
Equipment
Method
- Preheat the oven to 350 degrees F. Place the liners in the cupcake pan.
- In a medium bowl, whisk together the flour, cocoa powder, salt, and baking powder.
- In a large mixing bowl, cream together the butter and sugar until light and fluffy.
- Add the eggs and vanilla extract, mix well.
- Add the desired amount of food coloring and mix well.
- Gradually add the dry ingredients, alternating with buttermilk until well combined.
- Add the water and mix well again.
- In a small bowl, combine vinegar and baking soda, then add that mixture to the batter and mix well.
- Divide the batter evenly into the prepared cupcake liners.
- Bake for 15-18 minutes or until a toothpick inserted in the center comes out clean.
- Cool completely before frosting.
- In a large mixing bowl add the cream cheese, and beat until smooth.
- Add in butter, and beat butter into the cream cheese until smooth.
- Gradually add confectioner’s sugar (1-2 cups at a time), mixing in between each addition, beating until smooth and creamy.
- Beat in the vanilla until smooth.
- Spread onto the cupcakes using an offset spatula or pipe on with a piping bag and star tip.
- Add desired sprinkles immediately after adding the frosting.