Chocolate Mug Cake
The Chocolate Mug Cake: A Cozy Culinary Delight
As the winds grew chillier and the leaves began their descent from the trees, I often found myself reminiscing about the afternoons spent in my grandmother’s cozy, aromatic kitchen. It was there that I first discovered the magic of simple, comforting recipes, like the Chocolate Mug Cake. This particular treat, with its rich, chocolatey goodness, was a staple whenever we needed a quick dessert fix or a sweet indulgence to accompany our evening tea. Fast forward to today, I find myself often turning to this recipe when time is short but the craving for something decadent is strong.
The beauty of the Chocolate Mug Cake lies in its simplicity and the instant gratification it provides—ideal for those spontaneous moments of indulgence. In this post, I’ll guide you through the process of making this delightful treat, along with some handy tips and variations to suit your taste. Whether you’re a seasoned baker or a kitchen novice, this recipe is sure to become a favorite in your culinary repertoire.
Why This Recipe Works:
The allure of the Chocolate Mug Cake is its ability to deliver a rich, satisfying dessert experience without the usual time and effort involved in traditional baking. Here’s why this recipe is a standout:
- Quick and Easy: Perfect for when you’re craving dessert but short on time. From start to finish, this cake can be ready in just a few minutes.
- Minimal Ingredients: Uses pantry staples, making it budget-friendly. You likely already have everything you need in your kitchen.
- Single-serving: Ideal for portion control, yet easily scalable for more servings if you’re hosting friends or family.
- Rich Flavor: The combination of cocoa and vanilla creates a deep, satisfying taste that rivals any gourmet treat.
- Microwave Magic: No oven required, allowing for a fast and fuss-free experience. This makes it accessible for anyone, regardless of their kitchen setup.
Ingredients:
The ingredients for a Chocolate Mug Cake are straightforward, yet each plays a crucial role in achieving the perfect balance of flavor and texture:
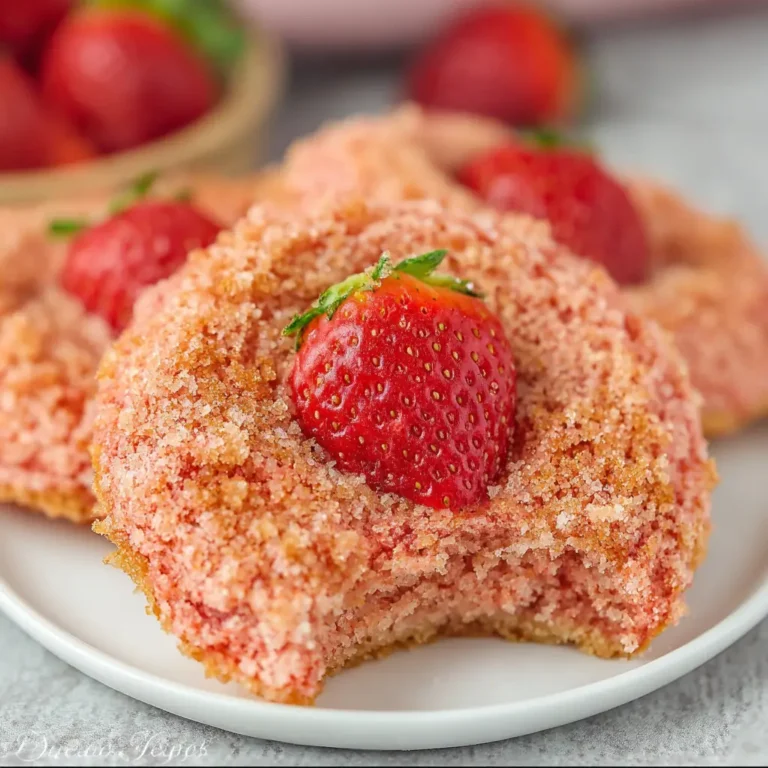
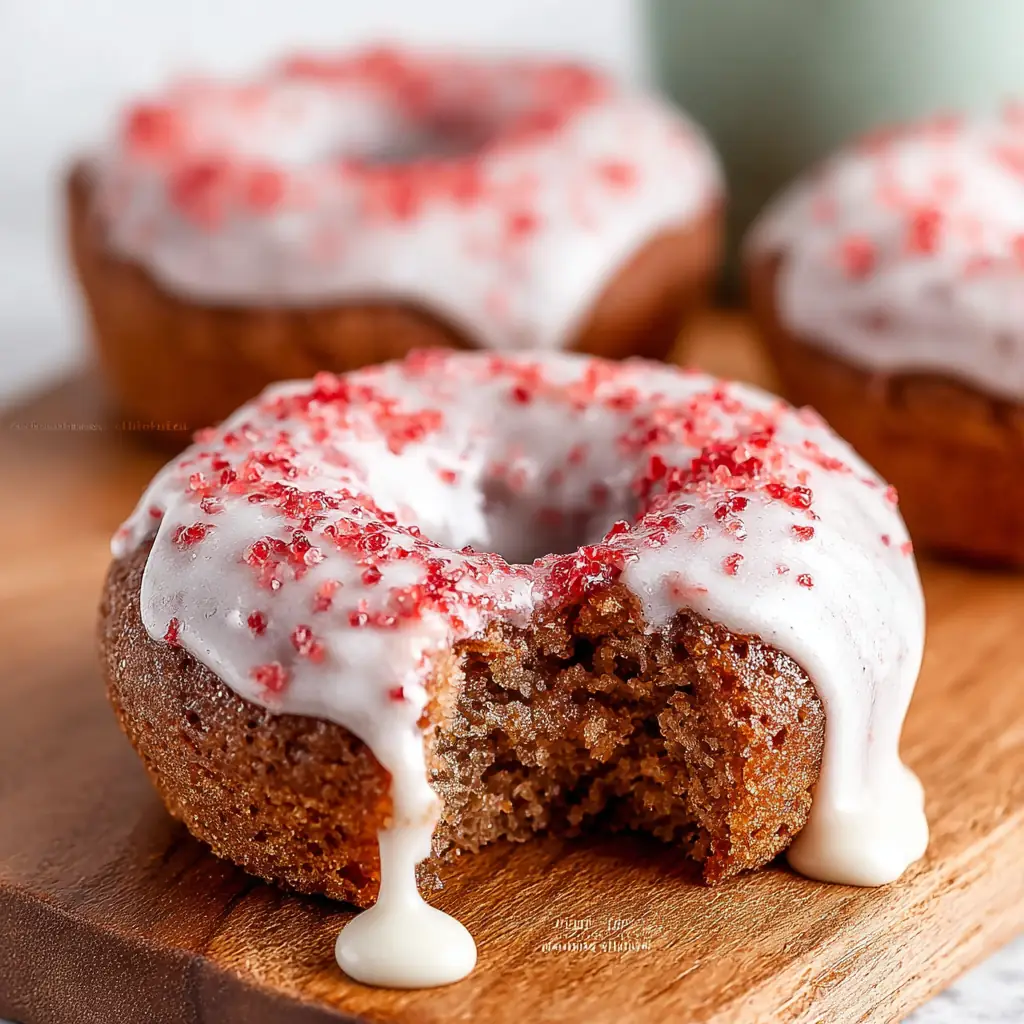
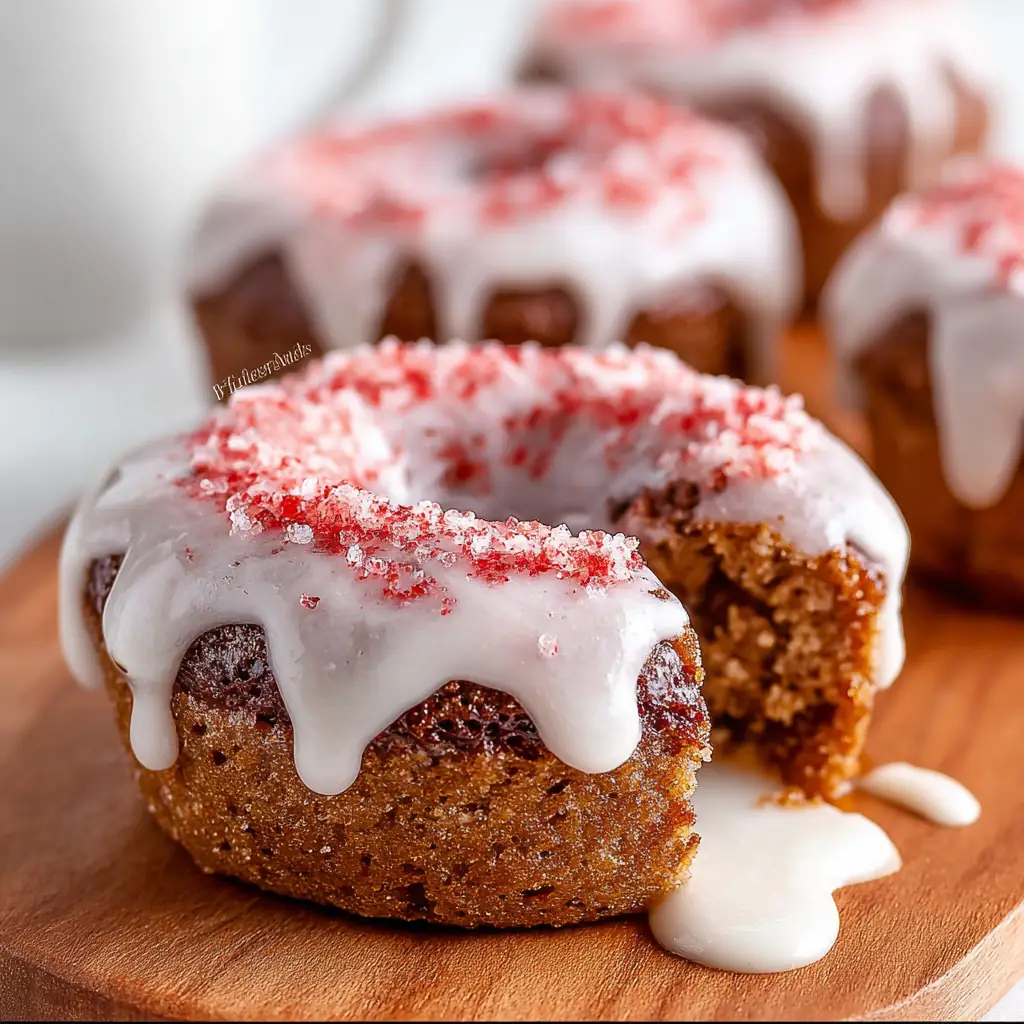
- 1 ounce freeze-dried strawberries: Adds a unique twist to the traditional chocolate mug cake, offering a subtle fruity note that complements the richness of the chocolate.
- 1 ½ cups all-purpose flour: Provides structure and texture, ensuring the cake holds together well.
- ¾ cup granulated sugar: Sweetens the cake without overpowering the chocolate, maintaining a balanced flavor profile.
- 2 teaspoons baking powder: Helps the cake rise, creating a light texture that melts in your mouth.
- ½ cup whole milk: Adds moisture and richness, contributing to the cake’s tender crumb.
- ⅓ cup vegetable oil: Keeps the cake tender and moist, preventing it from drying out.
- 3 tablespoons butter, melted: Enhances flavor and adds an extra layer of moisture.
- 1 large egg: Binds the ingredients together, providing structure and stability.
- 1 teaspoon pure vanilla extract: Complements the chocolate flavor, adding depth and complexity.
Step-by-Step Instructions:
Preheat the oven to 350F and grease your donut pans with nonstick baking spray or spritz with oil. Set aside.
This step ensures that your cake doesn’t stick to the pan, making it easier to remove and serve.Add the freeze-dried strawberries to a high-speed food processor or blender and pulse until they are a fine powder—about 45 seconds. Reserve 1 teaspoon of the strawberry powder for the glaze.
This powder not only infuses the cake with a hint of strawberry flavor but also adds a beautiful pink hue to the glaze.Add the remaining strawberry powder to a large bowl and whisk in the flour, sugar, and baking powder.
Mixing the dry ingredients thoroughly ensures an even distribution of flavors and a consistent texture throughout the cake.In a small bowl, whisk together the milk, vegetable oil, melted butter, egg, and vanilla.
Combining the wet ingredients separately allows for a smoother batter and prevents overmixing.Add the wet ingredients to the dry and mix just until combined—you don’t want to overmix.
Overmixing can lead to a tough cake, so aim for a batter that is just combined.Divide the batter between the wells of the donut pan, filling each one with about ⅓ cup of batter. I like to use a piping bag, but you could do this with a spoon as well.
Using a piping bag can make this step cleaner and more efficient, but a spoon works just as well.Bake for 16-18 minutes, or until a toothpick comes out clean.
This ensures that the cake is fully cooked without being dry.Transfer the donuts to a wire rack and allow them to cool completely before frosting.
Cooling the cake prevents the frosting from melting and helps it set properly.(Optional) Whisk together the confectioner’s sugar, milk, and the reserved teaspoon of the strawberry powder until smooth. Dip the donuts in the frosting or spread the frosting over the top.
This optional glaze adds an extra layer of flavor and visual appeal, making your mug cake even more irresistible.Store in an airtight container in the fridge for up to three days. Bring to room temperature before serving.
Proper storage ensures that your cake remains fresh and delicious, ready to enjoy whenever the craving strikes.
Prep Time: 5 minutes
Cooking Time: 16-18 minutes
Total Time: 21-23 minutes
Yield: 6 servings
Table: Calorie Breakdown for a Typical Serving
| Nutrient | Amount |
|---|---|
| Calories | 350 |
| Carbohydrates | 48g |
| Protein | 5g |
| Fat | 18g |
| Sugar | 24g |
Patricia’s Tips for Success:
To achieve the best results with your Chocolate Mug Cake, consider the following tips:
- Use Fresh Ingredients: Fresh baking powder ensures the right rise and texture, while high-quality vanilla extract can elevate the overall flavor.
- Don’t Overmix: Overmixing can lead to a tough cake—mix until just combined to maintain a tender crumb.
- Monitor Cooking Time: Microwaves vary, so check your cake after 60 seconds to avoid overcooking.
- Grease the Mug Well: Prevents the cake from sticking, making cleanup easier and ensuring a smooth release.
- Let it Cool Slightly: Allows the cake to firm up and flavors to meld, resulting in a more satisfying texture.
Cooking Variations:
The Chocolate Mug Cake is incredibly versatile, allowing for endless customization. Here are some ideas to inspire your creativity:
- Add Nuts: Stir in chopped nuts for added texture and flavor. Walnuts, pecans, or almonds all work beautifully.
- Chocolate Chips: Fold in chocolate chips for extra gooeyness and a more indulgent experience.
- Spice it Up: Add a pinch of cinnamon or chili powder for warmth and a hint of unexpected kick.
- Zesty Citrus: Incorporate a dash of orange or lemon zest for a refreshing contrast to the rich chocolate.
- Mint Infusion: A few drops of mint extract can transform your mug cake into a delightful mint-chocolate treat.
Serving Suggestions:
Enhance your Chocolate Mug Cake with these serving suggestions, turning a simple dessert into an unforgettable experience:
- With Ice Cream: A scoop of vanilla ice cream creates a delightful contrast, balancing the warm, gooey cake with cool, creamy goodness.
- Drizzle of Caramel: Adds sweetness and a touch of elegance, transforming your mug cake into a sophisticated dessert.
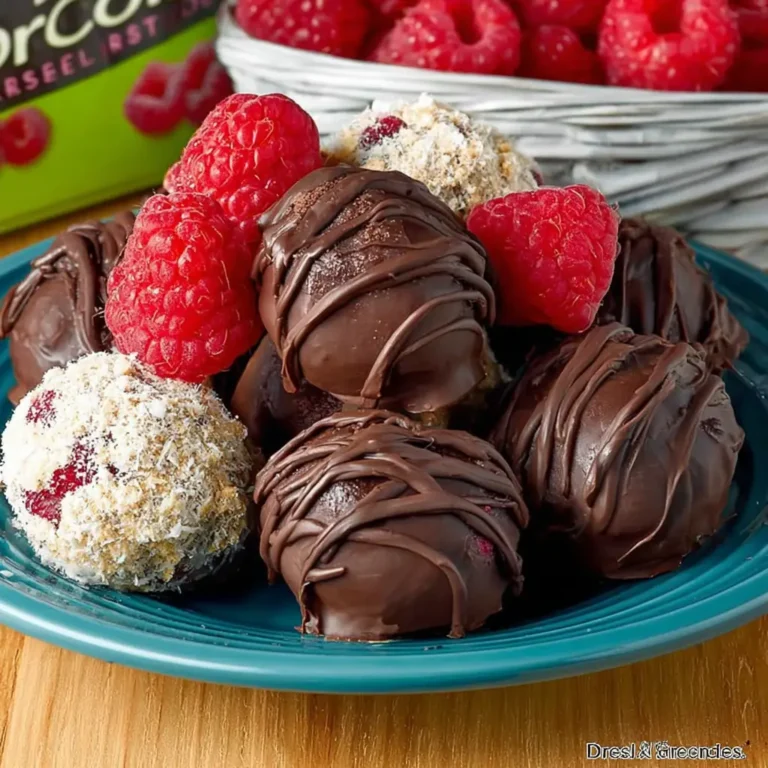
- Fresh Berries: Complements the chocolate with a burst of freshness, adding color and nutritional value.
- Whipped Cream: A dollop of whipped cream adds a light, airy texture, making each bite even more indulgent.
Additional Thoughts:
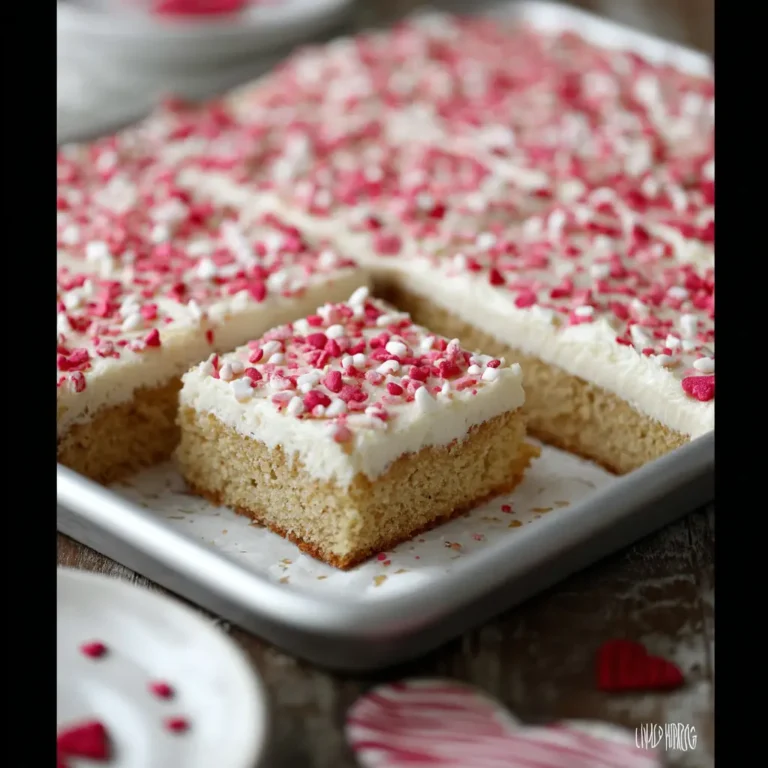
While a Chocolate Mug Cake may appear humble, its charm lies in its versatility and the joy it brings. Whether you’re enjoying it on a cozy evening by the fire or sharing it as a last-minute dinner party dessert, this recipe is bound to impress. The addition of freeze-dried strawberries offers a unique twist, blending beautifully with the rich chocolate notes. Remember, cooking is an adventure, and with every attempt, you’ll gain more confidence in your culinary skills.
For those looking to experiment further, consider integrating other seasonal ingredients or flavors that resonate with your personal preferences. The simplicity of the mug cake serves as a blank canvas, inviting you to explore and create.
Join the Conversation:
I’d love to hear how your Chocolate Mug Cake creations turn out! Did you try any of the variations, or perhaps create your own twist? Share your experiences and join our community of home cooks who find joy and fulfillment in the kitchen. Your feedback and stories not only inspire me but also help fellow readers in their culinary journeys.
Feel free to post your photos, tips, and creative adaptations in the comments section. Engaging with others who share your passion for cooking can spark new ideas and enrich your culinary experiences.
Conclusion:
The Chocolate Mug Cake is a testament to the fact that delicious desserts don’t need to be complicated. With minimal ingredients and time, you can create a luxurious treat that satisfies your sweet tooth while providing comfort and joy. Embrace the simplicity, experiment with flavors, and most importantly, savor each bite.
This recipe is more than just a quick fix for a dessert craving; it’s an opportunity to connect with cherished memories, explore new tastes, and share delightful moments with loved ones. So, gather your ingredients, fire up your microwave, and indulge in the magic of a Chocolate Mug Cake.
Frequently Asked Questions:
Q: Can I make this mug cake without an egg?
A: Yes, you can substitute the egg with a flax egg (1 tablespoon ground flaxseed mixed with 2.5 tablespoons water) or applesauce for a similar texture.
Q: How can I store leftover mug cake?
A: Store it in an airtight container in the refrigerator for up to three days. Be sure to bring it to room temperature before serving for the best texture.
Q: Can I use almond milk instead of whole milk?
A: Absolutely! Almond milk works well and is a great option for a dairy-free version. Other plant-based milks, such as soy or oat milk, are also suitable substitutes.
Q: Can I add toppings to my mug cake?
A: Yes, feel free to top it with whipped cream, nuts, or fruit for added flair. Customizing your toppings is a great way to personalize your dessert.
Q: Is there a gluten-free version of this recipe?
A: You can substitute the all-purpose flour with a gluten-free flour blend, ensuring all other ingredients are also gluten-free for those with sensitivities.
Q: What if I don’t have a microwave?
A: You can bake it in an oven-safe mug at 350F for about 15 minutes. Keep an eye on the cake to ensure it doesn’t overbake.
Q: Can I double the recipe for more servings?
A: Yes, simply double the ingredients and divide the batter into separate mugs. Be mindful of cooking times, as they may vary slightly with increased volume.
Chocolate Mug Cake
Ingredients
Equipment
Method
- Preheat the oven to 350F and grease your donut pans with nonstick baking spray or spritz with oil. Set aside.
- Add the freeze-dried strawberries to a high speed food processor or blender and pulse until they are a fine powder– about 45 seconds. Reserve 1 teaspoon of the strawberry powder for the glaze.
- Add the remaining strawberry powder to a large bowl and whisk in the flour, sugar, and baking powder.
- In a small bowl, whisk together the milk, vegetable oil, melted butter, egg, and vanilla.
- Add the wet ingredients to the dry and mix just until combined– you don’t want to overmix.
- Divide the batter between the wells of the donut pan, filling each one with about ⅓ cup of batter. I like to use a piping bag but you could do this with a spoon as well.
- Bake for 16-18 minutes, or until a toothpick comes out clean. Transfer the donuts to a wire rack and allow them to cool completely before frosting.
- (Optional) Whisk together the confectioner’s sugar, milk, and the reserved teaspoon of the strawberry powder until smooth. Dip the donuts in the frosting or spread the frosting over the top.
- Store in an airtight container in the fridge for up to three days. Bring to room temperature before serving.