The BEST Brownies
The BEST Brownies: A Journey into Chocolate Bliss
There’s something profoundly comforting about stepping into a warm kitchen with the aroma of chocolate wafting through the air. These moments take me back to my grandmother’s kitchen on cozy weekends, where the hum of the oven and the promise of a sweet treat were all the encouragement I needed to bake. Today, I am thrilled to share “The BEST Brownies” — a recipe that merges my love for chocolate and nostalgia into a perfect, fudgy delight. Whether you’re a seasoned baker or just starting out, these brownies promise a rich, velvety texture and an indulgent chocolate flavor that truly lives up to their name.
Why This Recipe Works:
The magic of these brownies lies in their well-crafted balance of ingredients and technique, ensuring a satisfying dessert experience every time you bake them.
Rich Chocolate Flavor
The use of both cocoa powder and unsweetened chocolate is essential for achieving that deep, intense chocolate taste. Cocoa powder provides the foundational chocolate flavor, while unsweetened chocolate adds a layer of depth and richness that is hard to beat. It’s important to choose high-quality cocoa powder and chocolate, as they significantly influence the final taste.
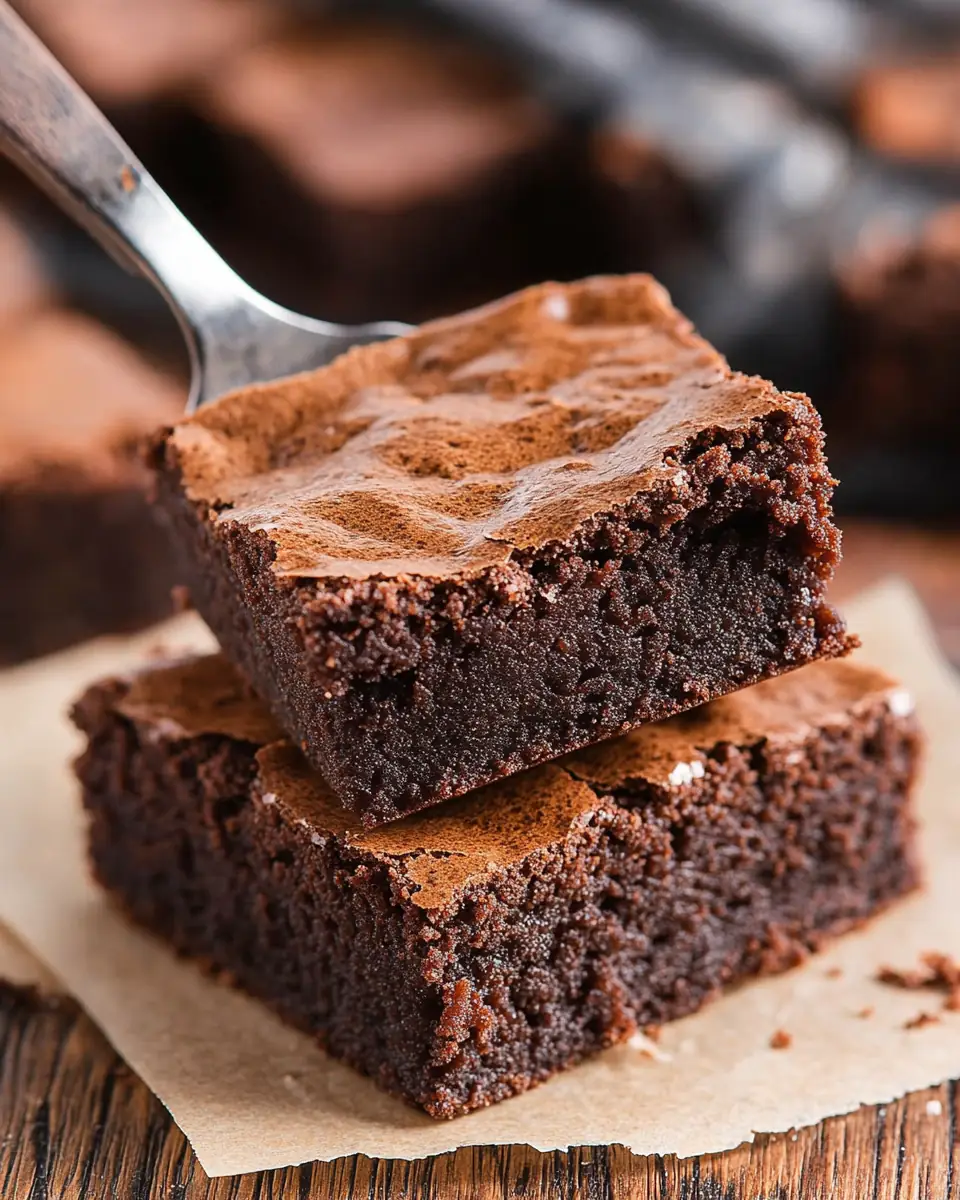
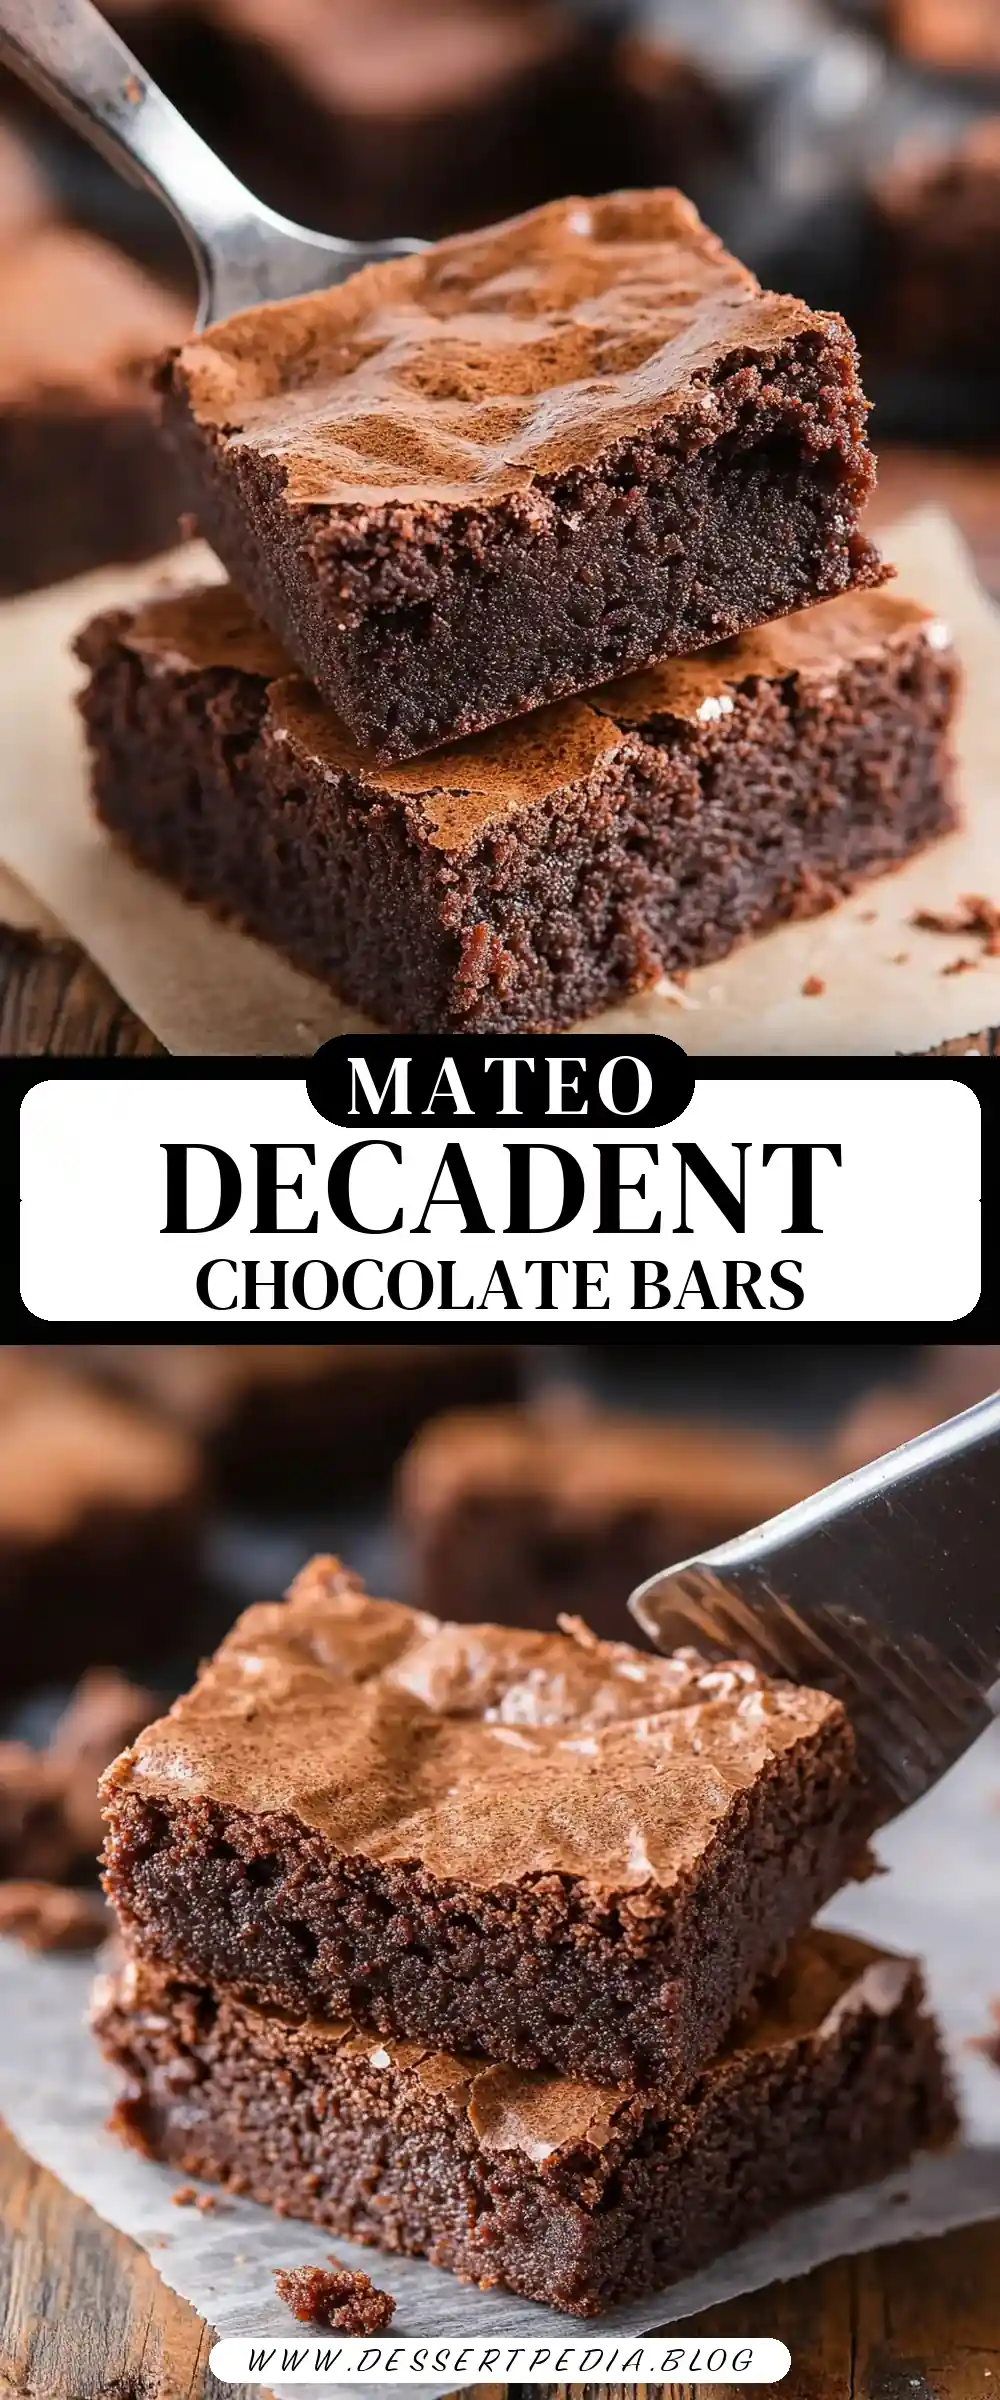
Perfect Texture
Achieving the ideal brownie texture—a balance between cakey and fudgy—can be tricky, but this recipe nails it. The combination of butter and vegetable oil is key. The butter contributes to the richness and flavor, while the oil ensures the brownies remain moist and soft without being greasy. This dynamic duo is what makes these brownies stand out.
Ease of Preparation
One of the joys of this recipe is its simplicity. Even though the results are decadent, the steps are straightforward and the ingredients are readily available. This accessibility makes it a great choice for any home cook looking to whip up a delicious dessert without unnecessary hassle.
Versatile Enjoyment
These brownies are incredibly versatile. They taste divine whether served warm, fresh from the oven, or chilled for a denser, more fudge-like experience. This flexibility means they are perfect for any occasion, be it a casual family gathering or a more formal celebration.
Nostalgic Appeal
For many, baking is as much about the process as it is about the final product. The act of stirring, mixing, and baking can be a comforting ritual that brings back fond memories. This recipe, with its roots in my grandmother’s kitchen, embodies that sense of nostalgia. It’s a reminder of family gatherings and shared moments, making it a cherished addition to any baking repertoire.
Ingredients:
- Cocoa Powder: Provides an intense chocolate flavor; use high-quality for best results.
- Boiling Water: Helps bloom the cocoa for a richer taste.
- Unsweetened Chocolate: Adds depth and a silky texture.
- Vegetable Oil: Keeps the brownies moist without being greasy.
- Butter: Adds richness and flavor.
- Eggs & Yolks: Contribute to the structure and fudginess.
- Vanilla Extract: Enhances the chocolate flavor.
- Granulated Sugar: Sweetens and helps create a crackly top.
- All-purpose Flour: Provides structure.
- Salt: Balances and enhances the chocolate flavor.
Step-by-Step Instructions:
Preheat Your Oven: Set your oven to 350°F (175°C) and prepare a 9×13-inch baking pan by greasing it lightly with nonstick spray or lining it with parchment paper for easy removal.
Mix Dry Ingredients: In a small bowl, whisk together the flour, granulated sugar, and salt. Set this mixture aside for later use.
Prepare Cocoa Mixture: In a large mixing bowl, whisk the cocoa powder and boiling water together until smooth, ensuring no lumps remain. This blooming process enhances the cocoa’s flavor.
Melt Chocolate: While the cocoa mixture is still hot, stir in the chopped unsweetened chocolate until fully melted and smooth.
Combine Wet Ingredients: Add the vegetable oil, melted butter, eggs, egg yolks, and vanilla extract to the chocolate mixture. Whisk until the batter is smooth and glossy, ensuring all components are well integrated.
Incorporate Dry Ingredients: Gently fold the dry flour mixture into the wet batter using a spatula. Stir just until no dry streaks remain to avoid overmixing, which can lead to tougher brownies.
Prepare for Baking: Pour the batter into the prepared pan and smooth out the surface evenly with a spatula to ensure even baking.
Bake: Place the pan in the oven and bake for 30–35 minutes, or until a toothpick inserted into the center comes out with a few moist crumbs. This indicates the perfect balance of doneness and fudginess.
Cool and Serve: Let the brownies cool in the pan before slicing to allow them to set properly, making it easier to achieve clean slices.
Nutrition Information:

Prep Time: 20 minutes
Cooking Time: 35 minutes
Total Time: 55 minutes
Yield: 6 servings
Table: Calorie Breakdown for a Typical Serving
| Nutrient | Amount |
|---|---|
| Calories | 183 kcal |
| Carbohydrates | 99 g |
| Protein | 12 g |
| Fat | 9 g |
| Sugar | 25 g |
Patricia’s Tips for Success:
Tip 1: Use high-quality chocolate and cocoa for the best flavor. The quality of these ingredients directly impacts the taste and texture of your brownies.
Tip 2: Do not overmix the batter; this ensures a tender crumb. Overmixing can lead to the development of gluten, resulting in tougher brownies.
Tip 3: Let the brownies cool completely before cutting for clean slices. This patience pays off with neat, professional-looking squares.
Tip 4: Experiment with different extract flavors like almond or mint for a twist. These small changes can create exciting new variations without altering the basic recipe too much.
Tip 5: Store brownies in an airtight container to maintain moisture. This helps keep them fresh and prevents them from drying out.
Cooking Variations:
Variation 1: Add a handful of chopped nuts such as walnuts or pecans for a crunchy texture. The nuts add an earthy flavor that complements the sweetness of the brownies.
Variation 2: Swirl in some peanut butter or Nutella before baking for added richness and flavor. This creates a marbled effect and introduces a creamy, nutty profile.
Variation 3: Top with chocolate chips or a sprinkle of sea salt before baking. The chocolate chips add extra sweetness, while the sea salt enhances the chocolate flavor and adds a sophisticated touch.
Serving Suggestions:
Suggestion 1: Serve warm with a scoop of vanilla ice cream. The contrast between the hot brownie and cold ice cream creates an irresistible combination.
Suggestion 2: Pair with a glass of cold milk for a classic treat. This timeless pairing is perfect for those who enjoy a simple, satisfying snack.
Suggestion 3: Enjoy with a dollop of whipped cream and fresh berries. The tartness of the berries cuts through the sweetness of the brownies, providing a refreshing balance.
Additional Thoughts:
The beauty of “The BEST Brownies” lies in their simplicity and adaptability. Whether you’re indulging in a quiet moment alone or sharing them at a festive gathering, these brownies bring a sense of joy and satisfaction. The recipe’s roots in my grandmother’s kitchen make them a cherished addition to my baking repertoire, and I hope they become a staple in yours as well. They remind us of the power of home-baked treats to bring warmth and connection into our lives, offering a sweet escape from the everyday hustle.
Join the Conversation:
I would love to hear about your experiences with “The BEST Brownies.” Did they remind you of any family traditions, or did you create new ones? Share your thoughts, tweaks, and photos in the comments below or on social media using #TasteBudsApproved. Let’s savor these moments together!
Conclusion:
Simple to make yet deeply satisfying, “The BEST Brownies” are a testament to the power of home-baked treats in bringing warmth and connection into our lives. Whether you’re a chocolate enthusiast or just in need of a sweet escape, these brownies are sure to delight with every bite. Their rich flavor, perfect texture, and nostalgic appeal make them a must-try for anyone who loves to bake.
Frequently Asked Questions:
Q: Can I use a different size pan?
A: Yes, but adjust the baking time accordingly. Smaller pans will result in thicker brownies and may need a few extra minutes, while larger pans will yield thinner brownies and require less baking time.
Q: Can I substitute butter with margarine?
A: You can, but the flavor and texture may slightly differ. Margarine tends to have a higher water content, which can affect the richness and structure of the brownies.
Q: Can I make these brownies gluten-free?
A: Yes, you can use a gluten-free flour blend as a substitute. Make sure the blend is suitable for baking to ensure the best results.
Q: How do I store leftover brownies?
A: Keep them in an airtight container at room temperature for up to 4 days. For longer storage, consider refrigeration or freezing.
Q: Can I freeze these brownies?
A: Absolutely! Wrap them tightly in plastic wrap or foil and freeze for up to 3 months. Thaw them at room temperature before serving for optimal texture.
Q: What if I don’t have unsweetened chocolate?
A: You can use dark chocolate, but reduce the sugar slightly to account for the sweetness in the chocolate.
Q: Can I add other flavors?
A: Yes, try adding espresso powder for a mocha twist. A teaspoon can enhance the chocolate flavor without overpowering it, creating a rich, coffee-infused brownie.

The BEST Brownies
Ingredients
Equipment
Method
- Preheat your oven to 350°F. Lightly grease a 9×13-inch baking pan with nonstick spray, or line it with parchment paper for easy removal.
- In a small bowl, whisk together the flour, granulated sugar, and salt. Set aside.
- In a large mixing bowl (or the bowl of a stand mixer), whisk the cocoa powder and boiling water until smooth and no lumps remain.
- While the cocoa mixture is still hot, stir in the chopped unsweetened chocolate. Continue stirring until the chocolate is fully melted and the mixture is smooth.
- Add the vegetable oil, melted butter, eggs, egg yolks, and vanilla extract to the bowl. Whisk until fully combined and the batter looks smooth and glossy.
- Gently fold the dry ingredients into the wet batter using a spatula. Stir just until no dry streaks remain—avoid overmixing.
- Pour the batter into your prepared pan. Use the back of a spoon or spatula to smooth out the surface evenly.
- Bake for 30–35 minutes, or until a toothpick inserted into the center comes out with a few moist crumbs (but not wet batter).
- Let the brownies cool in the pan before slicing. Enjoy warm, chilled, or straight from the pan with a fork.