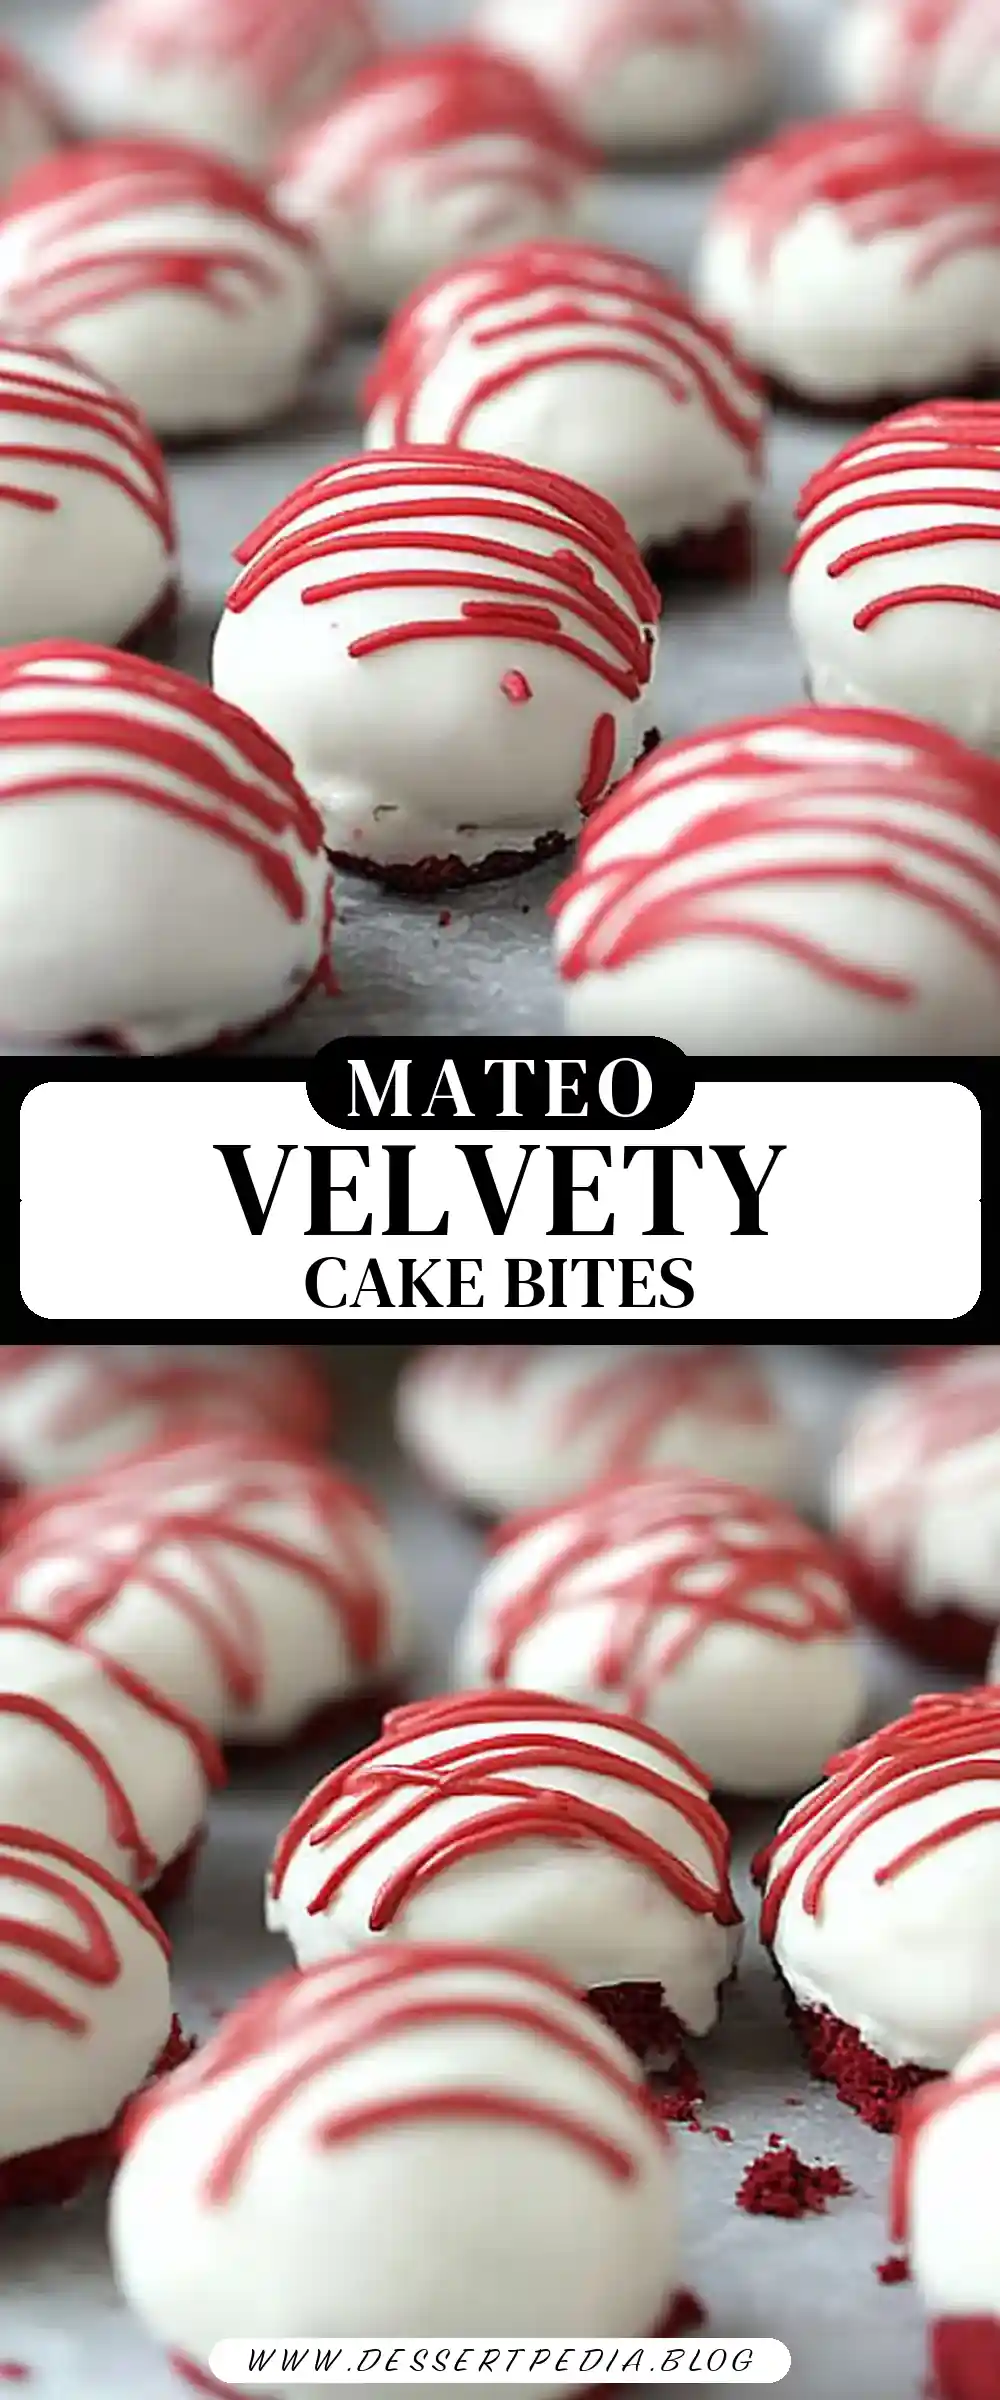
Red Velvet Cake Bites
Red Velvet Cake Bites: A Cozy Delight from My Grandmother’s Kitchen
There’s something inherently magical about stepping into a kitchen filled with the warmth of baking, the air rich with the sweet aroma of sugar and cocoa. My grandmother’s kitchen was such a place, where every weekend was a cozy affair of baking treats that celebrated both tradition and taste. Inspired by those cherished memories, I’m thrilled to share my Red Velvet Cake Bites recipe. These delightful morsels capture the essence of nostalgia and are perfect for sharing with loved ones or indulging in a moment of self-care. Join me as we delve into the rich flavors and simple joys of making Red Velvet Cake Bites.
Why This Recipe Works
The Red Velvet Cake Bites recipe is a testament to the magic that can be created with just a few simple ingredients and a touch of creativity. Let’s explore why this recipe is a standout choice for both novice and experienced bakers:
Simplicity
One of the key reasons this recipe is so beloved is its simplicity. By using a basic cake mix, it becomes accessible to bakers of all skill levels. There’s no need for intricate techniques or specialized equipment—just mix, bake, and enjoy. This straightforward approach allows anyone to create a delicious treat without the stress of complex procedures.
Flavor
Red velvet is a classic flavor that has stood the test of time. Its unique combination of cocoa and vanilla, paired with tangy cream cheese frosting, creates an irresistible taste. The creamy frosting interior of these bites enhances the traditional red velvet flavor, offering a delightful contrast in texture and taste with every bite.
Versatility
These cake bites are incredibly versatile, allowing for endless customization. You can experiment with different coatings, like dark chocolate for a richer flavor or colored candy melts for a thematic touch. Decorations can also vary, from simple drizzles to elaborate sprinkles, making them suitable for any occasion or personal preference.
Portability
The bite-sized nature of these treats makes them perfect for parties, picnics, or as gifts. They are easy to transport and serve, providing a mess-free option that guests can easily enjoy. Plus, their small size means they can be savored without feeling overly indulgent.
Make-Ahead Friendly
In today’s fast-paced world, the ability to prepare food in advance is a valuable asset. These cake bites can be made ahead of time and stored, allowing you to focus on other aspects of your event or simply enjoy them at your leisure.
Visual Appeal
The vibrant red color of red velvet cake is always a showstopper. It adds a festive touch to any table, making these bites as visually appealing as they are delicious. Whether for a holiday gathering or a simple afternoon treat, their striking appearance is sure to impress.
Ingredients
To create these delightful Red Velvet Cake Bites, you will need the following ingredients:
- Red Velvet Cake Mix (15.25 ounces): The base for our bites, providing that iconic red velvet flavor.
- Water (1 ¼ cups): As listed on the cake box, to hydrate the mix.
- Eggs (3): Essential for binding and structure, follow the box instructions.
- Vegetable Oil (½ cup): Adds moisture and richness, as per the cake mix directions.
- Cream Cheese Frosting (16 ounces): Ready-made or homemade, adds creaminess to the bites.
- White Chocolate Candy Coating (1 pound): For a smooth, sweet exterior.
- Red Candy Melts (15, optional): For decorative red stripes on top.
Step-by-Step Instructions
The process of making Red Velvet Cake Bites is as delightful as the outcome. Here’s a detailed guide:
Bake the Cake: Follow the package directions to bake your red velvet cake in a preheated oven. This step sets the foundation for your bites, ensuring they have that classic red velvet taste and texture.
Cool Completely: Allow the cake to cool fully. For a quick cool, place it in the freezer for 45 minutes or let it rest overnight. Cooling is crucial to prevent a sticky mess when you crumble the cake.
Crumble the Cake: Use your hands to break the cooled cake into fine crumbs in a large bowl. This is the fun part, where you can involve little helpers for an interactive baking experience.
Mix with Frosting: Gradually mix in the cream cheese frosting, ½ cup at a time, until the mixture binds well. The key is to add just enough frosting to hold the crumbs together without making them soggy.
Form into Bites: Roll the mixture into balls or discs, considering their rich flavor; smaller is often better. Use a cookie scoop for evenly-sized bites, ensuring consistency in appearance and texture.
Chill to Set: Arrange on a baking sheet and refrigerate for 30 minutes to firm up. This step ensures the cake bites hold their shape when coated with chocolate.
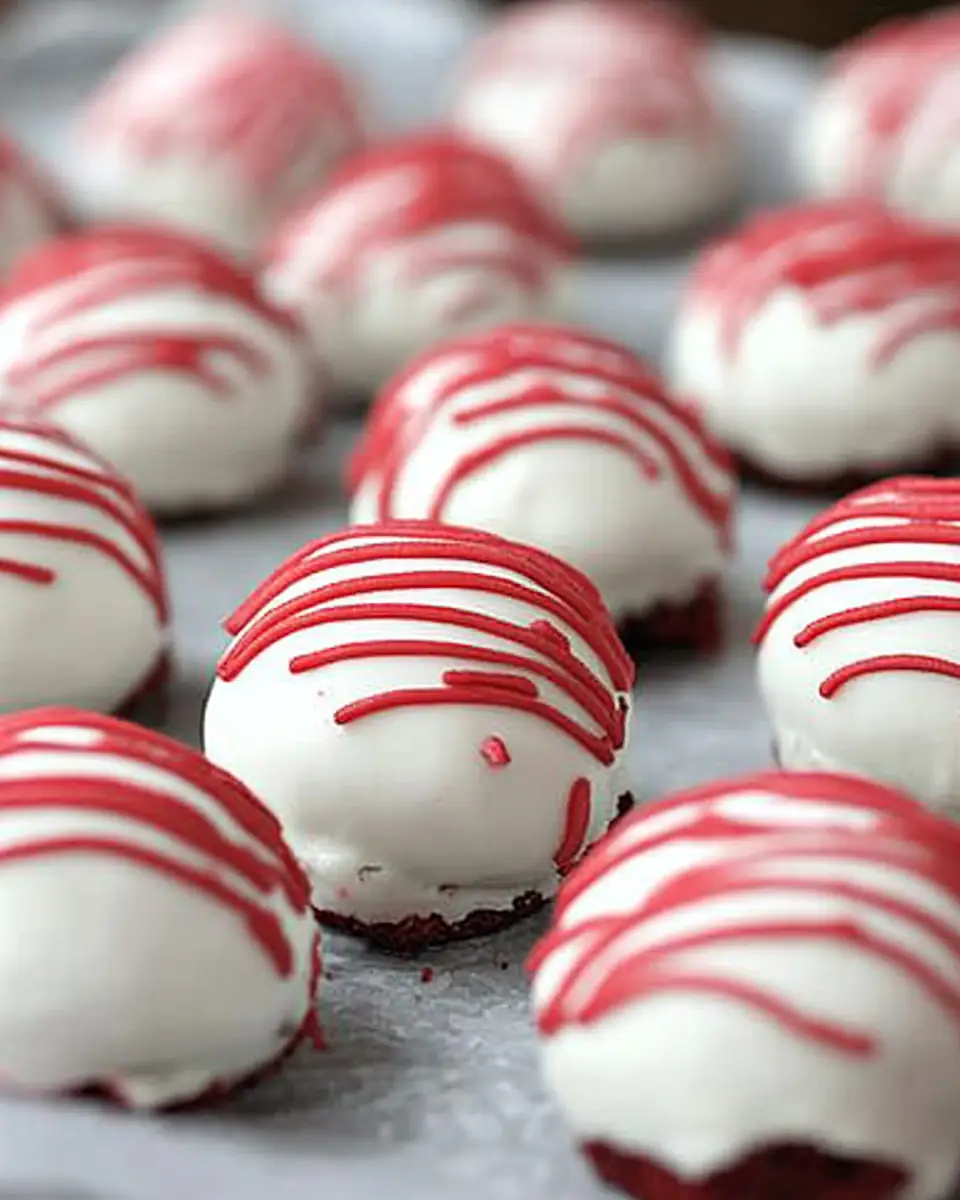
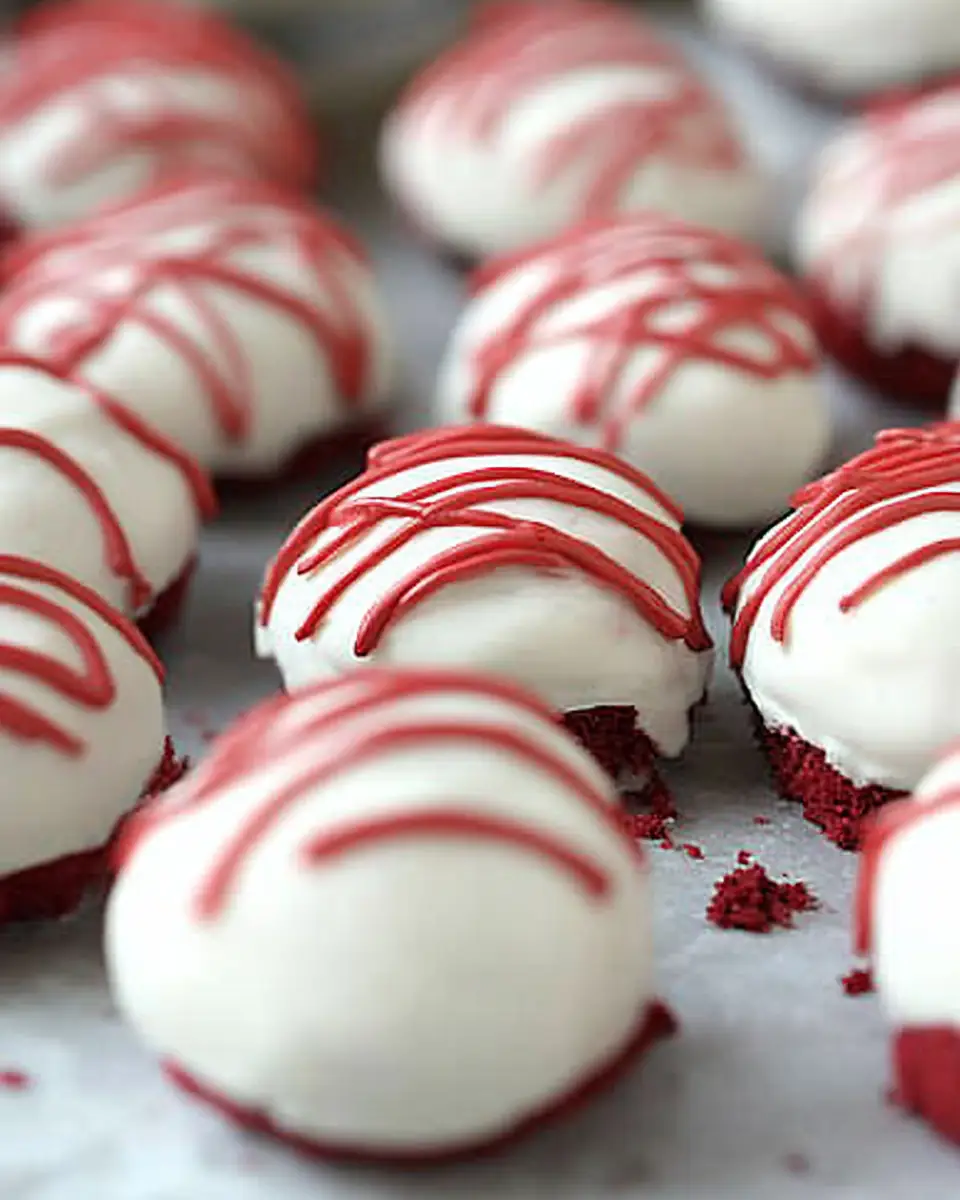
Coat with Chocolate: Melt the white chocolate according to package instructions. Use a skewer to dip each ball, ensuring an even coating. This creates a smooth, sweet exterior that complements the rich interior.
Decorate and Set: Place on wax paper to set. Decorate with sprinkles before the coating hardens or drizzle with melted red candy once set. This is your chance to get creative and add your personal touch.
Drizzle Red Candy (optional): Melt red candy melts, transfer to a sandwich bag, snip a corner, and drizzle over the bites. This final flourish adds a pop of color and an extra layer of flavor.
Prep Time: 2 hours
Cooking Time: 30 minutes
Total Time: 2 hours 30 minutes
Yield: 4-6 Servings
Table: Calorie Breakdown for a Typical Serving
| Nutrient | Amount |
|---|---|
| Calories | 150 kcal |
| Carbohydrates | 19 g |
| Protein | 1 g |
| Fat | 8 g |
| Sugar | 16 g |
Patricia’s Tips for Success
Creating the perfect Red Velvet Cake Bites is all about attention to detail. Here are my tips to ensure your success:
Tip 1: Use high-quality chocolate for a smoother coating. The quality of chocolate significantly impacts the final texture and taste.
Tip 2: Ensure the cake is fully cooled before crumbling to avoid a sticky mess. Patience is key here, as rushing this step can complicate the process.
Tip 3: Adjust frosting amount based on texture; add just enough for binding. Too much frosting can make the mixture too wet, while too little may not hold together well.
Tip 4: Use a cookie scoop for evenly-sized bites. This not only ensures uniformity but also aids in even cooking and coating.
Tip 5: If decorating with candy melts, ensure they are completely melted for easy drizzling. A smooth, consistent drizzle elevates the presentation.
Tip 6: Store in an airtight container to maintain freshness. Proper storage extends their shelf life, allowing you to enjoy them over several days.
Tip 7: Experiment with different sprinkles for seasonal themes. Personalizing your cake bites for holidays or special events makes them even more special.
Cooking Variations
While the classic Red Velvet Cake Bites are delightful on their own, here are some variations to spice things up:
Variation 1: Use dark chocolate coating for a richer flavor. This adds depth and complements the sweetness of the cake.
Variation 2: Substitute cream cheese frosting with buttercream for a different taste. Buttercream offers a lighter, sweeter alternative.
Variation 3: Add crushed nuts for texture within the cake mixture. Nuts introduce a crunch that contrasts the soft cake and smooth coating.
Variation 4: Incorporate a teaspoon of espresso powder for a depth of flavor. Espresso enhances the cocoa notes, providing a sophisticated twist.
Variation 5: Use colored candy melts to match holiday themes. This is a fun way to incorporate festive colors and make your treats stand out.
Serving Suggestions
How you serve your Red Velvet Cake Bites can enhance the overall experience. Consider these suggestions:
Suggestion 1: Serve as a dessert platter centerpiece at parties. Their vibrant color and elegant appearance make them a striking focal point.
Suggestion 2: Pair with a glass of cold milk or hot coffee. The rich, creamy taste of the cake bites is beautifully complemented by a refreshing beverage.
Suggestion 3: Include in gift boxes or treat bags for special occasions. These make thoughtful gifts that are sure to delight recipients.
Suggestion 4: Use as a topping for vanilla ice cream. The warmth of the cake bites pairs wonderfully with cold, creamy ice cream.
Suggestion 5: Enjoy with fresh berries for a refreshing contrast. Berries add a burst of freshness that balances the richness of the cake bites.
Additional Thoughts
Creating these Red Velvet Cake Bites is not just about the end result but the joy of the process. Each step is a delightful reminder of the warmth and love that goes into homemade treats. Whether you’re celebrating a special occasion or simply indulging a sweet tooth, these bites embody the spirit of sharing and enjoyment. The vibrant color, smooth coating, and rich taste make them irresistible and a testament to how simple ingredients can create something extraordinary.
The process of making these bites can be a communal activity, bringing family and friends together in the kitchen. It’s a chance to pass down traditions, create new memories, and enjoy the simple pleasure of baking. Whether you’re a seasoned baker or just starting, these Red Velvet Cake Bites are a perfect project to undertake.
Join the Conversation
I’d love to hear your experiences with making Red Velvet Cake Bites! Did you add your own twist or share them with someone special? Your stories and feedback enrich our community of passionate home cooks. Share your thoughts in the comments or tag me in your delightful creations on social media. Connecting with others who share a love for baking is one of the most rewarding aspects of sharing these recipes.
Conclusion
Red Velvet Cake Bites are a delicious testament to the joy of baking and sharing. Their simple preparation, combined with rich flavors, makes them a delightful addition to any gathering. I hope this recipe brings a bit of my grandmother’s kitchen warmth to yours, fostering memories of your own to cherish. The process of creating these bites is as rewarding as the final product, offering a moment of peace and creativity in a busy world.
Frequently Asked Questions
Q: Can I use homemade frosting instead of store-bought?
A: Absolutely! Homemade frosting can add a personal touch and adjust sweetness to your liking.
Q: How long can I store these cake bites?
A: They can be stored in an airtight container in the fridge for up to a week, preserving their freshness and flavor.
Q: What if I don’t have red candy melts?
A: You can skip them or use an alternative color for drizzling. This flexibility allows you to adapt the recipe based on what’s available.
Q: Can I make these ahead of time?
A: Yes, they are perfect for making in advance and storing until needed, making them an excellent choice for busy schedules.
Q: Do I need a specific brand of cake mix?
A: Any brand works, but follow the box instructions closely for best results. The key is to ensure the mix provides the right texture and flavor.
Q: How can I avoid the coating from cracking?
A: Ensure the cake bites are at room temperature before dipping in chocolate. This helps the coating adhere smoothly without breaking.
Q: What can I use instead of almond bark?
A: White chocolate chips or wafers are great alternatives, offering similar texture and flavor profiles.

Red Velvet Cake Bites
Ingredients
Equipment
Method
- Bake the cake according to directions on the package.
- Let it cool completely. You can speed up the process by placing the cake in the freezer for about 45 minutes.
- Crumble the cooled cake into a bowl using your hands.
- Stir in the frosting into the crumbled cake, about ½ cup at a time, until it holds together when rolled into a ball.
- Roll the mixture into balls and place on a baking sheet. Refrigerate for 30 minutes to set.
- Melt the white chocolate candy coating according to package directions.
- Dip each cake bite into the melted coating using a skewer, ensuring even coverage.
- Place the coated cake bites back onto the baking sheet or wax paper to set.
- If decorating with red candy melts, ensure the coating has set before drizzling.
- Melt red candy melts and drizzle over each bite using a resealable bag with a clipped corner.