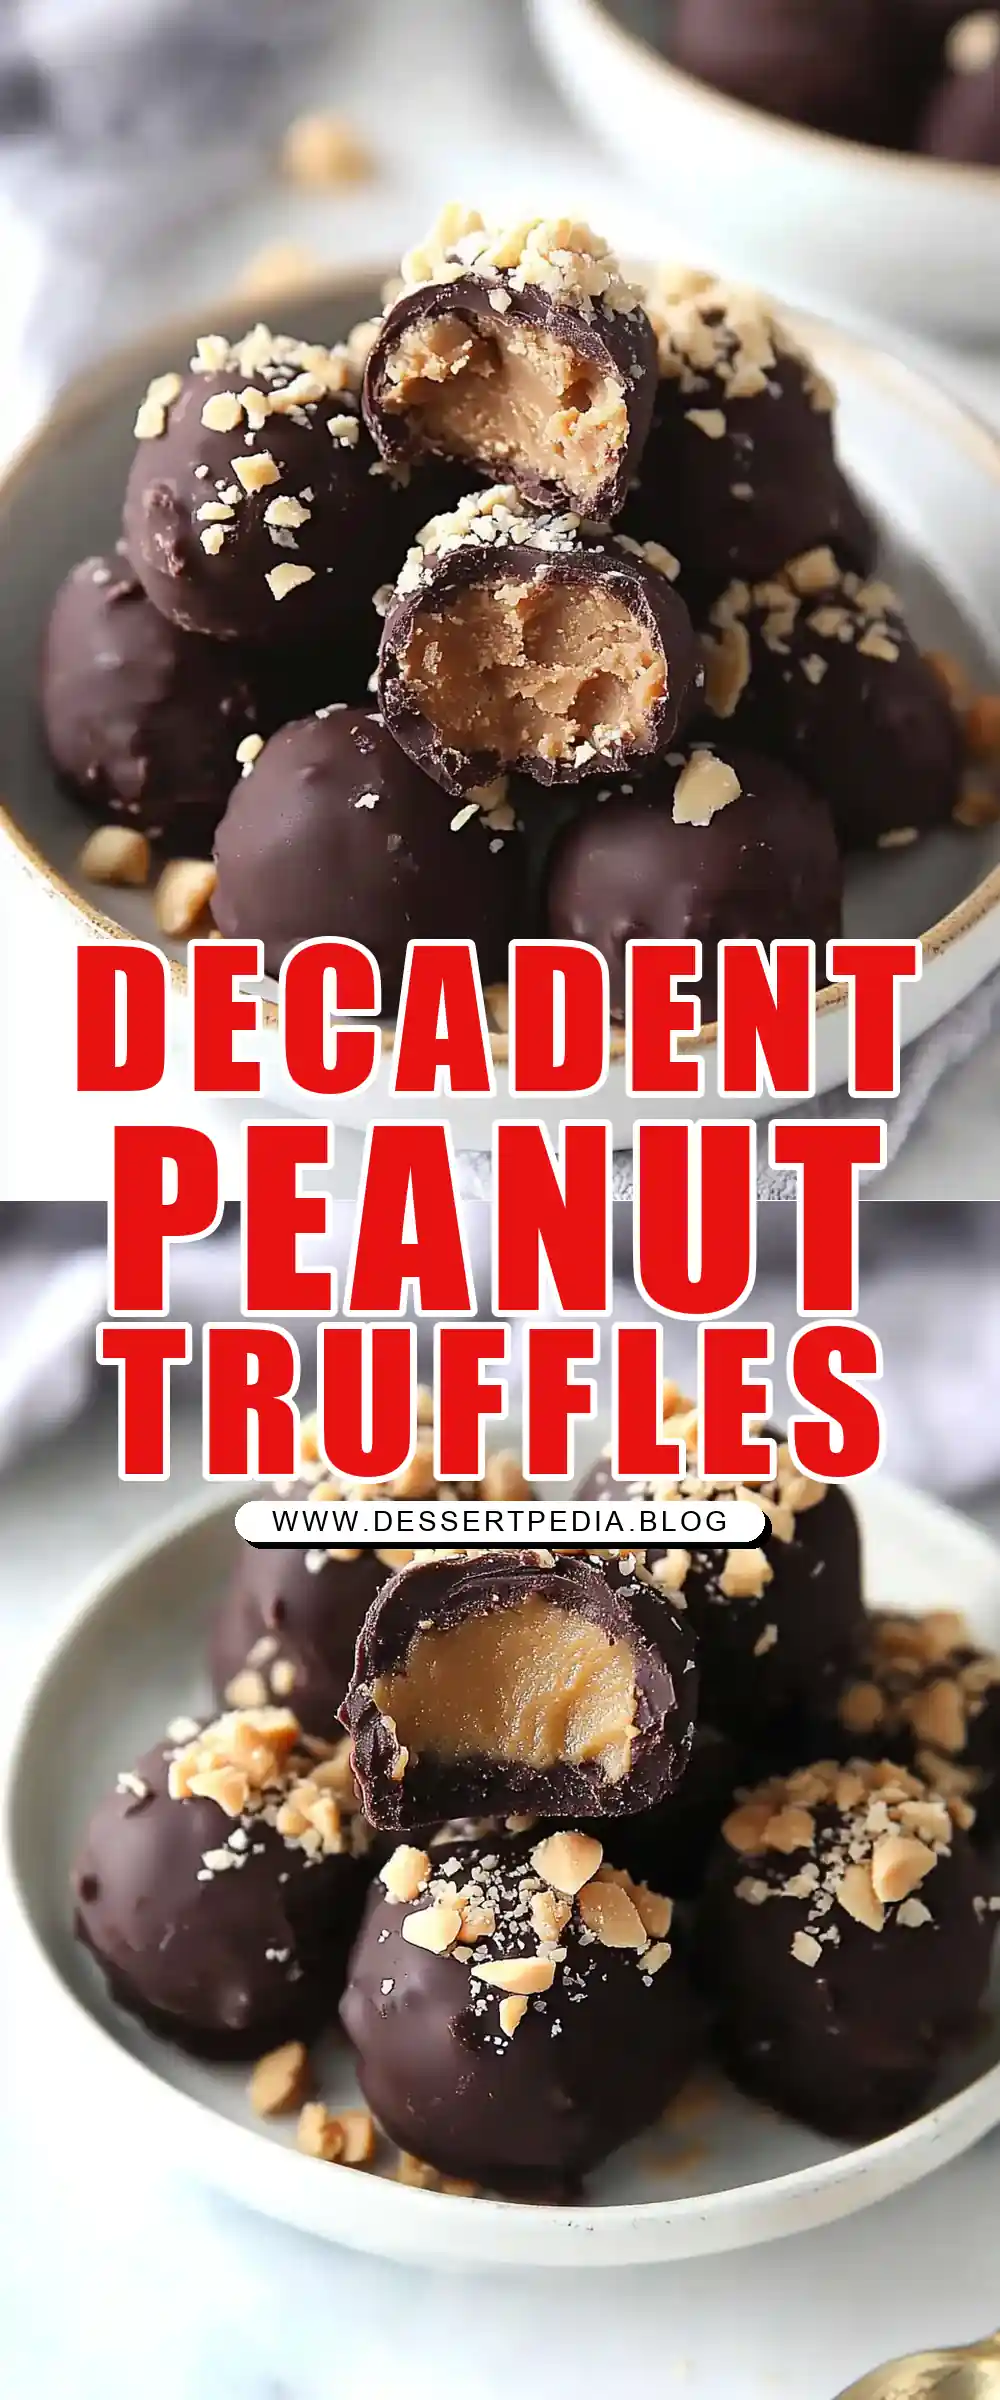
Peanut Butter Truffles
Peanut Butter Truffles: A Cozy Weekend Treat from My Grandmother’s Kitchen
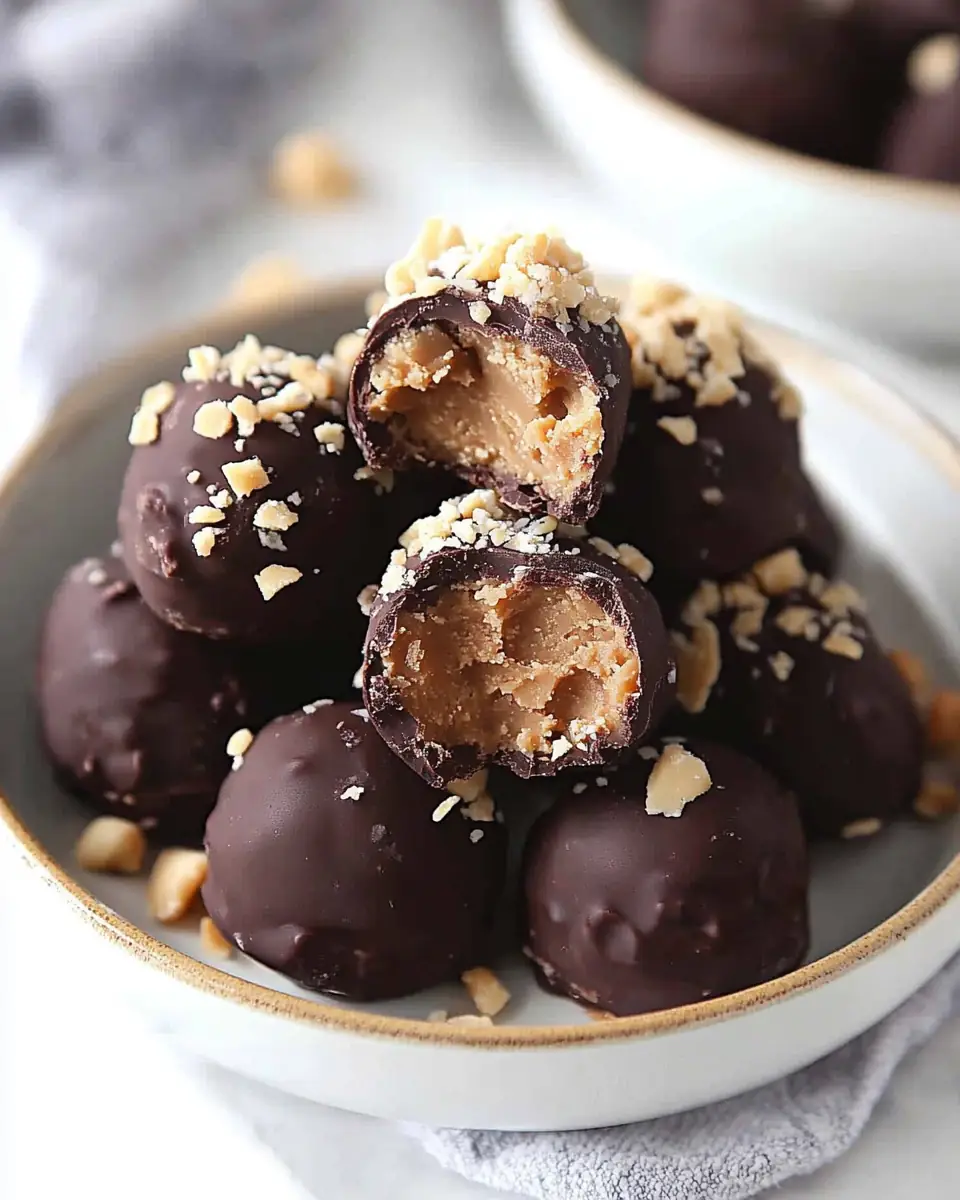
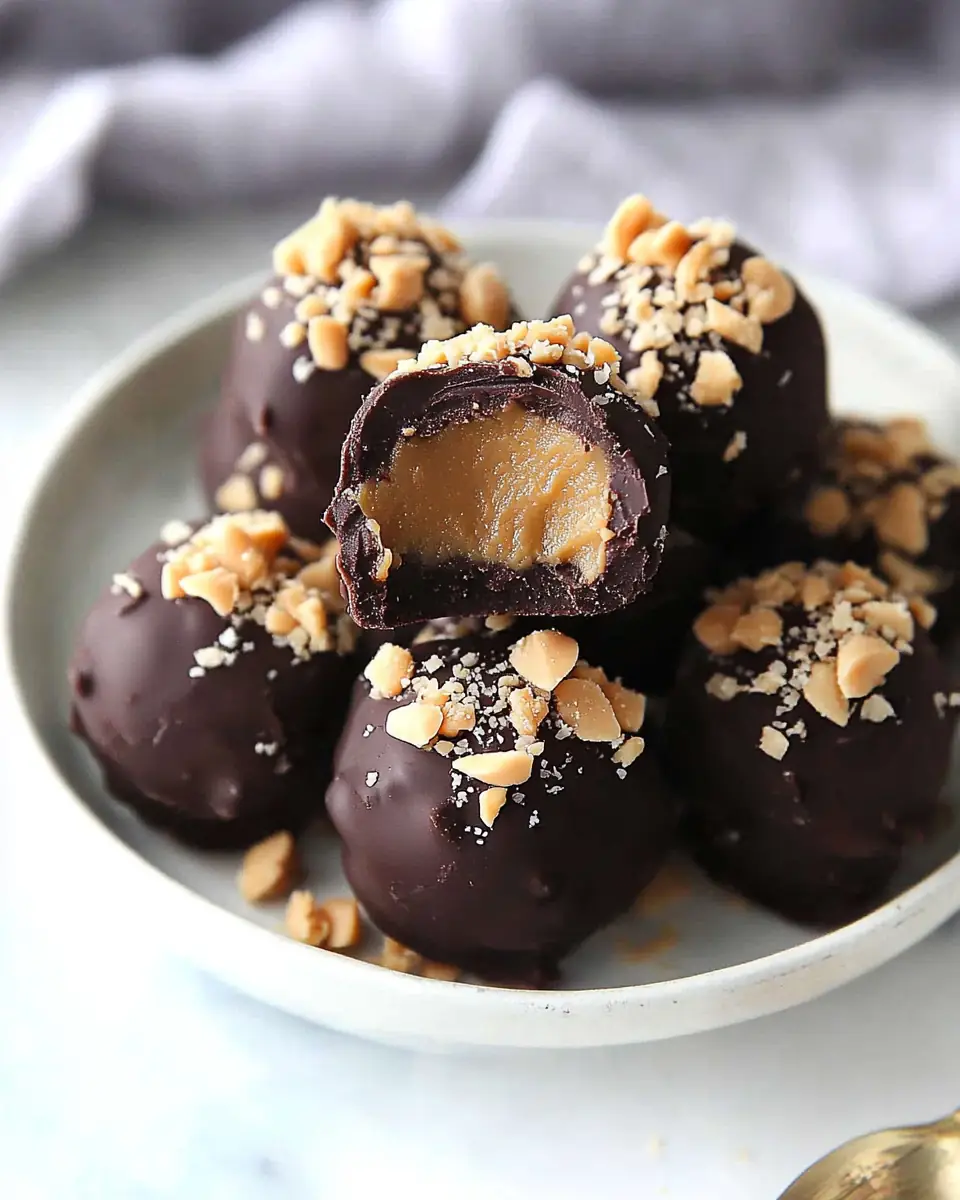
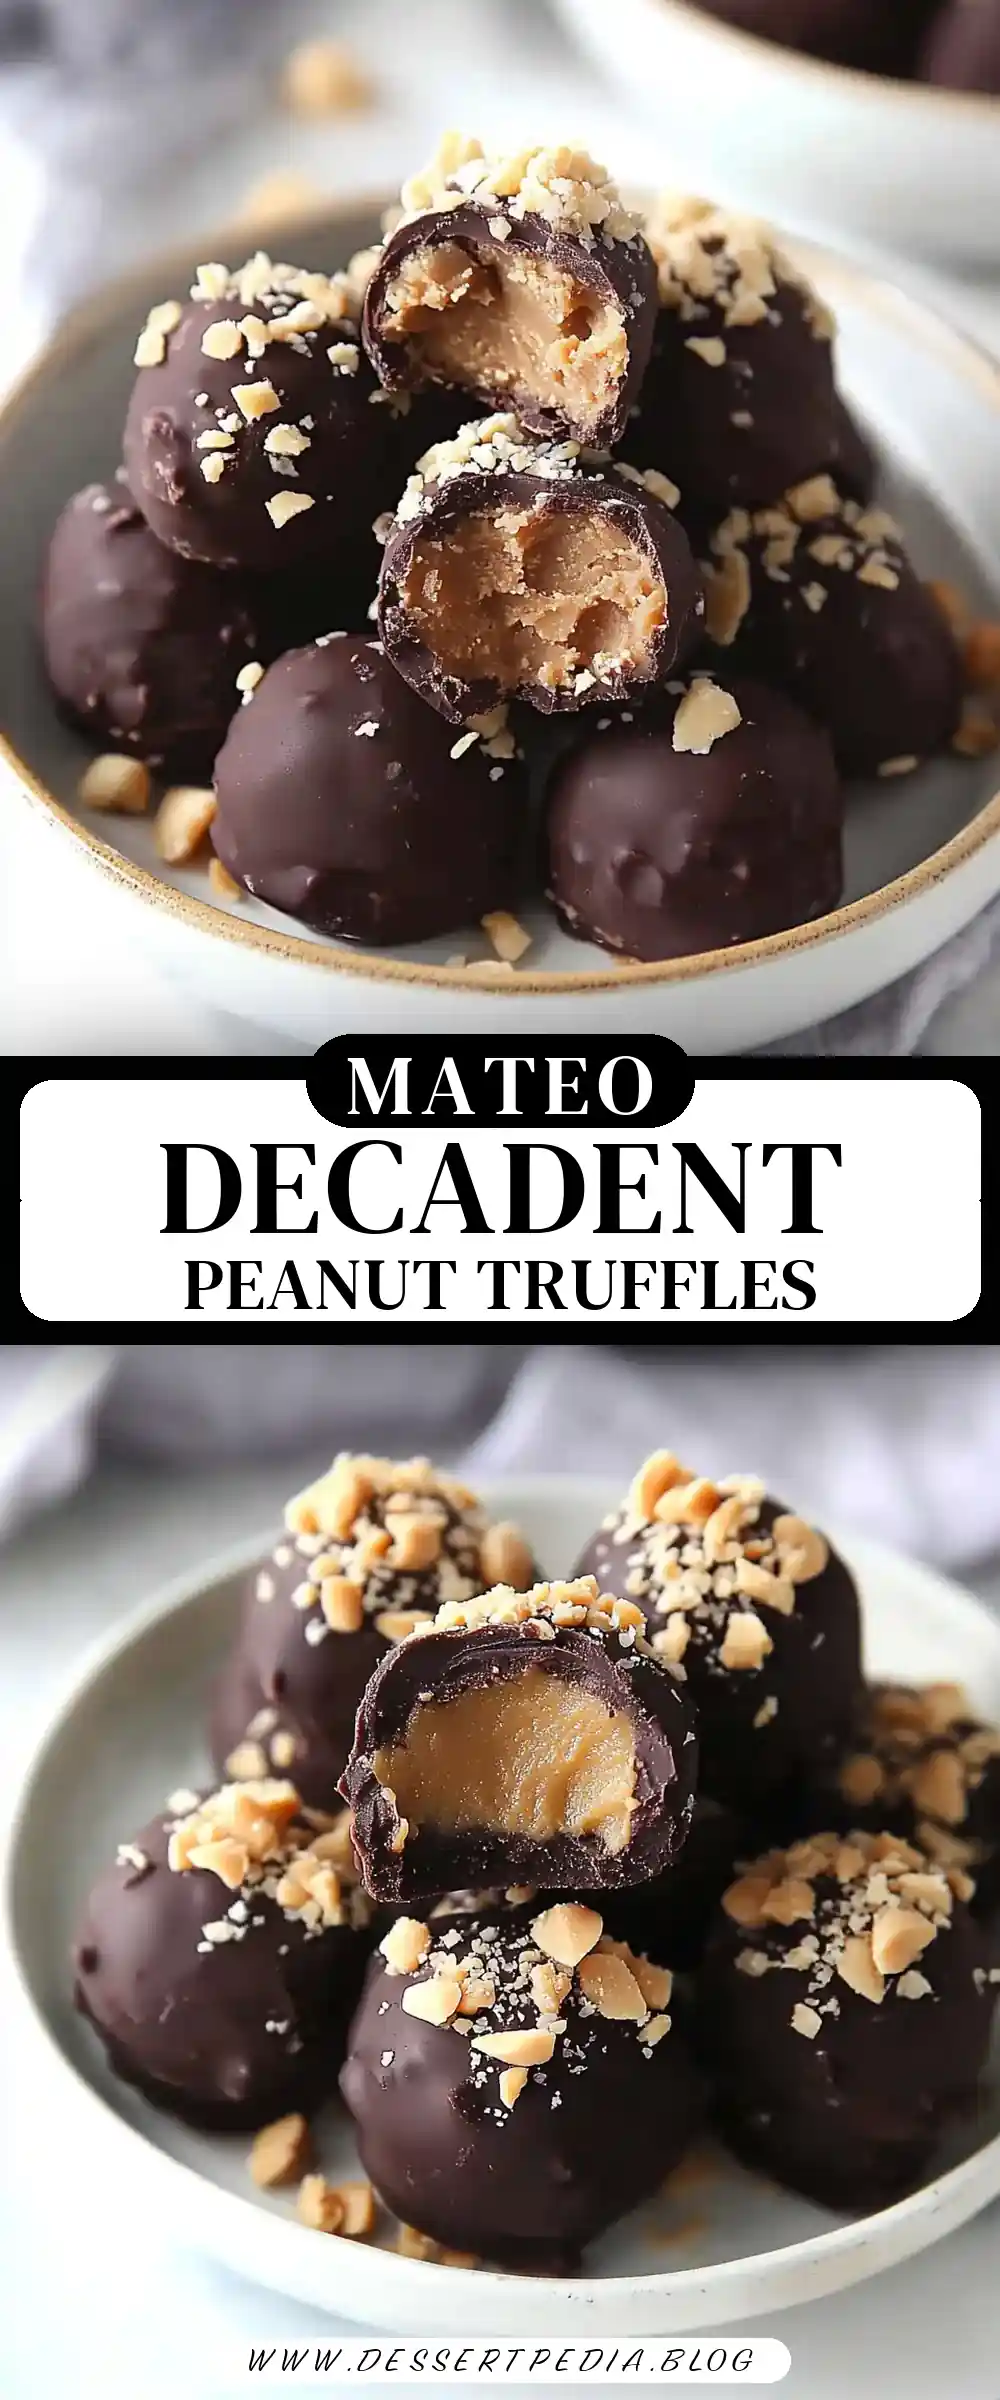
Every bite of these Peanut Butter Truffles takes me back to cozy weekends in my grandmother’s kitchen, where the air was always filled with a comforting blend of chocolate and peanut butter. These truffles are a sweet nod to those cherished moments and are perfect for anyone looking to recreate a bit of that warm, nostalgic magic in their own home. The rich, creamy peanut butter center enveloped in a smooth chocolate shell is nothing short of a delight. This recipe is not only delicious but also incredibly straightforward, making it accessible for home cooks of all skill levels. Let’s dive into this delightful treat that promises to impress and satisfy your taste buds.
Why This Recipe Works:
Ease of Preparation
The simplicity of this recipe is what makes it so appealing. With just a handful of ingredients and minimal equipment, you can whip up a batch of these truffles in no time. The process involves mixing, chilling, and dipping, making it a perfect recipe for beginners. The straightforward nature ensures that even those who may not consider themselves seasoned bakers can achieve professional-looking results.
Rich Flavor Combination
The classic pairing of peanut butter and chocolate is a match made in heaven. The creamy, slightly salty peanut butter complements the rich, slightly bitter dark chocolate coating. This combination creates a deeply satisfying taste profile that is both comforting and indulgent. The balance of flavors ensures that each bite is a harmonious blend of sweet and savory, making it difficult to stop at just one truffle.
Texture Contrast
One of the highlights of these truffles is the contrasting textures. The creamy, melt-in-your-mouth interior of the peanut butter mixture is beautifully offset by the crisp, smooth exterior of the chocolate shell. This textural contrast not only makes for an enjoyable eating experience but also adds to the visual appeal of the truffles, making them look as good as they taste.
Customizable
The versatility of this recipe allows for endless creativity. Whether you prefer milk, dark, or white chocolate, or want to incorporate different toppings, you can easily adapt this recipe to suit your personal preferences. Add crushed nuts, sprinkles, or even a drizzle of caramel to make these truffles uniquely yours. This flexibility ensures that you can tailor the truffles to fit any occasion or mood.
Perfect for Sharing
Truffles are the ideal treat for sharing with friends and family. Whether you’re hosting a gathering or looking for a thoughtful homemade gift, these truffles are sure to be a hit. Their bite-sized nature makes them perfect for parties, while their elegant appearance makes them an impressive addition to any dessert table. Package them in decorative tins or boxes for a personal touch that shows you care.
Ingredients:
- Peanut Butter (1 cup): Creamy peanut butter works best for a smooth texture.
- Unsalted Butter (4 tablespoons): Softened for easy mixing, adds richness.
- Powdered Sugar (1 cup): Sweetens and helps bind the mixture.
- Vanilla Extract (1 teaspoon): Enhances the overall flavor.
- Flaky Salt (a pinch): Balances the sweetness and enhances flavor.
- Dark Chocolate (8 ounces): Provides a rich, slightly bitter coating.
- Coconut Oil (2 tablespoons): Helps the chocolate set evenly.
- Garnish: Chopped peanuts and flaky sea salt add texture and flavor.
Step-by-Step Instructions:
- Mix the Base: In a mixing bowl, combine peanut butter, powdered sugar, butter, vanilla, and salt. This forms the base of your truffles, a harmonious blend of creamy and sweet.
- Blend to Perfection: Use an electric mixer to blend the mixture. This ensures a smooth consistency which is essential for forming perfect truffle centers. If the butter is too soft, freeze the mixture for 20 minutes to make it more manageable.
- Shape the Truffles: Scoop out 10 balls of dough and place them on a baking sheet lined with wax paper. Consistency in size ensures they all chill evenly and look uniform.
- Chill for Firmness: Freeze the peanut butter balls for 20 minutes. This step is crucial as it makes the truffles easier to handle when dipping in chocolate.
- Prepare the Chocolate Coating: Melt chocolate and coconut oil together using a double boiler or microwave, stirring frequently to ensure smoothness. The coconut oil helps the chocolate glaze the truffles smoothly.
- Dip Each Truffle: Remove balls from the freezer. Using a fork, dunk each into the melted chocolate and drain excess. This step requires a bit of finesse but is quite forgiving.
- Final Chill: Refrigerate truffles for at least 5 minutes before serving. This helps the chocolate set properly, ensuring a crisp exterior.
Prep Time: 10 minutes
Cooking Time: 1 minute
Total Time: 11 minutes
Yield: 10 truffles
Table: Calorie Breakdown for a Typical Serving
| Nutrient | Amount per Serving |
|---|---|
| Calories | 194 calories |
| Carbohydrates | 13 grams |
| Protein | 3 grams |
| Fat | 15 grams |
| Sugar | 9 grams |
Patricia’s Tips for Success:
Tip 1: Ensure the butter is softened for easy mixing but not too soft to avoid a runny mixture. A firm mixture is easier to shape and handle.
Tip 2: If the mixture feels too sticky, a brief chill in the freezer will firm it up. This ensures your truffles maintain their shape and don’t collapse.
Tip 3: Use high-quality dark chocolate for the best flavor. The quality of the chocolate will significantly impact the final taste of your truffles.
Tip 4: Be quick when dipping truffles in chocolate to ensure an even coat. If the chocolate begins to thicken, gently reheat it to maintain a smooth consistency.
Tip 5: Customize toppings with your favorite nuts or sprinkles for added texture. This personal touch can elevate your truffles and make them even more special.
Tip 6: Store truffles in an airtight container in the fridge to maintain freshness. This also keeps the chocolate coating crisp.
Tip 7: Experiment with white or milk chocolate for a sweeter bite. This variation can cater to different taste preferences and add variety.
Cooking Variations:
Variation 1: Add a teaspoon of espresso powder to the chocolate for a mocha flavor. This adds depth and complexity to the truffles.
Variation 2: Substitute almond or cashew butter for a different nutty taste. This simple swap can change the entire flavor profile of the truffles.
Variation 3: Roll truffles in cocoa powder instead of dipping in chocolate for a lighter option. This gives a sophisticated finish reminiscent of classic French truffles.
Variation 4: Incorporate crushed pretzels into the peanut butter mixture for a salty crunch. The added texture is a delightful surprise.
Variation 5: Add a hint of cinnamon or cayenne to the chocolate for a spicy kick. The warmth from the spices adds an unexpected yet pleasant twist.
Serving Suggestions:
Suggestion 1: Serve with a cup of hot cocoa for a cozy dessert pairing. The warmth of the drink complements the rich truffles beautifully.
Suggestion 2: Pair with fresh fruit for a balanced treat. The acidity and freshness of fruit can cut through the richness of the truffles.
Suggestion 3: Arrange on a charcuterie board with cheese and nuts for an elegant presentation. This is a sophisticated way to serve them at gatherings.
Suggestion 4: Gift in decorative tins for festive occasions. A homemade gift like this is always appreciated and feels personal.
Suggestion 5: Enjoy as a post-dinner indulgence with a glass of red wine. The tannins in the wine complement the chocolate, making for a luxurious pairing.
Additional Thoughts:
The beauty of these Peanut Butter Truffles lies in their simplicity and versatility. Whether you’re making them for a holiday gathering or as an everyday treat, they are sure to delight. The combination of flavors and textures is a testament to the magic that can happen in your kitchen with just a few basic ingredients. I encourage you to make these truffles your own by experimenting with different flavor combinations and garnishes, and most importantly, to share them with those you love. These truffles not only satisfy your sweet tooth but also serve as a beautiful reminder of the joy that comes from sharing homemade treats with others.
Join the Conversation:
Have you tried these Peanut Butter Truffles, or do you have your own variations to share? I’d love to hear your experiences and see your creations! Join our community of enthusiastic home cooks by sharing your thoughts and photos on social media using the hashtag #TasteBudsApproved. Let’s create a space where we can all learn, grow, and indulge in our shared passion for delicious food. Whether you’re a kitchen novice or a seasoned chef, your insights and creativity are always welcome.
Conclusion:
Peanut Butter Truffles are the perfect blend of simplicity and indulgence. With their rich flavor and easy preparation, they’re an ideal treat for any occasion. Whether you’re a seasoned baker or a novice in the kitchen, this recipe offers a delightful experience that’s bound to become a favorite. Gather your ingredients, and let this cozy weekend bake bring a touch of warmth and sweetness to your day. The memories you create while making and sharing these truffles will be just as sweet as the treats themselves.
Frequently Asked Questions:
Q: Can I use crunchy peanut butter instead of creamy?
A: Yes, but the texture will be slightly different with added crunch. This can add a delightful surprise for those who enjoy a bit of texture in their truffles.
Q: How should I store leftover truffles?
A: Store them in an airtight container in the refrigerator for up to a week. This keeps the chocolate crisp and the centers creamy.
Q: Can I make these truffles vegan?
A: Substitute dairy-free butter and chocolate, and ensure your peanut butter is vegan-friendly. These adjustments make the truffles suitable for those following a plant-based diet.
Q: What can I use instead of coconut oil?
A: You can use vegetable oil or omit it if you prefer a thicker chocolate coating. The oil helps the chocolate set smoothly, but it’s not essential.
Q: Can I freeze the truffles for later use?
A: Yes, freeze them in a sealed container for up to three months. Let them thaw slightly before serving for the best texture.
Q: Is there a substitute for powdered sugar?
A: You can use granulated sugar, but it may affect the texture slightly. Powdered sugar is preferred for its smooth finish.
Q: How can I make the truffles sweeter?
A: Add more powdered sugar to the peanut butter mixture for increased sweetness. Be mindful of balancing the additional sweetness with a pinch more salt if necessary.
Peanut Butter Truffles
Ingredients
Equipment
Method
- In a mixing bowl, add the peanut butter, powdered sugar, butter, vanilla, and salt.
- Use an electric mixer to beat the mixture together. If the butter is too soft, the mixture will be a bit too wet, so just freeze it for 20 minutes before proceeding, if so.
- Scoop out 10 balls of dough, and place them on a small baking sheet lined with wax paper or a silicone mat.
- Place the peanut butter balls in the freezer for 20 minutes.
- While the peanut butter truffles are in the freezer, melt the chocolate and coconut oil together either by using a double boiler, or by using the microwave. To melt the chocolate in the microwave, place the chocolate and coconut oil in a bowl, and microwave at 50% power for 30 second intervals, stirring after each one, until the chocolate is fully melted.
- Remove the balls from the freezer, and using a fork or chocolate candy tool, dunk each into the chocolate. The best way to do this is to drop the truffle in, very quickly roll it around, and then lift it back up to drain. The excess chocolate should drain between the fork tines or from the candy tool.
- Place the truffles into the fridge to set for at least 5 minutes before serving. These truffles are still soft even when frozen, because they are so rich.